Changing your own oil can seem daunting at first, but with the right preparation and tools, it’s actually a pretty straightforward process that anyone can do themselves. Not only does changing your own oil save you money compared to going to a mechanic, it also allows you to stay on top of this important maintenance task and ensure your engine gets the care it needs. Here’s a step-by-step guide on how to change your oil, along with tips for making the process smooth and easy.
Page Contents
- 1 Why Should You Change Your Own Oil?
- 2 What You’ll Need
- 3 Safety Tips
- 4 Draining the Old Oil
- 5 Replacing the Oil Filter
- 6 Adding Fresh Oil
- 7 Reset the Maintenance Light (If Applicable)
- 8 Finishing Up and Checking For Leaks
- 9 Oil Change Tips and Tricks
- 10 Signs You Need an Oil Change
- 11 Disposing Used Oil Properly
- 12 Conclusion
Why Should You Change Your Own Oil?
Here are some of the key benefits of changing your own oil instead of paying a mechanic to do it:
- Cost savings – Oil changes at a shop can cost $40-60, while doing it yourself only costs around $20-30 for the oil and filter.
- Convenience – You can change your oil anytime it’s needed instead of waiting for an appointment.
- Peace of mind – You’ll know the oil was changed properly and has the right viscosity and amount.
- Learn about your vehicle – Changing your own oil allows you to get familiar with your engine.
- Environmentally friendly – Used oil can be recycled responsibly instead of potentially being disposed of improperly.
What You’ll Need
Gather the following tools and supplies before getting started:
- New oil – Refer to your owner’s manual for the recommended oil type and viscosity for your vehicle.
- New oil filter – Check that you have the filter designed for your specific make and model.
- Drain pan – This should have a capacity of at least 4-6 quarts to catch the old oil. A low, wide pan works best.
- Wrench set – You’ll need the right sized wrench for removing the oil plug and filter.
- Jack and jack stands – These allow you to safely raise your vehicle to access the oil drain plug.
- Rags – Have plenty of these to clean up spills.
- Gloves
- Funnel – For pouring the new oil into the fill hole.
You may also want to pick up some degreaser or solvent to help remove any spilled oil on the driveway or under the vehicle. Avoid products like kitty litter that could get into the drain holes or engine.
Safety Tips
Oil changes involve working underneath a vehicle, so be sure to take the following precautions:
- Wear close-toed shoes and gloves to protect your hands.
- Be aware of pinch points when lifting and lowering the vehicle.
- Support the vehicle securely with jack stands – don’t rely on the jack alone.
- Put blocks behind the wheels to prevent rolling.
- Avoid getting oil on yourself as it can be slippery and hazardous to skin.
- Dispose of used oil responsibly – many auto parts stores recycle it for free.
Working safely is crucial, so don’t rush through the process. Make sure you have plenty of time and space.
Draining the Old Oil
Now comes the fun part – let’s get that old, dirty oil drained out. Follow these steps:
- Run the engine for 5-10 minutes to warm up the oil. Warm oil will flow out faster.
- Park on a level surface and apply the parking brake.
- Jack up the vehicle safely and support it on jack stands.
- Place the drain pan beneath where you’ll be removing the drain plug.
- Using the correct sized wrench, loosen the drain plug by turning it counterclockwise (it shouldn’t need to be removed completely).
- Allow the oil to fully drain out. This may take 10-15 minutes.
- Inspect the drain plug for any debris or metal pieces that could indicate engine problems.
- Clean off the drain plug and reinstall by tightening clockwise.
- Lower the vehicle back down until all four wheels are safely on the ground.
Make sure to monitor the draining oil for any unusual signs that could indicate issues like coolant leaks or excessive engine wear. The oil should flow relatively fast and have an amber color in most vehicles. Avoid spilling the used oil. Funnel it into a secure container clearly marked “used oil.”
Replacing the Oil Filter
While the oil is draining, you can get started on replacing the oil filter. Here’s how:
- Locate the oil filter, which is usually near the bottom of the engine on the side or back.
- Use an oil filter wrench to loosen and remove it, turning counterclockwise.
- Inspect the old filter to make sure the rubber gasket came off with it. Leaving this behind could lead to leaks.
- Check that the new replacement filter has the proper gasket in place.
- Lubricate the new filter’s rubber gasket with fresh oil and hand tighten it until snug.
- Finish tightening another 3/4 to 1 full turn after gasket contact.
- Check for any leaks after the new filter has been installed.
Changing the filter is crucial because it removes all the contaminants and dirt that have accumulated, allowing your engine to get completely clean oil. Avoid overtightening the new filter.
Adding Fresh Oil
The used oil should be fully drained and the new filter installed by now. It’s time to refill with fresh oil. Here are the steps:
- Refer to your owner’s manual for the correct quantity of oil needed. This is typically around 5-6 quarts.
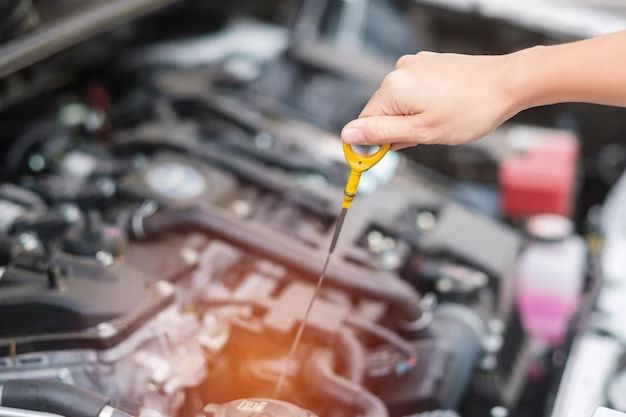
- Add the appropriate amount of recommended new oil through the fill hole, pouring in slowly and checking the dipstick periodically to monitor the level.
- Replace the oil fill cap once the dipstick indicates the oil level is at the “Full” mark.
- Start the engine and let it run for about a minute.
- Turn off the engine and wait a few minutes to allow the oil to settle.
- Check the oil level again on the dipstick. Top it off if needed until it’s at the proper level.
When choosing your new oil, always go with the viscosity and rating recommended by your vehicle manufacturer. This can usually be found in the owner’s manual. Avoid mixing incompatible oils.
Reset the Maintenance Light (If Applicable)
Many vehicles have an oil change maintenance reminder light. Here are some ways to reset it once your oil change is complete:
- Turn the ignition to “On” but don’t start the engine. Fully depress the gas pedal and hold for 10 seconds until the light resets.
- Turn the key to “On” and then press a sequence of buttons like “Trip Reset”, “Info”, and “Hold”. This varies by model.
- Disconnect the battery for 15 minutes, then reconnect it to reset the light. Make sure you have any anti-theft codes handy.
- Manually reset the light through the vehicle dashboard menu if available. Check your owner’s manual.
If you don’t reset the maintenance reminder, it will turn back on after your newly changed oil has reached the mileage or time limit indicated by the manufacturer. Refer to the manual or dealership if you can’t figure out how to reset it.
Finishing Up and Checking For Leaks
Once everything is tightened up and the new oil is added, take a few more steps to button up the job:
- Let the engine run and inspect all drain and fill points for any leaks or dripping.
- Tighten areas as needed to stop any oil seepage.
- Clean up any oil spills thoroughly using degreaser or soap and water.
- Dispose of old oil and filters properly – many autoparts stores accept these for recycling.
- Record your oil change details including mileage and date.
Changing your own oil doesn’t need to be difficult or messy. Having the right tools and setup makes the process straightforward and efficient. Just be patient, work carefully, and double check for leaks. With a little practice, you’ll be able to knock out an oil change in less than 30 minutes!
Oil Change Tips and Tricks
Here are some additional pointers to keep in mind for hassle-free oil changes:
- Check oil levels at least monthly to determine if a change is needed before the maintenance reminder comes on.
- Inspect the exterior of the oil filter when removing it to look for debris or leaks.
- Always wipe down the engine oil dipstick before taking a reading.
- Wear latex gloves to protect your hands and get a better grip on oily parts.
- Place cardboard under the drain pan to catch spills or splashes.
- Dispose of used oil cloths immediately to reduce fire hazards.
- Consider using a no-spill funnel when pouring in new oil.
- Check oil cap and drain plug for damage like cracks or stripped threads.
- Maintain proper engine oil level between changes for maximum protection.
Taking these extra precautions helps eliminate mistakes and makes the job go smoother.
Signs You Need an Oil Change
Don’t just wait for your maintenance reminder to pop up. Look out for these clues that it’s time to change the oil:
- Your engine oil has a dark, opaque appearance instead of transparent golden color.
- You’ve put more than 5,000 miles on your oil since the last change.
- You notice any oil leaks underneath your parked car.
- The oil level is lower than usual in between changes.
- You hear unusual engine noises like knocks or ticks on startup.
- Exhaust smoke has a blue-gray tint.
- Your engine runs hotter than normal.
Addressing these warning signs promptly by changing your oil will promote maximum engine life. Don’t delay oil changes beyond the recommended intervals.
Disposing Used Oil Properly
Never dump old engine oil down the drain, sewer, or directly into the ground or trash. It contains chemicals and contaminants that can pollute groundwater, damage the environment, or harm wildlife if handled irresponsibly. Follow these tips for proper disposal:
- Store waste oil in sealed containers marked “used oil.” Keep away from heat sources.
- Take it to a certified recycling center that accepts oil and filters. These can refine the oil to be reused.
- Auto part retail stores often provide collection points for oil recycling.
- Specialized waste management companies may collect oil for processing and reuse.
- Contact your local environmental agency for guidance on recycling centers in your region.
Some municipalities ban oil disposal at landfills or down drains. Abide by all regulations in your area so that dangerous compounds don’t jeopardize environmental and human health.
Conclusion
Changing your vehicle’s motor oil might seem intimidating but these step-by-step instructions show it’s actually a very straightforward DIY maintenance task. Anyone can save money by learning to do it properly themselves. The key things to remember are having the right tools, using jack stands safely, double checking for leaks, and disposing of waste oil responsibly. Follow the tips provided here and you’ll be able to keep your engine running smoothly for years to come.