If you notice issues with your refrigerator’s ice maker, such as reduced ice production or no ice at all, it’s possible the water inlet valve may be malfunctioning. The water inlet valve controls the flow of water into the ice maker and is an essential component for ice production. Here’s what you need to know about identifying a faulty ice maker water inlet valve and deciding if replacement is needed.
Page Contents
- 1 What is the ice maker water inlet valve?
- 2 Signs of a failing ice maker inlet valve
- 3 How to test the ice maker inlet valve
- 4 How to replace an ice maker inlet valve
- 5 Key tips when replacing the ice maker inlet valve
- 6 Why choose a professional repair service?
- 7 Cost to replace an ice maker inlet valve
- 8 Preventing ice maker inlet valve failures
- 9 Conclusion
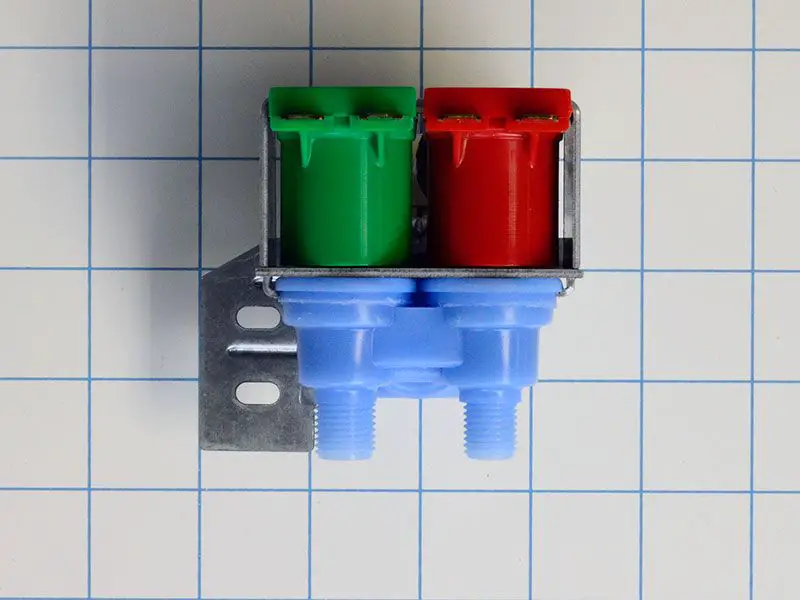
What is the ice maker water inlet valve?
The ice maker water inlet valve is a small, electrically-operated valve that opens and closes to control the supply of water entering the ice maker assembly inside your refrigerator. When the ice maker requires water to produce more ice, it sends a signal to the water inlet valve to open and allow water to flow through the fill tube into the ice mold. It will close again once the ice maker has received the sufficient amount of water.
The valve requires an electrical connection to get signals from the ice maker control module. It also connects via a water line to the household water supply. By controlling the flow of household water into the ice maker, the inlet valve plays a crucial role in ice production.
Signs of a failing ice maker inlet valve
A failing or defective ice maker inlet valve can manifest in several different ways. Here are some of the most common signs that your ice maker’s water inlet valve may be malfunctioning:
- Reduced or no ice production – If you notice your ice maker isn’t producing as much ice as it normally does, a bad inlet valve could be restricting water flow.
- Smaller ice cubes – Inlet valve issues can affect water flow volume into the ice maker, resulting in smaller cubed ice overall.
- Cloudy or irregularly shaped ice – With less water entering the ice mold, you may get hollow or oddly shaped ice cubes.
- Water leakage – A defective valve that doesn’t close completely can leak out water, potentially even when the ice maker is not in use.
- Constantly running valve – You may hear the valve turning on and off frequently without the ice maker actually cycling.
- Frozen water lines – Lack of water flow can allow lines to freeze up during colder conditions.
In most cases, if the ice maker inlet valve is malfunctioning, you’ll notice a decrease in ice production. However, other related problems like water leaks or frozen pipes can occur in severe cases.
How to test the ice maker inlet valve
If you suspect your refrigerator’s ice maker inlet valve is malfunctioning, you can test it to confirm. Here are two methods for testing the valve:
Power Test
The electrical power test allows you to check that the valve is getting power and operating when activated:
- Unplug the refrigerator or turn off power at the breaker.
- Remove the access panel in the back of the freezer section to expose the water valve.
- Disconnect the valve’s electrical connector plug.
- Use a multimeter to check for electrical continuity between pins on the connector while operating the ice maker (requires two people).
- If there is no continuity, the valve could be faulty.
Water Flow Test
Testing the actual water flow checks whether the valve opens properly to let water through:
- Unplug the refrigerator or turn off the breaker.
- Disconnect the water line from the inlet side of the valve.
- Have a container ready to catch water.
- Reconnect power and activate the ice maker so the valve opens.
- Check if water flows properly through the valve without issues.
- If no water or very little water comes out, the valve may be faulty.
Using these diagnostic testing methods, you can determine if the ice maker inlet valve itself is malfunctioning or if ice supply issues stem from another cause.
How to replace an ice maker inlet valve
Replacing a defective ice maker inlet valve is a fairly straightforward repair project. Follow these general steps:
- Turn off refrigerator’s water supply – Locate the shutoff valve supplying household water to the fridge and turn it off.
- Disconnect water and electrical connections – Remove any plastic cover panels if needed. Disconnect the water supply line from the old inlet valve. Unplug the valve’s electrical connector.
- Remove valve mounting screws – Remove any mounting screws securing the valve in place. This lets you remove the old valve.
- Install new valve – Position the new valve and replace any screws. Reconnect the water supply line and electrical plug.
- Restore water and power – Turn the water supply back on and plug in the refrigerator if unplugged. Check for any leaks.
- Test operation – Allow time for chilled water to flow to the ice maker. Test operation to confirm the new inlet valve works correctly.
Replace plastic panel covers once finished. Be sure to clean up any small water leaks or drips during the process. Then give the ice maker time to start producing ice with the new valve.
Key tips when replacing the ice maker inlet valve
- Consult refrigerator troubleshooting guides for your specific model to properly identify the valve location and any special removal instructions.
- Take a photo of the valve’s current wiring setup before disconnecting anything.
- Place a towel under the work area to absorb small drips when disconnecting water lines.
- Check for any cracks or damage on the existing water supply line and replace if deteriorated.
- Use compatible replacement valves – check your manufacturer’s appliance parts listings online for the correct part number.
Following your refrigerator manufacturer’s instructions closely will help ensure you remove and install the new valve correctly. Contact a refrigerator repair technician if you have any doubts about taking on the replacement job.
Why choose a professional repair service?
Although a DIY valve replacement is possible in many cases, there are benefits to having a trained appliance technician take on the repair:
- Experienced diagnosis of the issue.
- Access to specialized tools and testing equipment.
- Removing and reinstalling the valve safely and correctly.
- Identifying any other worn parts needing replacement.
- Confirming proper operation of ice maker after repair.
- Help avoiding costly mistakes or follow-up repairs.
Technicians can also provide troubleshooting if replacing the valve does not resolve ice supply problems. They can check for issues like failed control boards or low refrigerant levels affecting ice production.
Cost to replace an ice maker inlet valve
The cost to replace an ice maker inlet valve consists of a few elements:
- Valve part cost – The replacement valve itself ranges $25-$60 or more depending on the refrigerator model.
- Labor fees – Labor for a technician to replace the valve averages $125-$250 or more.
- Service charges – Additional fees may include trip charges and part pickup/delivery charges.
Total costs for parts, labor, and services typically fall in the $175-$350 range for valve replacement. Prices can vary based on technician, refrigerator make and model, and your location.
Cost to Replace Ice Maker Inlet Valve
| Cost Element | Average Cost |
|---|---|
| Parts (valve) | $25 – $60+ |
| Labor | $125 – $250 |
| Services Fees | $25 – $50+ |
| Total average cost | $175 – $350+ |
Keep in mind the above costs serve as general estimates only. Pricing depends on your refrigerator model, location, and the repair technician.
Preventing ice maker inlet valve failures
You can take a few proactive steps to help avoid ice maker inlet valve failures down the road:
- Keep the valve clear of debris – Dust and grime buildup can impede valve operation and shorten its lifespan. Periodically wipe down visible valve surfaces.
- Avoid plumbing impurities – Hard water, rust, and mineral deposits from pipes can clog the valve’s internal mechanisms over time. Use water filtration to improve purity.
- Level the refrigerator – Keeping the unit level prevents irregular ice formation and strain on components like the inlet valve.
- Change water filters – Replace any inline or internal water filters according to manufacturer specifications to optimize water quality.
- Address leaks promptly – Small water leaks around the valve can lead to ice buildup or electrical shorts. Deal with any visible leaks right away before major damage occurs.
With periodic maintenance and care, you can maximize the working life of your refrigerator’s ice maker inlet valve.
Conclusion
A malfunctioning ice maker inlet valve that fails to open and deliver sufficient water can lead to reduced ice production. Common signs of a bad valve include low ice output, smaller or irregularly shaped cubes, leaks, and water flow problems. Testing the electrical operation and water flow allows you to diagnose the valve. While replacement is possible as a DIY repair, using a trained appliance technician helps ensure proper installation and operation. Addressing any inlet valve issues promptly preserves ice-making capabilities and prevents further water damage related problems.
