Crown molding is an elegant way to add visual interest and architectural detail to a room. However, with so many options available, it can be tricky to figure out what size to get. Here is a guide on how to determine the right crown molding size for your space.
Page Contents
- 1 Measure Your Room
- 2 Consider the Room’s Architecture
- 3 Determine the Crown’s Height and Projection
- 4 Consider the Room’s Use
- 5 Match Your Home’s Style
- 6 Consider the Budget
- 7 Order Samples to Choose
- 8 Hire a Professional
- 9 Focus on Inside Corners
- 10 Select Complementary Profiles
- 11 Finish & Paint with Care
- 12 Illuminate Your Molding
- 13 Maintain Your Investment
- 14 Conclusion
Measure Your Room
The first step is to measure the dimensions of the room you want to install crown molding in. You’ll need to measure the length of each wall and make note of any windows, doors or other architectural elements. Pay attention to the ceiling height as well.
For example, if your room is 15 feet long by 12 feet wide with 8 foot ceilings, you would write down:
- Wall 1: 15 feet
- Wall 2: 12 feet
- Wall 3: 15 feet
- Wall 4: 12 feet
- Ceiling height: 8 feet
Having accurate room measurements will allow you to purchase the right linear footage of molding and determine the proportions that will look best.
Consider the Room’s Architecture
Take note of any architectural details in the room. Elements like windows, arches and corners will impact the crown molding details. For example:
- Coffered ceilings: Require wide crown molding to complement the depth of the coffers
- Arched openings: Need molded trim to precisely fit the curve of the arch
- Bay windows: Require corner molding blocks to join angles
Make sure to measure the room details carefully and account for them when choosing molding.
Determine the Crown’s Height and Projection
Crown molding is measured by its largest dimension, the height from the wall to the tallest point of the top edge. Standard sizes include:
- 3 1/2 inches
- 5 1/4 inches
- 7 1/4 inches
- 9 1/4 inches
The wider the crown, the bolder the architectural statement. Use larger crown molding in rooms with higher ceilings to maintain appropriate proportions. For standard 8 foot ceilings, 5 1/4 inch or 7 1/4 inch is common.
The other important molding measurement is the projection from the wall. Projection sizes include:
- 3/4 inch
- 1 1/4 inches
- 2 inches
A wider projection creates deeper shadow lines for visual interest. Use at least 1 1/4 inch projection in larger rooms.
Consider the Room’s Use
The function of the room should also inform your crown molding choice:
- Formal living & dining rooms: Use wide, ornate crown molding to create an elegant impression.
- Bedrooms & family rooms: Medium-width crown can add subtle detail and not overwhelm.
- Kitchens & baths: Narrower molding suits these spaces nicely without competing with cabinets and fixtures.
Selecting proportions that suit the room’s purpose will ensure the crown molding enhances the space appropriately.
Match Your Home’s Style
Match the style of crown molding to your home’s architecture for a cohesive look:
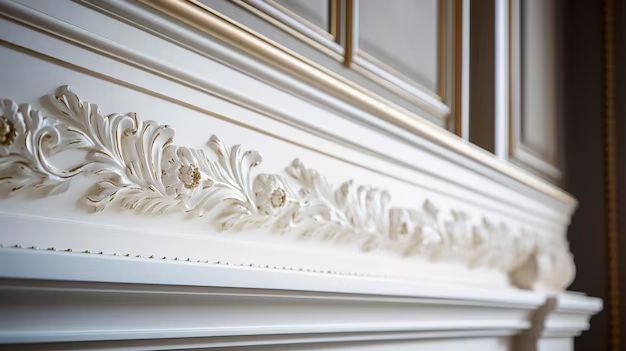
- Traditional homes: Intricately carved, decorative crown molding
- Craftsman style: Simple, straight crown profiles
- Modern spaces: Minimalist, discreet lines or indirect ceiling coves
Staying consistent with the existing trim and influences in your home creates harmony. Mixing severely contrasting molding styles looks disjointed.
Consider the Budget
Crown molding ranges dramatically in price. Factors impacting cost include:
- Material: Wood vs. polystyrene vs. polyurethane
- Intricacy of design: Simple vs. highly ornate
- Projection depth: 3/4″ vs 2″ from the wall
- Pre-primed vs. unfinished
- Specialty trim pieces: Inside & outside corners, end caps, etc.
Consider both material and labor costs. Creating a budget will help narrow your options.
Order Samples to Choose
Once you’ve narrowed down your options, order free molding samples from home improvement stores or molding specialty shops. Samples allow you to see profiles, dimensions and materials first-hand.
Hold samples up to the wall to visualize proportions. Look at samples in both natural and artificial light to evaluate color. Order 2-3 favorites to compare.
Hire a Professional
Proper crown molding installation is tricky. The angles where the walls meet the ceiling must be precisely measured and cut. Imprecise joining and gaps will look sloppy.
Hiring a professional trim carpenter to install your crown molding generally achieves the cleanest looking results. Pros also have special lifting equipment to reach high ceilings safely.
Focus on Inside Corners
For a seamless look, use high quality prefabricated inside corner blocks. Alternately, you can miter cut the inside edges, but this takes more skill to execute perfectly. Reinforce mitered joints with adhesive.
Outside corners are easily handled by cutting the molding at a 45 degree angle to join. Inside corners are more complicated to cut accurately.
Select Complementary Profiles
To add architectural interest, integrate crown molding with complementary trim and accents:
- Chair rail halfway up the wall
- Baseboards, picture rail or wainscoting at bottom
- Dentil details, ropes, corbels and other accents
Layering trim creates an elegant, custom look. Continuity across profiles makes the details look cohesive and designed.
Finish & Paint with Care
Prefinished molding offers convenience, but limits color selection. Unfinished wood must be carefully primed and painted onsite for full protection.
Use high quality painter’s tape when painting to keep edges crisp. Remove tape immediately after painting before the paint dries.
Seal molding with polyurethane for durability and easy cleaning. Use satin or semi-gloss sheens for easy wiping.
Illuminate Your Molding
Proper lighting showcases the details and dimension of crown molding. Use focused track lighting or recessed lighting to create shadows and highlights.
Aim lights from two separate lateral directions to bring out the depth. Uplighting flat against the ceiling tends to flatten the look.
Dimmers allow you to control the ambience and dramatize the trim details.
Maintain Your Investment
Use a gentle touch when cleaning painted crown molding to avoid chipping the finish. Use microfiber cloths and soft brush attachments on vacuum cleaners.
Dust molding frequently to prevent buildup. Address any leaks or humidity issues quickly to prevent warp or water damage.
Recaulk any gaps that appear between the molding and ceiling/wall. Touch up paint as needed.
Conclusion
Choosing the right crown molding height, depth, style and installation method helps create beautiful results. Careful room evaluation and sample review allows you to select proportions that perfectly fit and enhance the space.
Investing in quality materials and professional installation provides durability and visual harmony. With the right crown molding, you can add timeless elegance to any room.