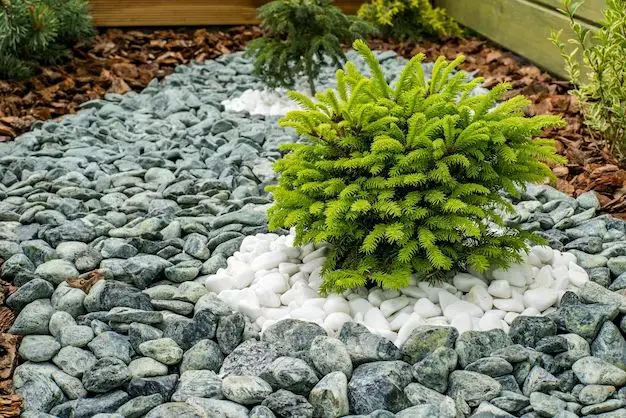
Putting rocks in your front yard can be a great way to improve the aesthetics and functionality of the space. Rocks can be used for landscaping, creating paths, adding visual interest, and more. However, there are some important factors to consider when putting rocks in your yard to ensure it looks nice and functions properly. In this article, we will discuss the benefits of using rocks, things to consider before getting started, types of rocks to use, and steps for installation. By the end, you’ll have all the information you need to successfully incorporate rocks into your front yard landscaping.
Page Contents
Benefits of Using Rocks in Your Front Yard
There are many great reasons to use rocks for landscaping in your front yard:
- Aesthetic appeal – Rocks add nice visual interest and texture to the yard.
- Durability – Rocks are very durable and longer lasting than mulch or grass.
- Low maintenance – Rock beds require less upkeep than gardens or lawns.
- Customization – You can be creative in designing unique shapes and patterns.
- Functionality – Rocks can be used to create paths, patios, fire pits, and more.
- Affordability – Rock is often cheaper than other landscaping materials like pavers.
- Good drainage – Rocks allow water drainage better than compact soil.
- Weed prevention – Rocks stop weeds from growing in areas prone to them.
As you can see, rocks offer many perks for improving the front yard space. They require little upkeep while providing visual appeal, functionality, and durability over time.
Things to Consider Before Installing Rocks
While rocks can provide great benefits for your yard, it’s important to think through a few things before getting started:
Purpose
Figure out your main motivation and purpose for adding rocks. This could be for decoration, building a walkway, preventing erosion, or more. Knowing the purpose will inform your rock type selection and design.
Location
Determine the right spot in your yard to place the rocks. Assess sunlight, drainage, existing plants, traffic patterns, and your home’s aesthetics. A landscape designer can be very helpful in selecting an optimal location.
Size of Area
Decide the approximate square footage your rock area will cover. This will determine how many rocks and what quantity of base material you’ll need to purchase. Measure out the space with stakes or a garden hose.
Type of Rock
Select rocks appropriate for your climate and purpose. See the types of rocks section below for help with rock selection.
Depth
Account for the proper depth when calculating quantities. A typical rock bed should be 4-6 inches deep. Deeper beds are needed for patios, paths, and heavy rocks.
Base Preparation
Prepare for a gravel base and/or weed barrier under the rocks depending on your goals. These extras will influence the project budget and work required.
Budget
Factor in costs for all materials, rental equipment, and professional landscapers if needed. Rock selection, quantities, and extra features will affect the total budget.
Timing
Schedule your project during good weather without extreme heat, rain, or frost. Setting rocks can take several days to complete. Avoid scheduling during very hot summer weather.
Thinking through these considerations before starting your rock installation will help the project go smoothly and achieve the landscaping goals you have in mind.
Types of Rocks for Your Yard
When selecting rocks, you’ll want to choose a type that is well-suited for your climate and intended purpose. Here are some top options to consider:
River Rock
- Naturally smooth and rounded small stones
- Varying colors like grey, brown, tan, white
- Drain well and won’t scatter
- Need a retaining border
- Not good for walking areas
Pea Gravel
- Tiny gravel rocks 1/4 inch or smaller
- Comes in colors like grey, brown, white
- Good for walkways, play areas, and pet spaces
- Prone to scattering and needs edging
Crushed Granite
- Small crushed rocks with angular facets
- Colors like brown, grey, reddish
- Good for pathways and patios
- Packs well but can scatter
Decorative Landscape Rock
- Larger accent rocks for decoration
- Can be colorful like reds and oranges
- Create focal points and interest
- Need proper support and placement
Natural Flagstone
- Irregular flat stones used for patios and walkways
- Provide natural stepping stones
- Can be prone to shifting
- One of the more expensive options
Consider the pros and cons of each type to select rocks well-suited for your specific yard plans and budget. Combining a few different rock varieties creates nice visual interest too.
How to Install Rocks in Your Yard
Once you’ve selected the right rocks and location, follow these basic steps for proper installation:
Step 1 – Prepare the Area
– Remove any grass, plants, or debris from the installation area
– Level and grade the soil area
– Build a border to contain the rocks (e.g. edging, mulch, concrete)
Step 2 – Add Gravel Base Layer
– Cover area with 2-4 inches of gravel or crushed rock
– Compact gravel down with a tamper or plate compactor
– Gravel provides drainage and prevents sinking/shifting
Step 3 – Install Weed Barrier (Optional)
– Add weed barrier fabric over the base gravel layer
– Overlap sheets and secure edges with stakes
– This will prevent weeds from growing up through rocks
Step 4 – Spread Desired Rocks
– Layer your chosen rocks on top in desired pattern
– Start rocks along your border edge as an anchor
– Use larger accent rocks first, then fill in with smaller rocks
– Leave some space between rocks for best coverage
Step 5 – Compact Rocks
– Use a flat plate compactor to tamp down the rocks
– Compacting helps settle the rocks and prevents shifting/sinking
– Make a few passes over the entire area
Step 6 – Finish With Decor Touches
– Sweep additional small rocks into crevices for a finished look
– Can add decorative gravel, mulch, or plants around the edges
– Spray off any dust or residue from the rocks
Following these steps properly will create a stable and great looking rock area that will last for many years to come. Periodic maintenance may be needed to keep rocks contained, fill any depressions, and keep weeds at bay.
How Much Rock Do I Need?
Determining the required amount of rock for your project takes a little bit of planning and math:
1. Measure the Area
Use a tape measure to get the length and width of the full installation area in feet. Multiply to find the square footage.
Ex. 10 ft x 20 ft = 200 square feet
2. Determine Depth
Decide how deep your rock bed will be, typically 4-6 inches. Deeper for patios and paths.
Ex. 4 inch depth
3. Calculate Cubic Volume
Multiply square footage by depth in feet to get cubic volume.
Ex. 200 sq ft x (4 in/12 in/ft) = 67 cubic feet (4 in = 0.33 ft)
4. Estimate Rock Amount
Multiply cubic feet by 1.5 to 2 tons of rock per cubic foot.
Ex. 67 cu ft x 1.5 tons/cu ft = 100 tons of rock needed
This formula accounts for spaces between rocks. Use it to estimate your rock quantity needs for purchasing. Having a little extra is ideal.
How Much Does Rock Landscaping Cost?
The cost of installing a rock yard will depend on the type of rock chosen, total square footage covered, any special features built, and if professional installation is used. Some typical cost ranges:
| Project | Cost per Sq Ft |
|---|---|
| Pea gravel or decorative rock | $0.50 – $1.50 |
| Crushed granite | $1.00 – $2.50 |
| River rock | $2.00 – $4.00 |
| Flagstone patio or path | $5.00 – $12.00 |
These prices reflect material and installation costs for DIY projects or hiring professional landscapers. Extra costs may apply for extensive grading, underlying construction, borders, special rock features, and decorative additions. Small 100 sq ft projects often start around $200 while large 500 sq ft rock lawns can be $5,000 or more. Get multiple estimates before starting significant rock yard projects.
Tips for Maintaining Your Rock Yard
Caring for your rock space properly will extend its life and keep it looking fresh. Here are some handy maintenance tips:
– Inspect for weeds and remove promptly when small
– Rake or sweep to prevent debris, grass, and leaves from accumulating
– Add more small pea gravel as needed to fill gaps over time
– Re-compact rock if depressions or shifting occurs
– Use polymeric sand for stability in rock patio or path joints
– Re-edge borders if rocks spread outward over the years
– Power wash or spray down rocks to remove dirt buildup
Proper maintenance only takes periodic effort but makes a big difference in longevity and aesthetics. Replenishing gravel, controlling weeds, and resettling rocks helps keep your yard looking fabulous.
Conclusion
Adding rocks can take your front yard landscaping to the next level with beauty, functionality, and durability. Follow the guidelines here for selecting the right rocks, calculating needs, installation steps, costs, and maintenance. With some planning and preparation, you can create a rock space your whole neighborhood will envy. A finished rock yard will enhance curb appeal, reduce maintenance, and provide enjoyment for years to come.