A loose or wobbly toilet seat can be annoying and unsafe. Thankfully, fixing a loose toilet seat is an easy DIY project that you can tackle in just a few minutes with some basic tools and supplies.
Page Contents
- 1 What causes a loose toilet seat?
- 2 How to tighten a wobbly toilet seat
- 3 How to fix a loose toilet seat with enlarged bolt holes
- 4 How to install toilet seat bolts correctly
- 5 How to remove corroded toilet seat bolts
- 6 How to choose the right toilet seat bolts
- 7 Tips for keeping toilet seat tight
- 8 How to remove stuck toilet seat nuts
- 9 Toilet seat installation tips
- 10 How to replace toilet seat bolts
- 11 Conclusion
What causes a loose toilet seat?
There are a few common reasons why your toilet seat may be loose or wiggly:
- The plastic bolts holding the seat down are stripped/damaged
- The nuts on the bolts are loose
- There is buildup, grime, or corrosion on the bolts
- The holes in the porcelain are enlarged or damaged
Over time, the bolts and plastic parts holding the seat down can become damaged from regular opening and closing of the seat. Buildup from hard water, grime, and moisture can also cause corrosion and loosening. And if a heavy person sits on the seat when it’s not completely tightened down, it can crack the porcelain mounting holes.
How to tighten a wobbly toilet seat
If your toilet seat is only slightly loose, try tightening the nuts under the seat first. To do this:
- Purchase a toilet seat tightening kit or gather supplies: adjustable wrench, screwdriver, replacement bolts, and wax ring (optional).
- Turn off the water supply valve behind the toilet.
- Flush to empty the toilet tank and bowl.
- Use the wrench to tighten the nuts on the underside of the toilet seat. Tighten them evenly and firmly, but not too much.
- Test the seat to see if tightening the nuts fixed the issue. The seat should no longer wiggle or tilt.
If simply tightening the existing nuts does not remove the wobble, you’ll need to fully remove the toilet seat and install new hardware. Follow these steps:
- Turn off the water supply and flush the toilet.
- Use a screwdriver to remove the caps covering the nuts on the base of the toilet.
- Hold the seat so it doesn’t fall and use the wrench to uninstall the nuts and bolts.
- Remove the toilet seat and set it aside. Scrape off any old wax or buildup from the bowl surface.
- Insert new bolts into the holes and thread the nuts on a few turns.
- Check that the new bolts are centered in the slotted holes on the bottom of the seat.
- Evenly tighten the nuts while holding the seat level. Alternate tightening sides until secure.
- Replace the caps over the nuts.
- Turn on the water supply and test for leaks.
When installing a new seat, look for sturdy plastic bolts made specifically for toilet seats. Avoid cheap metals like zinc that corrode easily. Using a little silicone grease on the bolts can also help prevent corrosion and loosening over time.
How to fix a loose toilet seat with enlarged bolt holes
If the mounting holes in the porcelain bowl have become stripped or enlarged, standard sized bolts won’t grip anymore. You have two options to fix this issue:
- Use jumbo bolts – Purchase special extra-long jumbo bolts designed for stripped toilet bowl holes. Follow the seat installation steps, using these bolts instead.
- Fill holes with epoxy or wax – Squirt epoxy or beeswax into the enlarged holes to reduce their size before inserting standard bolts. Let the epoxy fully cure before tightening nuts.
Filling the holes with epoxy putty or beeswax allows you to reuse standard sized bolts. Clean the holes thoroughly before applying the filler. You may need to shave down regular bolts slightly to fit in the filled holes.
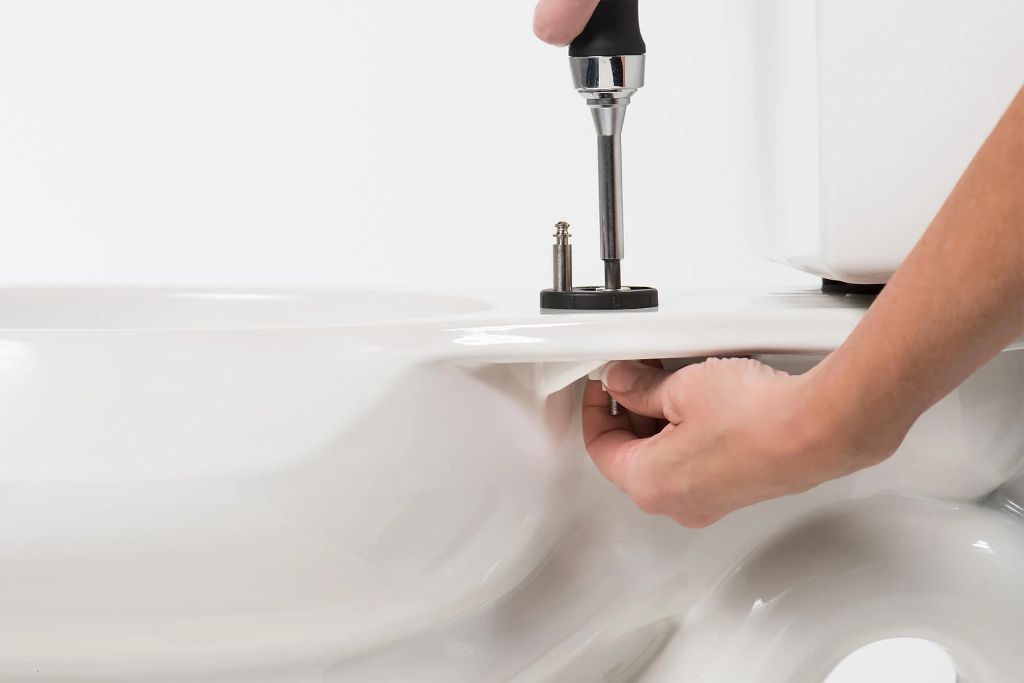
How to install toilet seat bolts correctly
Installing the bolts properly is key to keeping your seat securely attached. Follow these best practices when installing new toilet seat hardware:
- Clean surfaces – Remove all old wax, buildup, and grime from the porcelain and seat holes before installing new hardware.
- Even tightening – Tighten the nuts gradually and evenly on both sides to keep the seat centered and prevent cracking. Do a final tightening pass to ensure nuts are very snug.
- Proper bolt length – Make sure bolts are long enough to fully engage the nut but not puncture the porcelain. Around 1 inch of threading is ideal.
- Lubricate threads – Coat threads with silicone grease or plumbers tape to prevent corrosion and help prevent loosening.
- Check centering – Confirm the seat is centered over the bowl before fully tightening nuts.
Rushing the installation or uneven tightening is a common cause of stripped bolts and loosening over time. Take your time and be methodical for best results.
How to remove corroded toilet seat bolts
Corrosion from moisture is a common issue with metal toilet seat bolts. Corroded bolts can fuse to the porcelain or snap off when trying to remove them. Here are some tips for removing rusted or corroded toilet seat bolts:
- Spray bolts with penetrating oil – Let it soak for 15-30 minutes before trying to unscrew.
- Carefully chisel off porcelain – Use a cold chisel to chip away any porcelain fused to the bolts.
- Use locking pliers – Lock pliers onto the bolt head and twist to break the corrosion seal.
- Cut off bolts – If necessary, cut the bolt on either side of the nut with a hacksaw or dremel tool.
If the head of the bolt breaks off, you may need to drill out the remaining portion using a carbide drill bit. Prevent corrosion on new bolts by using silicone lubricant or protecting with plastic caps.
How to choose the right toilet seat bolts
Picking the right toilet seat bolts for your specific installation is important:
| Bolt Material | Pros | Cons |
|---|---|---|
| Plastic |
|
|
| Stainless Steel |
|
|
| Brass |
|
|
Plastic bolts are inexpensive and prevent corrosion, but they’re more prone to stripping and fracturing over time. Stainless steel is very strong but the installation takes finesse. Brass bolts offer a good compromise for most situations.
Bolt head style
Common bolt head styles include:
- Round – Used for slots; offers rotational adjustability.
- Hex – Gripped with a wrench; resists spinning.
- Square – Usually used with thumbscrew nuts for tool-free installation.
- Snake Eyes – Flattened heads can be turned by hand.
For standard toilet seats, hex or snake eye bolt heads often work best. Make sure the heads fit flush within the seat recess.
Bolt length
Measure the porcelain thickness and account for recessed nut depth when selecting bolt length. Recommended toilet seat bolt lengths include:
- 1 inch – For standard residential toilets
- 1 1/4 inches – For commercial wall-mount toilets
- 2+ inches – For extra support; use on loose seats
Bolts that are too short won’t fully engage the nut while overlong bolts can crack the toilet tank. Around 1 inch usually works for most toilets.
Washers
Using a washer under the bolt head and nut distributes clamping force and reduces likelihood of cracking. Stainless steel washers resist corrosion.
Tips for keeping toilet seat tight
Take these steps to prevent a loose, wiggly toilet seat from recurring:
- Check tightness monthly – Early tightening can prevent loosening.
- Clean bolts periodically – Remove buildup which causes corrosion.
- Lubricate threads – Grease threads to prevent rust and sticking.
- Upgrade metal hardware – Plastic bolts and nuts wear out over time.
- Avoid excessive force – Don’t let kids treat it like a seesaw.
- Replace worn parts – Fix cracked porcelain and elongated holes ASAP.
Replacing plastic bolts with stainless steel and keeping them clean and lubricated can extend the life of your toilet seat hardware. Periodic checks for looseness allow you to tighten before the problem worsens.
How to remove stuck toilet seat nuts
Toilet seat nuts that feel stuck or won’t unscrew can be incredibly frustrating. Here are some tips for removing seized, stuck toilet seat nuts:
- Spray with penetrating oil – Let it soak in for 15-30 minutes before trying to turn.
- Socket wrench – Provides greater grip and leverage than pliers.
- Heat with hair dryer – Heating can help break down corrosion.
- Tap around nut – Break corrosion seal by tapping with a hammer.
- Cut off nut – Saw through the nut on either side and pry it apart.
Be patient and persistent, allowing penetrating oil time to work before forcing. Heating and vibration from tapping can help release frozen nuts. In worst cases, sawing off the nut may be needed.
Toilet seat installation tips
Follow these recommended tips for hassle-free toilet seat installation:
- Read instructions – Follow manufacturer directions for your specific model.
- Check fit – Confirm the seat aligns with holes before removing old seat.
- Clean thoroughly – Remove old wax, buildup, and debris from holes.
- Insert new bolts – Start nuts a few turns; don’t fully tighten yet.
- Center seat – Align evenly over bowl before final tightening.
- Tighten nuts evenly – Tighten alternating sides a little at a time.
- Check stability – Verify seat does not loosen or wiggle when done.
Rushing the job or failing to tighten bolts methodically can lead to uneven installation and a loose seat down the road. Taking your time ensures proper centering and security.
How to replace toilet seat bolts
Replacing old, corroded, or damaged toilet seat bolts with new hardware restores stability and security to the seating. Follow these steps:
- Turn off toilet water supply and flush.
- Remove old seat nuts and bolts.
- Clean porcelain bolt holes thoroughly.
- Insert new bolts into holes.
- Install washers and thread nuts onto bolts.
- Check seat centering and tighten nuts slowly.
- Cover nut access holes with caps.
- Turn on water and test for leaks.
When installing replacement bolts, look for upgraded options like brass or stainless steel rather than plastic. Lubricating the threads with silicone grease can help prevent the new bolts from seizing up over time.
Conclusion
A loose toilet seat is not just annoying, it can also present a safety hazard. Inspecting the bolts and tightening the nuts under the seat every so often prevents loosening issues. For persistent wobble or after enlarged bolt holes develop, replacing the toilet seat bolts and nuts provides a more permanent fix. Using quality hardware, proper bolt length, and taking care to tighten evenly allows for secure installation that will last for years of use.
