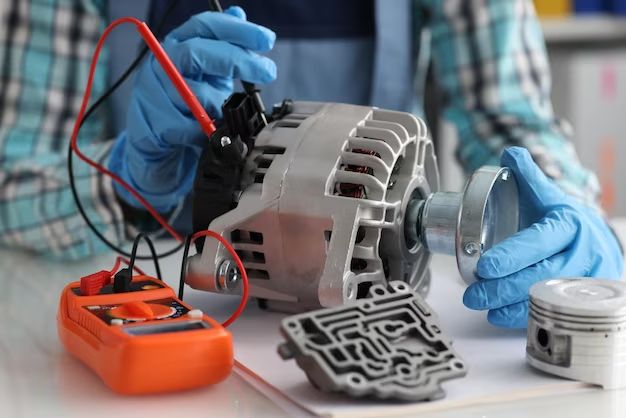
Testing your car’s alternator is an important part of regular vehicle maintenance and diagnosing electrical issues. A faulty alternator can leave you stranded or cause damage to your car’s electrical system. Luckily, there are a few simple tests you can perform yourself to determine if your alternator is working properly. In this guide, we will cover the steps for manually testing your alternator using just a multi-meter and basic hand tools.
Page Contents
What is an Alternator?
The alternator is the component in your vehicle that is responsible for generating electricity and charging the battery while the engine is running. It converts the engine’s mechanical rotations into electrical energy that powers your car’s electrical systems and recharges the battery. Without a properly functioning alternator, the battery will quickly drain and your car will die once the stored charge in the battery is depleted.
Key Alternator Functions
- Generates electric current to power accessories like headlights, interior lights, GPS, radio etc. while engine is running
- Charges the battery – maintains voltage levels when engine is on and recharges the battery
- Powers essential electrical systems if the battery charge is low
Signs that your alternator may be having issues include:
- Battery not charging properly
- Battery draining quickly
- Dim or flickering headlights
- Electrical components like radio cutting in and out
- Dash warning lights coming on
Conducting some simple alternator tests can help diagnose problems before they leave you stranded. Let’s look at how to test an alternator manually using a multimeter.
Tools and Supplies Needed
Testing your alternator does not require expensive specialized tools. Here are the basic things you will need:
- Multimeter – This is essential for electrical testing. Both analog and digital multimeters will work.
- Jumper cables – Required for jump starting the vehicle if battery is drained.
- Socket set – For removing battery terminals and alternator connections if needed.
- Lighting – Good lighting is a must when working under the hood.
- Safety equipment – Eye protection, work gloves, and proper clothing for working on hot engine components.
Optional but recommended supplies include a 12v test light, battery load tester, and service manual for your specific vehicle make and model. Now let’s get to testing that alternator!
Voltage Testing
The most straightforward test of your alternator is a simple voltage test. This confirms that the alternator is supplying voltage to charge the battery when the engine is running.
Here are the steps for voltage testing your alternator:
- Turn off all vehicle accessories like radio, lights, AC etc.
- Start the engine and let it idle.
- Set your multimeter to DC Volts mode. On most multimeters you select the 20V DC range.
- Touch the red multimeter probe to the positive terminal on the battery and the black probe to the negative terminal.
- Note the voltage reading on the multimeter display. It should read between 13.5-15 volts.
- If the reading is lower than 13-13.5 volts, the alternator is likely not charging properly.
- Repeat the test after turning on headlights, AC, rear defroster etc. Voltage should remain in the 13.5-15 volt range.
This voltage test lets you know that the alternator is sending adequate current to charge the battery. If voltages are outside the normal range, it indicates a problem with the alternator or charging system.
Voltage Testing Results
| Testing State | Normal Voltage Range |
|---|---|
| With engine running and accessories off | 13.5 – 15 volts |
| With accessories on | 13.5 – 15 volts |
Next we’ll discuss using a multimeter to directly test the alternator output for problems.
Testing Alternator Output
In addition to battery voltage, you can check the alternator’s output directly using a multimeter. This can uncover problems with alternator operation even if it is managing to keep the battery charged.
Follow these steps:
- Locate the main alternator output wire in your engine bay. Consult a vehicle service manual for the alternator wiring diagram.
- Attach the red probe of your multimeter to the alternator output terminal with the black probe to ground.
- With the engine off, you should get a very low or zero reading.
- Now start the engine and let it idle. The output should rapidly rise to around 13.5 – 15 volts.
- Rev the engine to 2000-3000 rpm. Voltage should increase to 14+ volts.
- Turn on all vehicle electrical accessories. The output should remain steady.
If output is low or fluctuating, it indicates a bad diode, bad regulator, bad alternator bearings, or worn alternator brushes.
Expected Alternator Output Voltage
| Condition | Output Voltage |
|---|---|
| Engine off | 0 volts |
| Engine idling | 13.5 – 15 volts |
| High RPM | 14+ volts |
| With accessories on | 13.5 – 15 volts |
Output testing can detect problems that simple battery voltage testing might miss. But there is one more excellent test for alternator health we need to cover.
Perform an Alternator Ripple Test
The ripple test can detect bad diodes and other internal alternator faults that manifest as AC ripple or fluctuations in the DC charging current. Even a small amount of ripple will cause the battery to overheat and fail prematurely.
Here is how to check for excessive ripple:
- Connect your multimeter as you did for the output voltage test above.
- Set your multimeter to AC voltage mode.
- With engine idling, check the AC voltage reading at the alternator output terminal.
- Acceptable ripple voltage is 0.5 volts or less.
- Higher than that indicates diodes or windings are breaking down.
This ripple test can detect underlying issues that output voltage tests may miss. If you find high AC ripple, the alternator needs further diagnosis and likely replacement.
Alternator Ripple Voltage Specs
| Ripple Voltage | Condition |
|---|---|
| 0 – 0.5 volts | Acceptable |
| Over 0.5 volts | Problem – check diodes and windings |
Alternator Load Testing
Load testing simulates driving conditions that demand maximum output from the alternator. This can uncover weak or undersized replacement alternators.
To perform a load test:
- Connect a specialized alternator load tester following manufacturer instructions.
- Start engine and bring to 2500 RPM.
- Apply maximum rated load and watch voltage gauge.
- Voltage should stay above 13 volts under maximum load.
- Drop below 13 volts indicates insufficient alternator capacity.
A load tester applies carbon pile, incandescent bulb, or inductive loads on the alternator. Comparison to factory rated output will show if capacity has deteriorated.
Load Testing Specifications
| Condition | Voltage | Result |
|---|---|---|
| Maximum load at 2500 RPM | Above 13 volts | Pass |
| Maximum load at 2500 RPM | Below 13 volts | Fail – insufficient output |
Load testing confirms your alternator can deliver enough power for all your vehicle’s electrical systems to operate under demanding conditions.
Testing for Parasitic Draw
A parasitic draw test finds current drains that exist even when the engine and all accessories are off. This can slowly drain your battery.
Steps for parasitic draw testing:
- Ensure ignition is fully OFF and no accessories are on.
- Disconnect negative battery cable.
- Set multimeter to 10 or 20 amp DC current mode.
- Attach multimeter leads in line with disconnected negative cable.
- Current draw should be less than 50 milliamps.
- Higher draw indicates a parasitic drain – troubleshoot fuses, switches, wiring faults.
This test can uncover electrical faults, bad alternator diodes, and wiring issues allowing current to discharge the battery.
Parasitic Draw Specs
| Current Draw | Condition |
|---|---|
| Less than 50mA | Acceptable |
| Over 50mA | Excessive – troubleshoot electrical faults |
Alternator Bearing Test
Noisy alternator bearings can indicate impending alternator failure. Check bearings by performing a “wiggle and spin test”:
- Locate alternator and inspect mounting brackets for cracks or looseness.
- Try to wiggle alternator pulley and case side-to-side.
- Movement indicates loose bracket or worn bearings.
- Spin pulley by hand. Spin should be smooth and quiet.
- Noise or grinding indicates worn alternator bearings that will soon fail.
Catching bad alternator bearings early prevents being left stranded when the alternator seizes up completely.
Alternator Bearing Inspection
| Inspection Result | Condition |
|---|---|
| No play or noise when wiggled | Pass |
| Side to side looseness | Bad mounting bracket |
| Grinding or roughness spinning | Worn bearings |
Brush Length Test
On older vehicles with internally regulated alternators, the brushes are a wear item that needs inspection. As brushes wear down, alternator output and voltage regulation decreases.
To check brushes:
- Remove alternator brush cover plate.
- Inspect brushes for wear using ruler or caliper.
- Minimum brush length is around 0.25 inches or greater.
- Shorter brushes need replacement.
Regularly inspecting and replacing worn brushes extends alternator lifespan on older vehicles.
Minimum Alternator Brush Length
| Brush Length | Condition |
|---|---|
| Less than 1/4 inch | Worn – needs replacement |
| 1/4 inch or greater | Good condition |
Conclusion
Using a digital multimeter along with a basic tool set allows you to conduct robust alternator testing in your own garage. Follow these essential tests:
- Voltage test – Confirm 13.5-15 volt charging when engine is running.
- Output test – Check for clean DC output around 14 volts when revved.
- Ripple test – Verify ripple is under 0.5 volts AC.
- Load test – Show alternator maintains voltage under heavy electrical load.
- Parasitic draw – Check for current draw under 50mA with engine off.
- Mechanical – Inspect bearings and brushes for wear.
Early detection of alternator issues can help avoid being left stranded or facing expensive electrical repairs down the road. With this guide, you now have the knowledge to effectively test your car’s alternator for optimal performance.