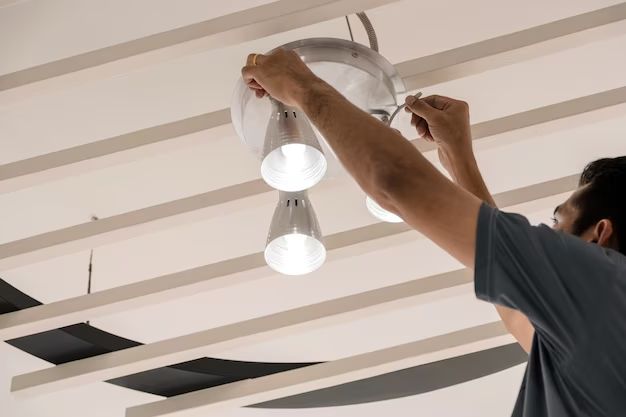
Installing a new ceiling light fixture can seem daunting, especially if you want to avoid complicated electrical work. However, with some planning and the right materials, it is possible to add a ceiling light without wiring in most cases. Here are some quick answers to common questions about wiring-free ceiling light installation:
Can I install a ceiling light without any wiring?
Yes, there are wiring-free options like battery-powered or solar-powered LED lights that can be installed without wiring.
What are the easiest ceiling lights to install without wiring?
Battery-powered, solar-powered, or adhesive LED puck lights are the easiest wiring-free ceiling light options. They have minimal components and can stick or hang from the ceiling surface.
How do you connect a ceiling light without existing wires?
Wiring-free lights use removable batteries or solar panels to generate power instead of wiring. Some also have adhesive pads or magnets to mount to the ceiling.
What kind of ceiling light doesn’t need wiring?
Battery-powered, solar-powered, and adhesive LED lights do not require wiring. Solar lights absorb sunlight during the day to power the LEDs at night.
Can you install recessed lights without electrical wiring?
Yes, there are recessed lighting kits that use battery packs or solar panels to generate power instead of wiring into existing electrical lines. The lights recess into the ceiling with springs or brackets.
Page Contents
Choosing a Wiring-Free Ceiling Light
When choosing a wiring-free ceiling light, here are some factors to consider:
- Light source – LED lights are the most efficient wiring-free option.
- Power source – Battery, solar, or adhesive powered.
- Lumens – 400+ for bright ceiling lighting.
- Mounting method – Adhesive, magnet, hook, or spring-loaded.
- Size and shape – Surface puck lights or recessed panels.
- Cost – Around $20-$100 per fixture.
Battery-powered LED puck lights are inexpensive and easy to install with adhesive strips. For a decorative look, solar-powered ceiling lamps with acrylic panels give ambient lighting without wires.
How to Install Ceiling Lights Without Wiring
Follow these general steps to install wiring-free ceiling lights:
- Choose the location – Pick a spot on the ceiling with good sun exposure if using solar lights.
- Check the surface – Make sure the area is clean and dry before attaching adhesive lights.
- Prepare the light – For battery lights, insert batteries before mounting. Solar lights may need to charge before use.
- Mount the light – Use adhesive, magnets, hooks, or springs to attach the light to the ceiling.
- Aim the light – Adjust the direction of puck lights or panels.
- Finish installation – Turn on the light to test and enjoy the new lighting.
Always follow the specific manufacturer’s instructions for installation and usage. Certain ceiling materials like concrete may require special adhesives or anchors.
Installing Adhesive LED Puck Lights
Adhesive LED puck lights are the easiest wiring-free option. Here are the steps for installing them:
- Choose puck light location and clean ceiling area.
- Remove adhesive backing and insert batteries (usually 3 AAA).
- Firmly press puck light onto ceiling for 30 seconds to ensure adhesive hold.
- Turn on the light and adjust the directional angle as needed.
Most adhesive puck lights include an on/off switch on the exterior housing. Place them at least 2 feet apart for even lighting.
Installing Solar-Powered Ceiling Lights
Solar ceiling lights require access to sunlight to charge. Follow these guidelines:
- Pick a ceiling location with 5-6 hours of direct sun exposure.
- Affix solar panel securely using adhesive pads or screws.
- Angle solar panel towards sun if possible.
- Attach lamp unit to ceiling with provided hardware.
- Let solar panel charge in sunlight for 6+ hours before first use.
- Turn light on and enjoy up to 8 hours of light at night.
For the best results, install solar ceiling lights on a south-facing ceiling area without obstructions like overhangs. Clean solar panels monthly to ensure maximal sunlight absorption.
Pros and Cons of Wiring-Free Ceiling Lights
Here are some key benefits and drawbacks of installing ceiling lights without wiring:
Pros:
- No electrical work required – Good for rentals or lack of experience.
- Portable and removable – Take lights with you when moving.
- Quick, simple installation – Just adhere to ceiling surface.
- Lower cost than wired lights – No electrician or wiring expenses.
- Easy to reposition – Change layout whenever needed.
Cons:
- Less light output than wired – Not as bright as 120V electrical.
- Battery changes required – Replace batteries every 6-12 months.
- Limited placement options – Solar lights need sun exposure.
- Not suitable for all ceilings – May not work on textured or porous surfaces.
- Temporary feel – Not as permanent as built-in wired lighting.
Wiring-free ceiling lights work best as an affordable and removable lighting solution in rooms without easy access to electrical circuits. They can supplement existing fixtures or provide portable task lighting. For bright, permanent primary lighting, wired electrical ceiling lights are usually the better choice.
Safety Tips
When installing any ceiling lighting without wiring, be sure to follow these safety precautions:
- Use only lights designed to be wiring-free – Do not try to rig a wired fixture.
- Regularly check adhesive – Replace puck lights if adhesive loses strength.
- Avoid overloading outlet circuits – Spread battery chargers across outlets.
- Don’t cover solar panels – Keep them clear for optimal light recharging.
- Never leave battery-powered lights unattended – Turn off when not in use.
- Check manufacturer ratings – Do not exceed voltage limits or wattage.
Following the included directions and not taking unsafe shortcuts will ensure your wiring-free lighting remains securely mounted and operating safely. Contact a professional electrician if ever in doubt about safely installing lighting.
Conclusion
Installing ceiling lights without wiring is totally feasible with the right battery-powered or solar-powered LED fixtures. Adhesive puck lights, solar panels, and recessed lighting kits now make it possible to add new ceiling lighting without any electrical work in most homes and apartments. Just be sure to follow the manufacturer’s instructions carefully for mounting the wiring-free lights. With some strategic placement and aiming, these affordable LED lights can provide ample illumination without professional installation. Just keep safety precautions in mind and enjoy the ease of instantly upgrading your ceiling lighting!
More Questions and Answers on Installing Ceiling Lights Without Wiring
Can I hang a ceiling light without wiring?
Yes, there are wiring-free pendant lights and chandeliers that hang from ceilings with a hook-and-chain system. They use battery packs or solar panels to generate power. Make sure hooks are anchored securely into ceiling studs or use a specialty ceiling hook rated for the lamp’s weight.
How much weight can adhesive puck lights hold?
Most adhesive LED puck lights can support 100-150 grams (3.5-5.3 oz). Read manufacturer specs to confirm puck light weight limits before mounting to ensure the adhesive can hold. Limit groups to 3-4 puck lights spaced close together on ceilings to avoid overloading the adhesive.
What surfaces work best for adhesive puck lights?
Smooth, non-porous surfaces like drywall, plaster, metal, glass, and plastic work best for adhesive puck light strips. Avoid textured, uneven, or porous surfaces like wood paneling or concrete. Some puck lights include extra adhesives for trickier surfaces.
Can I install ceiling lighting without existing wiring or outlets?
Yes, self-contained battery-powered and solar-powered lights do not require connection to existing electrical wiring. They generate their own electricity, allowing installation without outlets or junction boxes in the ceiling. Just ensure there is adequate sun exposure for solar fixtures.
How do I choose the right number of ceiling lights?
Here are some tips for choosing adequate lighting:
- Living rooms – 3-4 lights for overall ambient lighting.
- Kitchens – 4-6 lights focused over work areas like counters.
- Bathrooms – 2-4 lights around the mirror/vanity.
- Bedrooms – 2 lights for general illumination and reading.
- Foyers – 1-2 lights to highlight entryway and coat hooks.
Also consider the room size and ceiling height. Bigger rooms and ceilings require more lighting fixtures for sufficient coverage.
How can I improve celling light brightness without wiring?
To maximize brightness from battery-powered or solar ceiling lights without wiring, follow these tips:
- Use LED lights – LEDs produce brighter light using less energy.
- Look for 500+ lumens – The higher the lumens, the brighter the light.
- Get 4000-5000K color temperature – Cooler light appears brighter.
- Keep batteries fresh – Replace every 6-12 months for full power.
- Clean solar panels – Dust buildup reduces light charging ability.
- Supplement with table/floor lamps – Add more lighting where needed.
Combining multipleLED ceiling lights with fresh batteries creates the brightest possible wiring-free ceiling lighting.
What maintenance is required for wiring-free ceiling lights?
Wiring-free ceiling lights require minor routine maintenance:
- Clean solar panels every 2-3 months with a soft cloth.
- Check adhesive strips and remount loose puck lights as needed.
- Replace batteries every 6-12 months per manufacturer instructions.
- Dust light covers and fixtures periodically to maximize light output.
- Test lights occasionally and replace any defective units.
Setting reminders to check the condition of the lights and change batteries will keep a wiring-free system running optimally.
How can I improve the light quality from battery-powered ceiling lights?
To get better quality light from battery-powered LED ceiling fixtures:
- Use lights with a CRI (color rendering index) of 80+.
- Choose the appropriate kelvin temperature: 2700-3000K for warm, homey light or 4000-5000K for cool, bright light.
- Look for a RA (color accuracy) of 90+.
- Combine multiple smaller lights instead of few larger ones for even illumination.
- Layer lighting with accent, task, and ambient fixtures.
- Aim lights properly to reduce shadows and glare.
High CRI and RA numbers along with careful placement will maximize light quality from battery-powered ceiling lights.