Adding a new light switch to an existing circuit can seem daunting, but it’s actually a straightforward DIY electrical project for most homeowners. With proper planning and safety precautions, you can install an additional light switch on your current circuit and enjoy the convenience of controlling lights from multiple locations.
Page Contents
- 1 Overview of the Light Switch Installation Process
- 2 Circuit Basics
- 3 Switch Wiring Configurations
- 4 Tools and Materials Needed
- 5 Step 1: Turn Off Power at the Breaker
- 6 Step 2: Remove the Existing Switch
- 7 Step 3: Identify the Wires
- 8 Step 4: Install New Electrical Box (If Needed)
- 9 Step 5: Connect the New Switch Wires
- 10 Step 6: Mount the New Switch
- 11 Step 7: Restore Power and Test
- 12 Safety First When Installing Electrical Wiring
- 13 Conclusion
Overview of the Light Switch Installation Process
Here is a quick overview of the steps involved in adding a light switch to an existing circuit:
| Step | Description |
|---|---|
| 1 | Turn off power to the circuit at the main breaker panel |
| 2 | Remove the existing light switch and expose the wires |
| 3 | Identify the hot wire, neutral wire, ground wire, and load wires |
| 4 | Install electrical box for the new light switch as needed |
| 5 | Connect the wires from the new light switch |
| 6 | Secure the new light switch in the electrical box |
| 7 | Turn power back on and test the new light switch |
While the basic steps are straightforward, there are some important safety guidelines and electrical concepts to understand before getting started. The rest of this article will provide more details on how to safely and successfully install an additional light switch on your circuit.
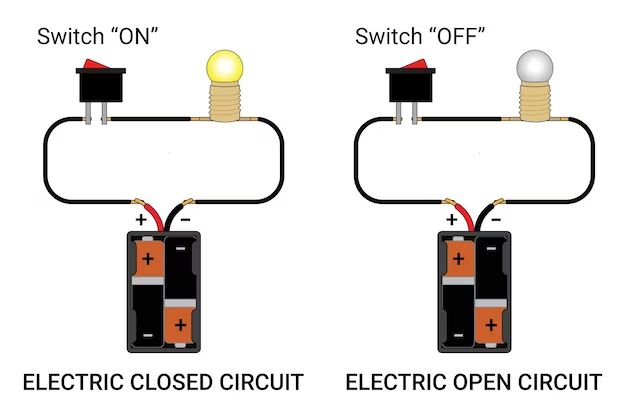
Circuit Basics
To add a new light switch, it’s important to understand some basics about home electrical circuits. A basic home circuit consists of:
- Hot wire – Carries electricity from the breaker panel to the lights/receptacles
- Neutral wire – Completes the circuit back to the breaker panel
- Ground wire – Provides a safe path for electricity in case of faults
- Load wires – Carry electricity from switches to lights and receptacles
When installing a new light switch, you will disconnect the hot wire from the existing switch and connect it instead to both the new and old light switches. The load wire will also be connected to both switches in order for each one to control the lights independently.
Switch Wiring Configurations
There are a few different wiring configurations you may encounter when adding a new light switch:
Single-Pole Switch
A single-pole switch has two terminals and controls a light fixture from a single location. This is the most common and simplest scenario for adding a new light switch. The hot wire is disconnected from the existing switch and connected to both the new and old switch. The load wire remains connected to the existing switch only.
3-Way Switch
A 3-way switch requires three terminals and controls a light fixture from two separate locations. In this case, the circuit has an additional traveler wire that connects the pair of 3-way switches. The hot wire gets connected to the common terminal on both switches. The traveler wire goes from the traveler terminal on one switch to the traveler terminal on the other switch. The load wire connects to the remaining terminal on both switches.
4-Way Switch
A 4-way switch is used when there are more than two switch locations controlling the same light. This requires a pair of 3-way switches and one or more 4-way switches in between. The 4-way switch will have four terminals, and the traveler wires from adjacent switches connect to the two traveler terminals.
Tools and Materials Needed
Here are the basic tools and materials you’ll need to have on hand before starting the project:
- Voltage tester – To safely check for live wires
- Screwdrivers
- Wire strippers
- Electrical tape
- Single-pole or 3-way switch (as needed)
- Electrical box (if adding a new switch location)
- NM cable or conduit
- Wire nuts
- Flashlight
Make sure to turn off the circuit breaker supplying power to the light switch and verify power is off with a voltage tester before doing any work. Having the proper tools and materials ready will make the installation process go smoothly.
Step 1: Turn Off Power at the Breaker
The first step is to locate the circuit breaker for the existing light switch and turn it off. This allows you to work safely on the switch without risk of shock. To be sure power is disconnected, you can use a non-contact voltage tester on the wires. Make sure whoever is living in the home knows not to turn the breaker back on while you’re working on the switch.
Step 2: Remove the Existing Switch
With the power confirmed off, you can now remove the existing light switch from the wall. Typically there will be one screw at the top and one at the bottom of the switch. Unscrew these to loosen the switch from the electrical box.
Carefully pull the switch out from the box while leaving the wires connected. You may need to disconnect some push-in connectors on the back of the switch. If so, take note of where each wire was connected.
With the old switch removed, you should now see the hot, neutral, ground, load, and any traveler wires exposed in the switch box.
Step 3: Identify the Wires
Before connecting the new switch, you’ll want to positively identify the hot, neutral, ground, load, and traveler wires (if present). There are a few ways to identify household electrical wires:
- Hot – The hot wire will be black, or sometimes red. Confirm it’s hot by using a voltage tester.
- Neutral – The neutral wire will be white or light gray.
- Ground – The ground wire will be bare copper or green.
- Load – The load wires will travel between the switch and light fixture. Often black or red.
- Travelers – Traveler wires in a 3-way switch circuit will often be red/black or white/black.
If the wire colors in your switch box don’t follow these standard wire colors, you may need to trace each one out individually to confirm.
Step 4: Install New Electrical Box (If Needed)
If you’re installing the new light switch in a location where there wasn’t previously a switch, you’ll need to install a new electrical box for the new switch. The box should be mounted around 4 feet off the ground.
Common plastic new work boxes can be installed when you have access to wall studs. Make sure it is large enough (at least 2 inches deep) to accommodate the new switch and wires.
For existing drywall with no access behind it, you can use an old work box which clamps securely inside the wall opening.
The box should be securely mounted flush with the finished wall surface. If in doubt, consult an electrician for proper box installation.
Step 5: Connect the New Switch Wires
With the new switch and electrical box installed, it’s time to connect the wires from the new switch to the circuit wiring. Make sure to carefully follow the new switch manufacturer’s instructions for proper connection.
Here are some general guidelines for connecting the wires to the new switch:
- Connect the hot (black) wire to the common terminal on the new switch
- Connect the load wire to the other terminal on a single-pole switch
- For a 3-way switch, connect travelers to the traveler terminals
- Connect the neutral (white) and ground (green/bare) wires together with a wire nut
- Wrap each connection securely with electrical tape
Consult a detailed wiring diagram for 3-way or 4-way switches to ensure proper traveler wire connection. Getting the traveler wires crossed will lead to a switch that does not work properly.
Step 6: Mount the New Switch
With all wires securely connected, you can now remount the new light switch into the electrical box. Make sure no bare wires are exposed outside of wire connectors. Push any extra wire length back into the box to maintain ample space.
Secure the switch into the box using the included screws. For plastic boxes, be careful not to overtighten the screws or you may crack the box.
Step 7: Restore Power and Test
Once the new switch is mounted, you can turn the circuit breaker back on to restore power. Use a voltage tester to confirm power is running to the new switch.
Flip the new light switch on and off to ensure the lights are functioning properly from both the old and new locations now. For 3-way switches, change the position of both switches to verify lights are controlled accurately from both.
If the switch doesn’t control the lights properly, turn the power back off and double check that all wires are connected to the correct terminals according to the manufacturer’s wiring diagram.
Safety First When Installing Electrical Wiring
Anytime you work with household electrical wiring, be sure to put safety first:
- Turn off power at the breaker and verify it’s off before starting work
- Follow all applicable electrical codes for your region
- Only work on small basic circuits if you have electrical experience
- Hire an electrician if you’re ever unsure about switch wiring
- Use a voltage tester to be sure power is off
- Connect wires securely and insulate all connections
By shutting off power, verifying wires with a tester, and working carefully, you can safely install a new light switch in your home. Taking proper safety precautions will allow you to upgrade your lighting circuits and controls.
Conclusion
Installing an additional light switch on your existing circuit is a DIY project most homeowners can tackle. While it requires working with electrical wires, as long as proper safety precautions are followed, you can achieve great results. With the steps outlined above for understanding your switch circuit, disconnecting the power, identifying the wires, installing a box, connecting the switch, and testing your work, you’ll be on your way to enjoying the convenience of controlling your lights from multiple locations in your home.