Anchoring objects into a cinder block wall can seem intimidating, but it’s actually quite straightforward once you understand the process. Cinder blocks provide a porous and durable material for securely anchoring heavy objects like shelving units, TV mounts, and more. The key is using the right anchors and installation method for your specific application.
In this comprehensive guide, we’ll walk through the entire process step-by-step, from choosing the right fasteners to properly installing them in the cinder blocks. We’ll also provide tips and considerations for maximizing strength and safety.
Page Contents
What You’ll Need
Before starting any anchoring project, you’ll want to gather the necessary supplies. Here’s an overview of what you’ll need:
Anchors
For cinder block walls, you’ll want to use anchors specifically designed for hollow concrete masonry. Some top options include:
– Concrete screw anchors – These are screwed into pre-drilled holes and tap their own threads into the cinder block. They provide very secure anchoring for heavy loads.
– Concrete sleeve anchors – These insert into pre-drilled holes and expand when a screw is inserted into the sleeve. Great for heavy duty applications.
– Concrete wedge anchors – A wedge and sleeve are hammered into a pre-drilled hole and then expanded by a bolt threaded into the sleeve. Excellent holding power.
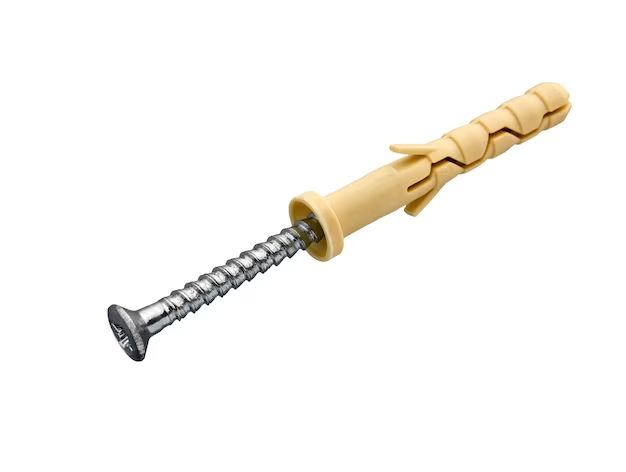
– Plastic anchors – For lighter loads (under 50 lbs), plastic anchors are easy to install and inexpensive. Not as strong as mechanical anchors.
Drill and Drill Bits
You’ll need a power drill along with masonry drill bits sized to match your anchors. The bits should have carbide tips. For sleeve anchors, you’ll also need a sleeve setting tool.
Other Supplies
– Safety glasses
– Dust mask
– Hammer
– Tape measure
– Pencil or marker
– Level
Selecting the Right Anchor
With the wide variety of cinder block anchor options, how do you choose the right one? Here are some key factors to consider:
Weight Load
Consider how much weight the anchor will need to support. Plastic anchors should only be used for objects under 50 lbs. For anything heavier, opt for a mechanical concrete anchor designed for masonry use. Check the manufacturer ratings to select an anchor rated for your intended load.
Hole Size
The diameter of the drilled hole must match the specifications for the anchor size you select. Anchor hole sizes generally range from 3/16″ to 3/4″. Match this to an appropriate masonry drill bit.
Cinder Block Density
Standard 8″ x 8″ x 16″ cinder blocks have nominal densities around 100 pounds per cubic foot. Denser cinder blocks can better hold anchors, so check your specific block density if possible.
Interior vs. Exterior Use
For exterior applications subject to moisture, select galvanized or stainless steel anchors rated for outdoor use. Zinc plated anchors provide decent corrosion resistance for interior applications.
Permanent vs. Temporary
For a permanent installation like shelving supports, choose anchors designed for long-term cinder block use. For temporary applications, plastic anchors are easier to remove.
Anchor Hole Location Tips
Proper placement of the anchor hole in the cinder block will optimize the holding strength. Follow these best practices:
Depth
Drill holes at least 1″ deeper than the anchor depth to allow debris clearance. Typical depth is 2″ to 3″.
Edge Distances
Keep at least 1.5″ from any edge of the block to prevent breakage. 2″ or more is better for heavier loads.
Spacing
Space multiple anchors at least 2″ apart to maintain full strength. Closer spacing can cause the block to crack.
Orientation
Align the anchor hole perpendicular to the face of the wall for maximum strength.
Drilling Holes in Cinder Block
With the right location determined, now you’re ready to drill the anchor holes:
Use Eye and Ear Protection
Always wear safety glasses and a dust mask when drilling concrete to protect yourself from debris. Wear ear plugs as well if using an electric drill.
Mark the Holes
Use a pencil or marker to mark the desired hole locations based on your planned layout. Use a level to align the marks vertically and horizontally.
Secure the Base
If drilling near the top of a wall, secure an anchor base to the cinder block to prevent drill slipping. Clamping a 2×4 board flush with the blocks works well.
Use Carbide-Tipped Bits
Masonry drill bits must have carbide tips to withstand abrasive cinder block. Match the bit diameter to your anchor size.
Drill Perpendicular
Position the drill perpendicular to the wall face and use the marked holes as guides for drilling straight and true. Apply firm pressure.
Drill Slowly
Let the masonry bit do the work by drilling at medium-low speeds. High speeds can damage the carbide tips.
Keep Holes Clean
Frequently back the bit partially out to clear dust and debris from the hole while drilling.
Use Lubrication
Optionally apply water or a dedicated masonry drill lubricant to the hole during drilling to keep dust down.
Installing Concrete Screw Anchors
Concrete screw anchors provide some of the strongest holding power for cinder block applications. Here’s how to install them:
Select Appropriate Size
Match the concrete screw diameter and length to the hole size needed for your application load.
Clean Out the Hole
Use compressed air or a vacuum to remove all debris from the drilled hole. Do not proceed if hole is obstructed.
Insert the Anchor
Place the screw anchor tip into the hole. The threads should align perpendicular to the wall face.
Hammer the Anchor (If Needed)
If the anchor doesn’t thread into the hole easily, use light hammer taps to help get it started straight.
Screw in the Anchor
Use a screwdriver or power drill to drive the concrete screw fully into the hole until tight and flush. Do not overtighten.
Install Object
Place the object over the screw head and use washers and nuts as needed to secure in place. Tighten firmly.
Installing Sleeve Anchors
Sleeve anchors slip easily into a hole and then expand for rock-solid holding strength. Follow these instructions for proper installation:
Drill Proper Depth Hole
Drill hole at least 1/4″ deeper than anchor length to allow space for dust. Hole diameter must match sleeve size.
Clean Hole Thoroughly
Vacuum and brush hole to remove all debris. No dust or particles can be present for sleeve to function.
Insert Sleeve
Place threaded end of anchor sleeve fully into hole with dish side facing out. Sleeve should fit completely flush.
Hammer Sleeve (If Needed)
For tight holes, use a hammer with the setting tool to tap the sleeve smoothly into the hole.
Set the Anchor
Place setting tool tip into sleeve dish and strike sharply several times until sleeve expands and locks in place.
Insert Bolt
Thread bolt through object to be mounted and into sleeve nut. Tighten firmly to desired level. Do not overtighten.
Installing Wedge Anchors
Offering excellent load capacity, wedge anchors are an ideal choice for heavy cinder block loads. Follow these steps:
Drill Proper Depth Hole
Hole diameter and depth should precisely match anchor specifications to ensure proper expansion.
Clean Out Hole
Thoroughly vacuum dust and debris from hole. No particles can block wedge from entering hole.
Start Anchor Into Hole
Insert threaded end of anchor into hole so wings align perpendicular to wall face. Lightly hammer anchor flush if necessary.
Tighten Bolt to Expand
Tighten the bolthead using a wrench to pull the anchor into the hole and expand the wedge behind the sleeve.
Keep Tightening
Continue firmly tightening the bolt until the wings fully expand and the anchor will not turn further. Do not overtighten.
Install Object
Slip object to be mounted over bolt end and secure with washers and nuts as needed. Tighten appropriately.
Using Plastic Anchors
For lightweight objects under 50 pounds, plastic push-in anchors offer an easy cinder block anchoring option when used properly:
Drill Appropriate Hole
Drill a hole slightly smaller than anchor diameter. Depth should equal anchor length.
Press Anchor into Hole
Place tip in hole and use hammer to tap anchor into hole until flange is flush with surface.
Allow Curing Time
Plastic needs time to expand and settle in hole. Allow several hours or overnight before using.
Insert Screw
Screw the provided Phillips or slotted screw into the anchor plastic. Do not overtighten.
Avoid Weight Shifts
Once installed, avoid sudden weight shifts or vibration on the object to prevent anchor pull-out.
General Anchor Tips
Keep these best practices in mind for any cinder block anchor project:
– When in doubt, choose a stronger, more robust anchor for the job. It’s better to err on the side of excess strength.
– Carefully follow all manufacturer instructions for hole sizing, drilling depth, installation procedures, and loading capacity.
– Ensure at least 1.5″ clearance from block edges and 2″ spacing between neighboring holes.
– Always pre-drill holes with carbide-tipped masonry bits sized for the anchor diameter. No improvising.
– Keep anchor threads perpendicular to the wall face for maximum holding strength.
– Wear safety glasses, dust mask, and ear protection when drilling concrete.
– When possible, use a sleeving tool and hammer to cleanly seat anchors into holes.
– Tighten anchors firmly during installation, but be careful not to overtighten as this can weaken the block.
– For heavy objects, use multiple anchors spread over a wide area for better load distribution.
Conclusion
With the right preparation and technique, almost anyone can securely anchor objects into a cinder block wall. Just take your time, use robust anchors sized for the load, drill proper holes, and follow the steps outlined for smooth installation. Expect the anchors to hold strong for many years when placed correctly. And be sure to follow safety procedures during drilling to protect yourself from debris. We hope this guide gives you the knowledge and confidence for your next cinder block anchoring task. Let us know if you have any other questions!