Applying fertilizer to your lawn is an important part of lawn care and maintenance. Fertilizer provides nutrients that grass needs to stay green and healthy. While you can apply fertilizer by hand, using a spreader is a more efficient method that provides even coverage across your entire lawn. Here is a step-by-step guide on how to properly apply lawn fertilizer using a broadcast spreader.
Page Contents
- 1 Benefits of Using a Spreader
- 2 Types of Spreaders
- 3 Choosing the Right Spreader
- 4 How to Use a Broadcast Spreader
- 5 Fertilizer Application Tips and Tricks
- 6 Fertilizing New Lawns
- 7 Common Spreader Issues and Solutions
- 8 Safety Tips When Using Fertilizer
- 9 Fertilizing Tips for Different Grass Types
- 10 Organic vs Synthetic Fertilizer
- 11 Transitioning to Organic Lawn Care
- 12 Cost Comparison of Fertilizer Types
- 13 Environmental Considerations
- 14 Conclusion
Benefits of Using a Spreader
There are several key benefits to using a broadcast spreader to fertilize your lawn:
- Even coverage – Spreaders provide consistent, uniform coverage across your entire lawn. This ensures all areas get fertilized, without over or under applying in certain spots.
- Efficiency – Spreaders are faster than applying fertilizer by hand. You can cover more ground in less time.
- Controlled application – Spreaders allow you to easily adjust settings to control the application rate. This helps avoid wasting excess fertilizer.
- Less physical strain – Push spreaders eliminate the need to bend over and throw fertilizer by hand across your lawn.
Overall, a broadcast spreader takes the guesswork out of fertilizing and makes the job easier, faster and more accurate.
Types of Spreaders
There are two main types of spreaders designed for fertilizer application:
Push Spreaders
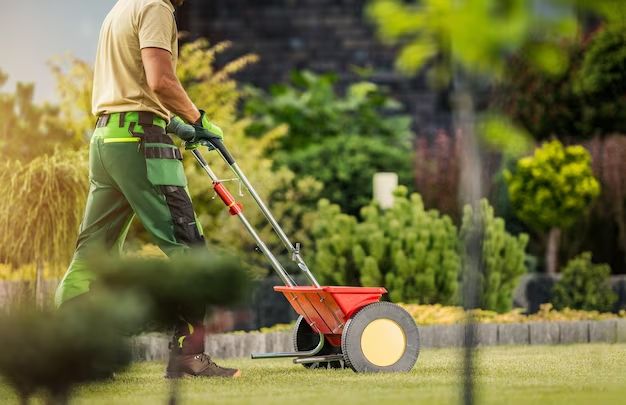
Push spreaders are wheeled devices that you walk behind and push across your lawn. You fill the hopper with fertilizer and as you push, a mechanism drops the fertilizer through an opening onto the grass.
- Pros: Inexpensive, good for small-medium sized lawns, models with edge guards reduce overlap
- Cons: Requires more physical effort to operate, not ideal for large lawns
Tow Behind Spreaders
Tow behind spreaders attach to a lawn tractor, ATV or other riding mower. As you drive across your lawn, the fertilizer drops through an opening in the back.
- Pros: Covers large areas quickly with less effort, can fertilize acres efficiently
- Cons: More expensive, requires a riding mower to attach to, less versatile
For typical residential lawn sizes, a push spreader is usually the best choice in terms of convenience and value.
Choosing the Right Spreader
Here are some tips for choosing a high quality spreader:
- Capacity – Make sure the hopper can hold at least 40-50 lbs of fertilizer to minimize refilling.
- Adjustable settings – Models with adjustable spread settings give you precision over application rates.
- Even spread – Look for designs that provide a wide, consistent spread pattern across the entire width of the spreader.
- Edge guard – Prevents fertilizer from spreading onto sidewalks, drives, flower beds, etc.
- Pneumatic tires – Air-filled tires provide smoother operation on uneven turf.
- Durable construction – Opt for steel or heavy plastic construction that will hold up over time.
Reputable brands like Scotts, Spyker and Earthway make quality spreaders that will provide years of reliable service.
How to Use a Broadcast Spreader
Step 1 – Assess your lawn
Walk your lawn and assess the turf grass. Look for bare, thin or discolored areas that indicate poor soil nutrition. Also identify slopes, low spots and other areas that may need extra fertilizer.
Step 2 – Choose an appropriate fertilizer
Select a fertilizer designed for your grass type, such as Kentucky bluegrass, Bermuda, or other varieties. The numbers on the bag (eg 10-10-10) indicate the percentages of key nutrients – nitrogen, phosphorus and potassium.
Step 3 – Calibrate your spreader
Perform a calibration test to determine the appropriate spreader setting for your desired application rate. Start with a low setting and put down fertilizer over a measured area. Weigh the amount dispensed and adjust settings accordingly.
Step 4 – Read the label
Carefully read the label on your fertilizer bag. It will indicate the recommended coverage area per pound of nutrient. This specifies how much area the fertilizer should cover.
Step 5 – Apply fertilizer
Fill your spreader and begin applying fertilizer in straight, overlapping passes across your lawn. Walk at a steady, brisk pace for even coverage. Periodically check the hopper and refill as needed.
Step 6 – Address problem areas
Use a lower spreader setting for slopes and thin areas to avoid runoff or burnout. Use a higher setting for patches that need extra nutrients. Make multiple passes over low spots.
Step 7 – Clean up and water in
Sweep any fertilizer from sidewalks and drives back onto the lawn. Water thoroughly after application to dissolve granules and soak nutrients into the soil. Allow lawn to completely dry before mowing.
Following proper techniques for filling, calibrating and operating your spreader ensures optimal fertilizer coverage. Always adhere to the manufacturer’s instructions for safe handling and storage. With routine fertilizing, your lawn will maintain lush, green, healthy grass all season long.
Fertilizer Application Tips and Tricks
Here are some additional tips for getting the most out of fertilizer application:
- Apply early in the morning when grass is damp for adhesion.
- Break up applications into lighter doses every 6-8 weeks vs one heavy application.
- Alternate between fast and slow release fertilizers for prolonged nutrition.
- Avoid overapplying near water sources like ponds to prevent runoff.
- Reapply if heavy rains occur shortly after fertilizing to replace nutrients washed away.
- Reduce nitrogen levels during summer to discourage disease and excess growth.
- Leave grass clippings when mowing to return nutrients back to the soil.
- Supplement with compost and organic materials like manure to improve soil.
- Test soil periodically to determine specific nutrient deficiencies.
- Overseed bare areas along with fertilizing to encourage new growth.
Paying close attention to proper fertilization practices will keep your grass healthy and reduce any risks of overexposure.
Fertilizing New Lawns
When establishing a brand new lawn, either via seed or sod, follow these tips for fertilization:
- Wait until new grass is 2-3 inches tall before first fertilizer application.
- Use starter fertilizer high in phosphorus to promote root system growth.
- Apply at half the normal rate and increase gradually over the first season.
- Allow 8 weeks between applications for new lawns.
- Do not fertilize after late fall to avoid winter damage.
- Supplement new sod with extra nitrogen for rapid green-up.
New lawns have less established root systems and are more susceptible to fertilizer burn. Use a gently does it approach the first year. Proper mowing, irrigation and fertilization will ensure your new lawn gets off to a healthy start.
Common Spreader Issues and Solutions
Problem: Fertilizer leaking from spreader
Solution: Check hopper for cracks and replace any damaged seals. Make sure opening is correctly calibrated and not too wide.
Problem: Uneven spreading pattern
Solution: Calibrate spreader settings. Level device to distribute weight evenly. Slow down pace for more precise spreading.
Problem: Fertilizer spreading onto sidewalks
Solution: Attach edge guard accessory or position spreader to avoid hard surfaces. Carefully sweep any stray fertilizer back onto lawn.
Problem: Spreader clogs frequently
Solution: Use fresh, dry fertilizer as moisture can cause clumping. Avoid overfilling hopper. Shake occasionally during use to loosen.
Problem: Excess fertilizer use
Solution: Recalibrate spreader settings. Apply in two lighter passes instead of one heavy application.
Regular spreader maintenance and calibration is essential for avoiding mechanical issues. Refer to manufacturer guidelines for proper use and care.
Safety Tips When Using Fertilizer
When working with both spreaders and fertilizers, follow these safety guidelines:
- Wear gloves and wash hands after use.
- Read all warning labels and only apply as directed.
- Keep children and pets off lawn after applying until product is watered in.
- Store unused fertilizer properly in a cool, dry space.
- Apply when no rain is forecast to avoid runoff.
- Sweep any product from sidewalks back into the lawn, not down storm drains.
- Use spreaders designed to hold fertilizer only, not seed spreaders.
- Avoid breathing in fertilizer dust by standing upwind when filling spreaders.
While extremely useful tools, fertilizers should be handled with care to avoid hazards. Adhering to all safety recommendations keeps you and your lawn healthy.
Fertilizing Tips for Different Grass Types
Fertilizer needs can vary for different grass species. Follow these tips:
Warm Season Grasses
- Types: Bermuda, zoysia, centipede, St. Augustine, buffalo grass
- Fertilize in early summer just before active growth period.
- Use fertilizer higher in nitrogen for greener, lush growth.
- Avoid too much nitrogen which can cause excessive thatch buildup.
Cool Season Grasses
- Types: Kentucky bluegrass, ryegrass, tall fescue, fine fescues
- Fertilize in fall to develop deep roots before winter dormancy and again in spring.
- Use balanced fertilizer that won’t push top growth at expense of roots.
- Cut back on nitrogen in summer to avoid disease problems.
Always choose fertilizers labeled for your specific grass species for best results. Let the grass type dictate your nutrient approach.
Organic vs Synthetic Fertilizer
You can fertilize your lawn with either organic or synthetic fertilizer products:
Organic Fertilizers
- Derived from plant or animal sources like manures, composts, bone meal, etc.
- Release nutrients more slowly into soil.
- Enhance soil microbial activity and overall health.
- Less concentrated nutrients, so need heavier applications.
- More expensive compared to synthetic options.
Synthetic Fertilizers
- Contain inorganic compounds manufactured chemically.
- Nutrients are more readily available for faster green-up.
- Harsher chemical properties require careful application.
- Often less expensive per nutrient pound.
- Do not improve soil structure or microbial life.
Many people use a combination approach, supplementing synthetic fertilizers with periodic organic inputs. Talk to your local nursery to learn more about organic and synthetic fertilizer benefits.
Transitioning to Organic Lawn Care
If seeking to move towards organic lawn fertilization, here are some tips:
- Get a soil test to identify any deficiencies to specifically target.
- Gradually introduce organic inputs like composts and manures over time.
- Reduce synthetic fertilizer amounts incrementally over a few seasons.
- Overseed to fill in thin areas as synthetic fertilizers are phased out.
- Accept some decrease in color and density as soil ecology adjusts.
- Add beneficial microbes to aid the soil food web.
- Increase mowing height to encourage deeper roots.
- Adjust expectations to allow lawn’s health to improve naturally.
With careful reduction of synthetic inputs and increasing soil organic matter, an organic lawn can thrive. But the transition requires patience over an initial period of adjustment.
Cost Comparison of Fertilizer Types
When evaluating different fertilizer options, the cost per pound of nitrogen is a helpful comparison. Here are average nitrogen costs for different products:
| Fertilizer Type | Average Cost Per Pound of Nitrogen |
|---|---|
| Synthetic (urea) | $0.30 – $0.60 |
| Synthetic Slow Release | $0.70 – $1.00 |
| Organic Blend | $1.00 – $1.50 |
| All Natural Organic | $2.00 – $3.00 |
While organic options cost more per pound of nitrogen, they provide long term soil enrichment. Evaluate costs along with benefits to determine the best fertilizer investment.
Environmental Considerations
When applying fertilizers, be mindful of potential environmental impacts:
- Prevent runoff into storm drains through proper watering-in of products.
- Use only the minimal amount needed to achieve desired turf response.
- Employ organic fertilization to improve soil health and reduce chemical loads.
- Never apply fertilizers near water bodies like ponds which are vulnerable to nutrient pollution.
- Consider alternatives like corn gluten that inhibit weed germination to reduce chemicals.
- Test soil regularly and only apply nutrients that are actually deficient.
- Convert lawn sections to more pollinator-friendly native plants and grasses.
With informed care, homeowners can maintain beautiful lawns while being mindful of the surrounding ecosystem.
Conclusion
The proper application of fertilizer with a broadcast spreader is fundamental to nurturing a thriving lawn. Following the steps outlined, including choosing quality equipment, calibrating settings, using proper technique, and applying safe handling practices, leads to a lush, green carpet of healthy grass. Pair fertilization with proper mowing, irrigation, aerating and other care for maximum benefit. With the right tools and methods, homeowners can create a lawn that becomes the envy of the neighborhood.