Page Contents
Quick Answers
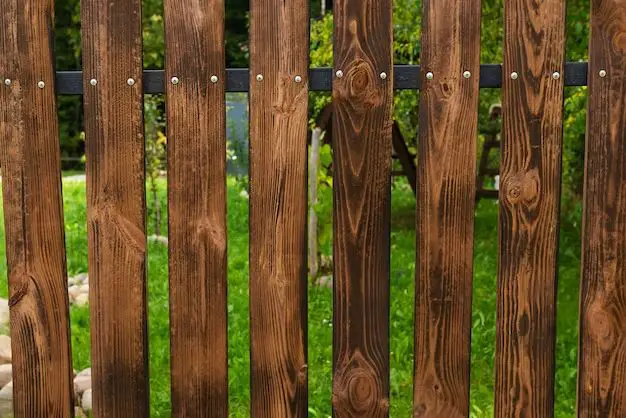
Attaching a trellis topper to a fence can seem daunting, but it’s actually a straightforward DIY project. Here are some quick answers to common questions:
– The main tools you’ll need are a drill, screws or nails, and wood glue. Make sure the hardware is rated for outdoor use.
– Trellis toppers typically attach to the fence with screws or nails driven into the fence boards. Predrill holes to prevent splitting.
– For extra strength, apply exterior wood glue along the top edge of the fence before setting the trellis in place. Allow the glue to dry before securing with screws/nails.
– Space the trellis topper screws/nails every 12-16 inches for proper support. Drive them at slight angles through the trellis into the fence.
– Consider adding decorative caps or covers over the screw/nail heads for a cleaner look.
– Seal any cut edges of the wood with exterior paint or sealer to prevent rotting and extend the trellis lifespan.
– Ensure the trellis is level across the top before permanently attaching it. Use shims if needed to fill any gaps.
Choosing the Right Trellis Topper
When selecting a trellis to mount on top of your fence, you’ll first need to decide on the style and material. Some common options include:
– Wood trellises made from cedar, redwood, or pressure-treated pine. These are attractive, affordable, and easy to work with. Cedar and redwood have natural rot resistance.
– PVC or vinyl trellises that mimic wood’s look but won’t rot or deteriorate. More expensive but very low maintenance.
– Wrought iron or aluminum trellises adding a decorative touch. Durability varies by quality.
– Reeded or lattice-style trellises made from wood, metal, or plastic. The crisscross design creates a canal for vines to climb.
– Arbors or archways that span over gates or openings in the fence line.
Match the height, length, and style of the trellis topper to your existing fence design. The trellis should be slightly narrower than the fence width to allow for overhang on each side. Consider how much privacy you want to maintain when selecting trellis patterns.
Choosing Attachment Hardware
Since the trellis topper will be exposed to the elements year-round, it’s critical to use exterior-rated hardware to attach it securely to the fence. Here are some hardware options to consider:
– Exterior wood screws, either coated or stainless steel. For softer woods, use a fine thread. For harder woods, use a coarse thread. 2 to 3 inch lengths are ideal.
– Galvanized or stainless steel nails. Ring shank and spiral shank nails provide extra holding power. Nail size should be suited to the trellis and fence thickness.
– Exterior-rated wood glue for extra adhesion in addition to mechanical fasteners. Look for waterproof polyurethane glue or similar.
– Decorative caps or covers to hide screw and nail heads. Iron, copper, and plastic caps add a finished look.
– Weather-resistant wood sealant if the trellis was purchased unfinished. Seal all sides before installation.
– Rust-resistant joist hangers to attach trellis ends to fence posts for added stability.
Choose corrosion-resistant hardware and a quantity sufficient to support the full weight of the trellis and any plants growing on it.
Preparing the Fence
A bit of planning and preparation are needed before mounting the trellis topper itself:
– Examine the fence closely and make any necessary repairs first. Replace loose or rotten boards as needed to ensure it can support the added weight.
– Check that the fence is as level and plumb as possible along the length where the trellis will be installed.
– Measure the exact length and height of the fence section. Cut the trellis to size if needed for an exact fit.
– Lightly sand and clean the fence top to remove any glossy finish, grease, or debris that could interfere with adhesion.
– Mark stud locations if attaching trellis to a wood fence. You’ll need to drive screws into studs for maximum holding strength. A stud finder or knocking can locate them.
– Have all tools and hardware ready before starting. This includes a drill, driver bits, nails/screws, glue, tape measure, level, sawhorses, and pencil.
– Wear safety glasses, gloves, and other protective gear when cutting trellis components.
Proper planning makes installing the trellis topper much simpler. Take the time to accurately measure and customize the trellis size if needed.
Attachment Techniques
Here are some step-by-step instructions for securely attaching a wood trellis topper to a wood fence using screws:
Supplies Needed:
– Power drill and driver bits
– Countersink drill bit (optional)
– Exterior wood screws (2-3″ length)
– Exterior wood glue
– Caulk gun
– Tape measure and pencil
– Level
– Sawhorses or support rails
– Safety glasses and work gloves
Steps:
1. Place the trellis upside down on sawhorses or a flat surface for easy access.
2. Apply a bead of exterior wood glue down the top length of the fence where the trellis will attach.
3. With help from another person, flip the trellis right side up and place it onto the fence, centered as desired.
4. Align and lightly clamp the trellis to the fence while the glue dries. Check for level.
5. Using a drill with driver bit, predrill holes into the fence boards through the trellis frame. Holes should be slightly smaller than screw diameter. Space holes every 12-16 inches.
6. Use a countersink bit to recess screw holes if desired. This allows installing decorative caps.
7. Fasten the trellis by driving 2-3″ exterior wood screws through the predrilled holes and into the fence boards. Do not overtighten.
8. Allow the glue to fully cure for 24-48 hours before releasing clamps. The trellis is now securely attached.
9. Apply weatherproof wood sealant to protect any cut trellis edges against moisture.
10. Install decorative caps over screw heads for an upgraded finished look.
Follow a similar process if using galvanized nails instead of screws. Always check local building codes for any requirements when building fences and trellises.
Alternative Attachment Options
Here are some other reliable ways to mount a wooden trellis topper to a wood fence:
– Use joist hanger hardware at each end of the trellis. Screw a joist hanger into the fence post, then set the trellis end into the metal bracket.
– For lattice-style trellis panels, secure them with exterior-rated zip ties threaded through the open squares and around fence boards.
– Attach a reeded trellis panel using hooks anchored into the fence. Hang the trellis on the hooks.
– Use metal fence brackets designed for trellis toppers. Attach the brackets to the fence, then set the trellis into the slots.
– For privacy trellis panels, secure them with exterior bolts all the way through the fence frame using washers and nuts on the backside.
– Attach a smaller decorative trellis using heavy-duty outdoor adhesive or liquid nails rather than mechanical fasteners.
– For PVC/vinyl or metal trellis, use special self-tapping screws made for use with plastic lumber or sheet metal.
– Weave flexible willow or rattan trellis pieces through the openings in a wood fence and secure at top and bottom.
No matter the attachment method, be sure to check the trellis frequently for stability. Restrengthen as needed over time to keep it safe. Proper mounting is crucial.
Decorative Considerations
Beyond just functionally attaching the trellis, also consider the decorative factor when installing:
– If desired, use trim pieces along the top or sides of the trellis to conceal raw edges and emulate a built-in look. Use cedar, redwood, or PVC trim for durability.
– Paint or stain the trellis prior to mounting if the desired color differs from the fence. Be sure to use exterior-grade paint.
– Mix and match different colors and finishes of wood if using multiple trellis pieces for visual interest.
– Incorporate lighting into the trellis design to illuminate and showcase the space at night. Use solar options for easy installation.
– Add decorative metal or wooden scrollwork along the top or sides for an upgraded look.
– Use trellis toppers to soften the transition between different fence styles or materials on the property.
Trellises can do more than just provide vertical gardening space. Take advantage of their potential as an eye-catching design element. Get creative with materials, colors, textures, and accents. Proper installation will keep it beautifying your fence for years to come.
Maintenance
While trellis toppers are low maintenance, follow these tips to keep them looking their best:
– Inspect annually for any loose, cracked, or deteriorating components. Repair as needed.
– Remove any plants, leaves, or other debris accumulating on top of the trellis that could impede drainage.
– Reapply exterior wood sealant/stain every 2-3 years to protect the wood from UV damage and moisture.
– Hose down vinyl or metal trellises periodically to prevent dirt buildup and mildew.
– Check that attachment hardware remains secure over time. Reinstall any popped nails or loose screws.
– Consider removing climbing plants in winter to prevent added wind and snow load stress on the trellis.
– Sand and repaint any areas showing chipping, peeling, or flaking paint to maintain the protective finish.
– Tighten hardware on decorative trellis accents if they become loose. Remove and store them seasonally if desired.
With routine TLC, a fence-mounted trellis topper will enhance your landscape for many years. Be diligent about repairs and upkeep.
Conclusion
Adding a trellis topper is an easy way to improve the look of a basic wood fence. Match the trellis size and style to your fence design and garden needs. Use weather-resistant outdoor hardware, screws, or nails to firmly attach the trellis along the fence top. Follow the recommended spacing between fasteners. Allow wood glue to fully cure before releasing clamps. Decorate the trellis with trim, lighting, accents, or climbing plants. Maintain the trellis with annual inspections, cleaning, repairs, and resealing as needed so it continues adorning your fence for years to come.