Running extension cords across floors can create tripping hazards and look messy. Attaching an extension cord to the wall gets it up off the floor and out of the way. This is a relatively easy project that can be done in just a few steps with some basic tools and supplies.
Page Contents
- 1 Benefits of Attaching Extension Cords to Walls
- 2 Choosing an Extension Cord
- 3 Tools and Materials Needed
- 4 Step 1: Plan the Route
- 5 Step 2: Cut Cord to Proper Length
- 6 Step 3: Attach Anchors and Clips
- 7 Step 4: Secure Extension Cord
- 8 Step 5: Connect Cord and Outlet Test
- 9 Tips for Attaching Extension Cords on Walls
- 10 Safety Precautions
- 11 Conclusion
Benefits of Attaching Extension Cords to Walls
There are several benefits to attaching extension cords to walls:
- Gets cords off the floor – Reduces tripping hazards
- Looks neater and cleaner – No messy cords strewn about
- Protects cords from damage – Less likely to be stepped on or run over
- Allows cords to be run longer distances – Can span across rooms attached to baseboards
- Creates a more permanent solution – Cords won’t move around or get unplugged as easily
Attaching extension cords to walls or baseboards gets them safely up off the floor and out of the way. This makes any room look cleaner and minimizes the risk of tripping over loose cords or accidentally pulling them from outlets.
Choosing an Extension Cord
When choosing an extension cord to attach to a wall, there are a few important features to consider:
- Length – Measure the distance you need to run the cord and buy an appropriate length with extra slack.
- Gauge/Diameter – Heavier 12 or 14 gauge cords are best for permanent installation.
- Indoor/Outdoor Rating – Outdoor cords are more durable. Indoor cords can be used outside if protected.
- Right Angle Plug – Makes plugging into outlets easier when attached to baseboards.
- Flat Cord – Lays flush against the wall for a cleaner look.
A 12 or 14 gauge outdoor extension cord with a right angle plug is ideal for attaching to walls. Opt for a flat cord if you want the flush, discreet look. Purchase a cord that is longer than needed so you have extra slack.
Tools and Materials Needed
Gather the following tools and materials before starting this project:
- Extension cord
- Drywall anchors or screws
- Drill
- Drill bits
- Screwdriver
- Stud finder (optional)
- Cable staples, clamps or clips
- Cable ties (optional)
Using the proper supplies will make installing the extension cord easier and provide a secure hold.
Step 1: Plan the Route
Decide where you want to run the extension cord along the wall. Determine the most direct path between the outlet and where the cord ends will be used. Consider the following when planning the route:
- Avoid high traffic areas
- Run cord along corners or edges of rooms when possible
- Outline the path with painter’s tape if needed
- Ensure the cord reaches the outlet and device
Mapping out the route will make installing the cord go smoothly and look clean.
Step 2: Cut Cord to Proper Length
Cut the cord to the desired length using wire cutters. Leave some extra slack in the cord rather than cutting it too short. You want to have some extra length to work with for a cleaner installation.
Measure twice and cut once to avoid ending up with a cord that’s too short. A proper cut also avoids bunching and winding up excess cord.
Step 3: Attach Anchors and Clips
Use drywall anchors, screws, cable staples, or clips to attach the extension cord to the wall securely. Studs provide the strongest mounting points if located along the route. Wall anchors work for drywall without studs. Here are some attachment options:
Studs:
- Use small screws directly into the studs
- Pre-drill holes to make screwing easier
- Space screws 12-16 inches apart
Drywall:
- Use plastic drywall anchors and screws
- Drill holes for anchors then insert anchors
- Screw into anchors to mount cord
- Space anchors 12-16 inches apart
Cable Staples/Clips:
- Hammer staples directly into drywall or studs
- Press clips into drywall or use included screws
- Space staples or clips 4-6 inches apart
Proper spacing between attachment points keeps the cord flush against the wall and prevents sagging.
Step 4: Secure Extension Cord
With anchors, screws, staples or clips in place along the planned route, carefully attach the extension cord to the wall. Follow these tips when securing the cord:
- Work in small sections, attaching as you go
- Keep cord taut but not too tight
- Use cable ties to bundle together and organize excess length
- Coil up extra cord near outlets
- Check that cord lies flat against wall
Take care not to overtighten screws or staples so you don’t damage the cord. Check that connections are secure.
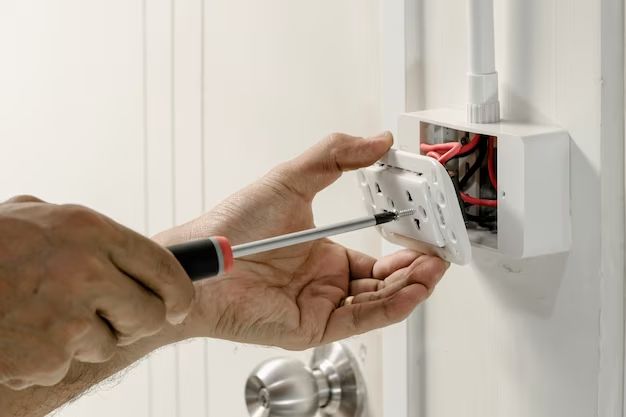
Step 5: Connect Cord and Outlet Test
With the cord mounted to the wall, plug it into the outlet and device to test it. Make sure devices turn on and work as expected down the entire length of the cord.
If needed, use cable ties to organize any excess cord near the outlet for a cleaner look. Use cord covers or trim pieces to cover small exposed sections on walls.
Check wall connections and tighten or adjust anything loose. Consider adding some additional staples, clips or ties for very long runs.
Tips for Attaching Extension Cords on Walls
Follow these tips for a cleaner look and safer installation:
- Use painter’s tape to map route first
- Cut cord a few feet longer than measured length
- Keep staples/anchors evenly spaced 4-6 inches apart
- Avoid high traffic areas and walkways
- Use cable management accessories for excess cord
- Check connections are secure after installed
- Only conceal cord inside walls if in-wall rated
Taking a little extra time to carefully plan the route and install the cord makes a big difference in the final look and safety.
Safety Precautions
Take the following safety precautions whenever running and attaching extension cords:
- Never overload cords – Use proper gauge for amp rating
- Don’t string multiple extension cords together
- Use only grounded 3-prong cords for safety
- Avoid pinch points behind furniture
- Position cords away from heat sources
- Never run cords underneath rugs or carpets
- Check for damage before using old cords
Damaged or overloaded cords can overheat and start electrical fires. Use surge protectors and avoid overloading circuits.
Conclusion
Attaching an extension cord to a wall or baseboard gets it up safely off the floor. This creates a cleaner look and reduces tripping hazards. With some basic tools and supplies, it’s an easy project that can be completed in a short time.
Properly mounting extension cords also protects them from damage while ensuring they stay plugged in and in place. Just be sure to follow safety precautions and not overload cords. Taking the time to neatly run and install extension cords makes them much easier to live with long-term.
| Tool | Purpose |
|---|---|
| Extension cord | To provide power where needed |
| Drywall anchors/screws | For mounting cord to wall |
| Drill | For drilling anchor holes |
| Screwdriver | For securing screws |
| Stud finder | For locating studs to mount to |
| Cable staples/clips | To firmly attach cord |
| Cable ties | For bundling excess cord |
| Step | Instructions |
|---|---|
| 1 | Plan route along wall |
| 2 | Cut cord to needed length |
| 3 | Install wall anchors and clips |
| 4 | Secure extension cord to mounts |
| 5 | Test cord and outlets work |