Attaching corrugated metal panels to cabinet doors can add an industrial, rustic, or modern look to your kitchen or bathroom cabinets. While it may seem daunting, with the right materials and techniques, it can be a straightforward DIY project. The key steps are preparing the cabinet door surface, cutting the metal to size, applying adhesive, and adding trim pieces for a finished look. With some time and effort, you can achieve the unique aesthetic of metal clad cabinetry.
Page Contents
What tools and materials do you need?
Here are the basic supplies you’ll need to attach corrugated metal panels to cabinet doors:
- Corrugated metal sheets – Typically made of galvanized steel with a wavy, ribbed texture. Available in various colors and metal finishes.
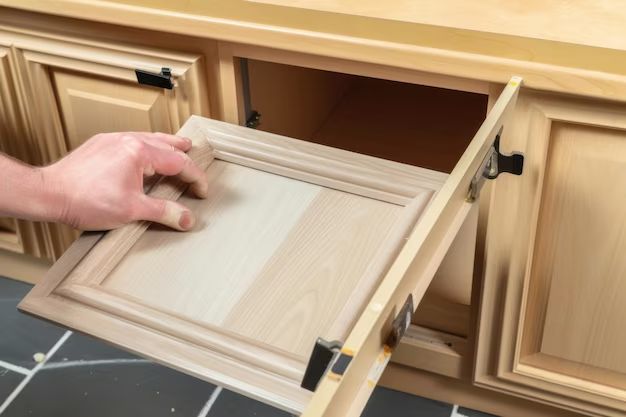
- Cabinet door – The flat door surface needs to be clean and smooth. Remove any knobs and handles first.
- Metal snips – Hand tool for cutting corrugated metal sheets to size.
- Sandpaper – For scuffing up the cabinet door surface so the adhesive adheres better.
- Adhesive – Such as liquid nails or other heavy duty construction adhesive. Look for a type suited for metal.
- Caulk gun – To apply adhesive easily and evenly.
- Rivets – For affixing the metal sheets firmly to the center of the cabinet door.
- Edge trim – Metal strips that cover the edges of the corrugated metal and the cabinet door.
- Screws – For attaching the edge trim. Self-tapping screws work best.
- Drill and drill bits – For pilot holes for the screws.
- Painter’s tape – To mask off edges and hold pieces in place.
Safety gear like gloves and eye protection is also recommended when working with metal. As far as tools, you may also find a table shear or metal brake helpful for straight cuts, but manual snips can be used for most DIY installations.
How to Prepare the Cabinet Doors
Proper prep work is crucial for getting the corrugated metal to adhere correctly to the cabinet doors. Here are the key steps:
- Remove existing hardware – Take off any knobs, pulls, or hinges from the cabinet doors so you have an unobstructed surface to work on.
- Clean thoroughly – Use a degreaser or all-purpose cleaner to remove any dirt, grease, or grime so the adhesive bonds well.
- Sand the surface – Lightly scuff up the entire door front surface with 120-150 grit sandpaper. This helps the adhesive grip.
- Apply painter’s tape – Tape off the outer border so no adhesive drips onto the cabinet frame.
- Cut metal to size – Measure the door surface area and cut your corrugated sheet to match using metal snips. Leave a 1/8″ margin.
- File edges smooth – Use a metal file to remove any rough snipped edges so they don’t cut your hands.
Taking the time to properly clean and scuff the door makes a huge difference in getting the metal sheets to stick tightly. Going over the surface methodically with sandpaper optimizes the glue adhesion.
How to Affix the Corrugated Metal Panels
Once your materials are prepped, you’re ready to attach the metal sheets to the cabinet doors:
- Apply adhesive – Run a bead of liquid nails or other adhesive all around the door surface, staying about 1/2″ from the edges.
- Position metal – Place the cut corrugated sheet so it aligns with your tape border and press firmly.
- Add rivets – Drill guide holes and add 3-4 rivets symmetrically across the center of the panel for extra reinforcement.
- Let adhesive cure – Allow the recommended cure time before moving on to trim and edge finishing.
- Inspect for gaps – Look for any spots where the metal doesn’t adhere and add extra adhesive if needed.
- Remove painter’s tape – Take off the tape carefully after the adhesive has fully set.
The combination of construction adhesive and rivets creates a super robust bond between the metal and original cabinet door. Don’t underestimate the importance of pressure while the adhesive dries. Using weights or clamps helps immensely.
How to Finish the Edges
For a clean, integrated look, you’ll want to attach metal edge trim pieces that conceal the cut edges of the corrugated metal and blend it with the cabinet frame.
Here are a few options for edge finishing:
- Straight metal trim – Easy option that gives a subtle finished edge.
- Overlapping trim – Second metal trim piece that overlaps the first for more depth.
- End cap trim – Rounded edges help hide metal cuts and shape transition.
- Z trim – Tapered metal strip attaches at a 90 degree angle for seamless fit.
When installing the trim:
- Measure and cut trim to fit each door edge precisely.
- Drill pilot holes in the trim to prevent warping when screwed into place.
- Mask off edges with painters tape for clean installation lines.
- Attach trim snugly with self-tapping screws into the door frame.
Take care predrilling all holes for the edge trim screws – this prevents the metal from buckling or distorting as you affix it. Edge finishing pulls together the overall polished, built-in look.
Tips and Tricks
Here are some helpful tips to get the best results from your corrugated metal cabinet door project:
- Use painter’s tape generously – Tape off all adjoining surfaces to protect from adhesive drips.
- Clamp metal pieces tightly – Applying constant pressure ensures maximum adhesive contact.
- Check thickness – Thicker 22-24 gauge metal is best for cabinet doors to prevent warping.
- Clean cuts carefully – File away any metal burrs or snips that can cut fingers.
- Work in ventilated area – Wear a respirator when cutting metal to avoid breathing particle dust.
- Seal edges with caulk – Waterproofing protects against moisture getting under metal panels.
- Consider custom trim – You can bring metal trim pieces to a metal fabrication shop to get perfect sizing.
Applying extra clamping force and using premium adhesives designed for metal bonding go a long way. Focus on perfectly sanded, cleaned, and prepped cabinet door fronts for best results.
Benefits of Using Corrugated Metal
Why choose corrugated metal for cabinet revamps in the first place? Here are some of the unique perks:
- Rustic aesthetic – Distressed galvanized steel has an attractive industrial farmhouse vibe.
- Diverse finishes – Metals like copper, brass, and nickel offer eye-catching gleams.
- Textured look – The layered corrugated pattern provides visual depth and interest.
- Durability – Metal stands up to heavy use and abrasion better than wood or laminate.
- Moisture resistance – The non-porous finish protects against splashes, spills and humidity.
- Easy to clean – Food, grease, and grime wipe right off the smooth surface.
- Fire resistant – Metal won’t burn or enable flame spread like wood can.
- Customization – Cut metal pieces can fit any cabinet configuration.
For kitchens, bathrooms, laundry rooms, and more, corrugated metal introduces eye-catching texture and sheen. The protective, simple-to-clean finish ensures long-lasting durability as well.
Design Inspiration
Corrugated metal cabinet revamps can look stunning in all different design styles. Here are some inspiring ideas:
Modern – For contemporary flair, opt for sleek nickel silver or stainless steel finished metal. Trim edges with slim metal strips.
Farmhouse – Play up the rustic appeal with weathered galvanized steel. Leave edges slightly unfinished for an authentic look.
Industrial – Lean into the urban loft vibe with black, graphite, or copper metals. Rivet panels randomly for eclectic personality.
Retro – Use chrome or mirrored metal for a retro diner or art deco look. Go for curved trim pieces and retro knobs.
Minimalist – Keep it simple with matte black or white for a neutral, seamless aesthetic. Focus on perfectly straight edges.
Eclectic – Make it funky and artistic with a patchwork of mixed metals, corrugation textures, and varied edge details.
Let the existing cabinet style and your broader home vision guide your material and finish choices. The distressed warehouse chic or sleek modern look can be tailored to your personal taste.
Cost Considerations
What’s the cost for materials to complete a typical corrugated metal cabinet door installation? Here’s a rough estimate:
| Item | Estimated Cost |
| Corrugated metal sheet, 24″ x 48″ | $30 – $50 |
| Adhesive (liquid nails), 10 oz | $6 |
| Caulk gun | $8 |
| Edge trim, 25 ft | $40 |
| Rivets, pack of 25 | $5 |
| Sandpaper, pack of 25 sheets | $10 |
| Total | $100 – $120 |
For a full set of standard cabinet doors, you would need around $300 – $500 in materials. The good news is that metal sheets, trim, and other supplies can be used for multiple projects.
Factor in pickup of a table shear rental for perfectly straight cuts if needed. Having an extra set of hands also speeds up the process considerably. But for the most part, the basic DIY project remains affordable and achievable.
Conclusion
Adding corrugated metal cladding is a relatively straightforward renovation that can completely transform drab cabinets. The industrial aesthetic and durable, water-resistant finish open up contemporary design options well beyond basic wood or laminate. With the right adhesive selection and careful surface preparation, the metal sheets adhere tightly and permanently. Investing some sweat equity into careful cuts, proper edge trim finishing, and meticulous installation results in a custom look that enhances any room’s decor. For a budget-friendly upgrade that looks high-end, metal-clad cabinet doors are a go-to choice.