Attaching stacked stone to a wall can completely transform the look and feel of a space. The earthy, rustic aesthetic of natural stone brings warmth and texture to any room. While it may seem daunting, with the right tools and techniques, stacking stone on a wall is an achievable DIY project for any homeowner.
Page Contents
- 1 What You Need
- 2 Preparing the Wall
- 3 Applying the Mortar
- 4 Stacking and Shaping the Stone
- 5 Grouting
- 6 Tips and Tricks
- 7 Maintenance
- 8 FAQ
- 8.1 What type of stone is best for stacking?
- 8.2 What kind of mortar should I use?
- 8.3 How much stone do I need?
- 8.4 What tools will I need?
- 8.5 How long does installation take?
- 8.6 How do I cut the stacked stones?
- 8.7 Can I install stone over existing drywall or plaster?
- 8.8 How long should I let the mortar cure before grouting?
- 9 Conclusion
What You Need
Before beginning your stacked stone wall project, you’ll need to gather the necessary materials and tools:
- Stacked stone veneer – Available in a variety of styles and colors. Stone is sold by the square foot.
- Mortar or thinset – Used to adhere the stone to the wall. Purchase premixed mortar or make your own by mixing cement, sand, and water.
- Masonry trowel – For applying the mortar and shaping it.
- Grout – Fills in the gaps between stones once stacked. Match the color to your stone.
- Grout float – For smoothing and shaping the grout.
- Sponge – For wiping away excess grout.
- Safety gear – Gloves, goggles, mask/respirator.
In addition to these supplies, make sure the wall you are stacking stone on is smooth, clean, and structurally sound.
Preparing the Wall
Proper prep work is crucial to achieving a professional stacked stone result. Follow these steps:
- Clean the wall thoroughly to remove any dirt, dust, oil or debris. Wash with a cleaner or vinegar solution if needed.
- Make any necessary repairs to cracks, holes or uneven surfaces. Use spackle or caulk to patch small flaws.
- Apply a concrete bonding agent to the wall per manufacturer’s instructions. This helps the mortar adhere.
- Cut pieces of metal lath and attach them to the wall with concrete nails. This provides extra grip for the mortar.
Your wall is now ready for the stone! Be sure to work in manageable sections, completing one area before moving onto the next.
Applying the Mortar
With the prepped surface ready, you can begin applying the mortar that will hold the stacked stone in place:
- Prepare the mortar according to package directions, mixing it to a thick consistency. Let it sit for 10 minutes before using.
- Use the mortar trowel to apply a 1/2″ thick layer of mortar to the wall, covering an area slightly larger than your first piece of stone. Apply in an upward direction.
- Immediately use the trowel to scrape and shape the mortar, creating a textured, uneven surface for the stone to adhere to.
Mortar should be applied freshly right before placing each new stone. Don’t spread it too far ahead, as it will dry out quickly.
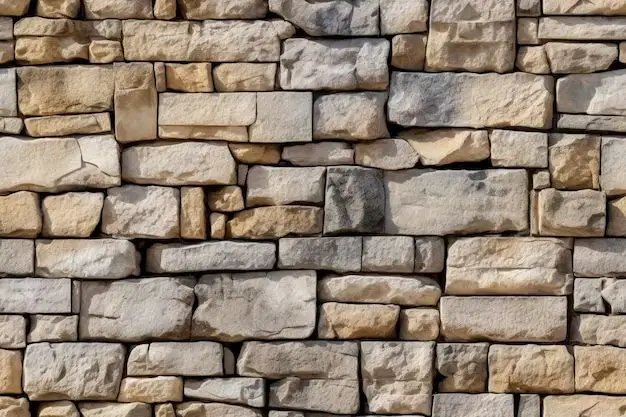
Stacking and Shaping the Stone
Now the fun part – selecting stones and arranging them in an aesthetically pleasing pattern. Follow these tips for beautiful results:
- Gather an assortment of stone shapes and sizes so you have options to work with.
- Start in a bottom corner and place your largest, flattest stones first to anchor the design.
- Build up each section in a random, mosaic-like pattern using stones of varying depths, lengths and heights.
- Aim for 1/2″ – 1″ gaps between stones. The mortar will show through attractively.
- Make sure all stones are fully embedded in the mortar with a solid connection.
- Use stone shims as needed in uneven spots to keep things level.
Take your time selecting and arranging the stone veneers, and remember you can rearrange pieces until you get the look you envisioned.
Grouting
Once your stone is fully stacked, it’s time to grout. Follow these steps:
- Let the mortar cure for 24-48 hours before grouting.
- Dampen the surface of the stone slightly before applying grout. This prevents absorption.
- Scoop grout onto the stone wall and press it deeply into all joints using the grout float.
- Smooth and shape the grout, filling all gaps fully. Remove any excess.
- Allow the grout to become firm, then polish the joints with a clean, damp sponge.
- Wipe any remaining grout haze away with a soft cloth once dry.
Sealing the grout once cured will protect it from moisture and staining.
Tips and Tricks
Follow these additional tips for best results on your stacked stone wall project:
- Select a statement wall to showcase the stone instead of overwhelming a whole space.
- Incorporate various colors and textures of stone for added interest.
- Illuminate with sconces or mini accent lights to show off the stonework.
- Consider a professional install for multi-story applications like fireplaces.
- Seal your finished stone wall annually to prevent water damage and deterioration.
Maintenance
Natural stone walls are durable but still require occasional maintenance. Here’s how to care for your wall:
- Inspect for loose stones or cracks needing re-grouting. Make repairs promptly.
- Reapply sealant every 1-2 years.
- Clean with a soft brush and mild soap/water solution when dirty.
- Avoid using acidic cleaners which can damage the mortar.
- Rinse off any cleaner residue completely.
- Re-grout as needed to keep joints sound.
With proper care, your stacked stone accent wall will provide natural beauty for years to come! Let your imagination guide you in creating a one-of-a-kind focal point for any space.
FAQ
What type of stone is best for stacking?
Thin veneer stones between 1 and 2 inches thick are ideal for stacking. Good options include slate, travertine, limestone, and manufactured faux stones. Avoid heavy natural stones like granite that require additional structural support.
What kind of mortar should I use?
Use a high-quality, polymer-modified mortar designed for stone veneer applications. This type of mortar offers superior adhesion and flexibility compared to standard mortars.
How much stone do I need?
Purchase 10-15% more stone than your measurements to allow for irregular shapes and cuts. As a general rule, plan on:
- 12-15 stones per square foot
- 1.5 pounds of mortar per stone
- 0.5-1 tubes of grout per 10 square feet
What tools will I need?
Essential tools include a masonry trowel, grout float, sponges, buckets, a rubber mallet, chisel, and grout bag. You’ll also need safety gear like gloves, goggles and a mask or respirator.
How long does installation take?
Expect stone stacking to take 2-4 days for DIYers on a 10-15 square foot accent wall. Work time depends on your skill level and how intricate the design is. Professional installs are faster.
How do I cut the stacked stones?
Use a masonry wet saw with a diamond blade to accurately cut stone veneer. You can also use a masonry chisel and hammer. Tap lightly and take your time to avoid breaking the stone.
Can I install stone over existing drywall or plaster?
No, stacked natural stone must be installed over a solid substrate like plywood, concrete, brick or block. Attach metal lath to the surface first to improve mortar bonding.
How long should I let the mortar cure before grouting?
Allow the mortar to cure for 24-48 hours before applying grout. This allows it to harden properly so the grout won’t shift the stones.
Conclusion
With the right preparation and techniques, installing a stacked stone accent wall is an achievable DIY project for any skill level. Carefully follow the steps for preparing the wall, applying mortar, arranging the stones, and grouting to achieve a seamless finished look. Stacked stone adds natural warmth, texture and style to any indoor or outdoor space. Just take your time and let your creativity guide you.