Adding trim to your kitchen cabinets is a great way to give them an updated, finished look. The trim serves both aesthetic and functional purposes – it conceals gaps between the wall and cabinet edges and gives your kitchen a more polished appearance. While it may seem daunting, attaching trim to your cabinets is actually a straightforward process that you can tackle in a weekend. Here’s a step-by-step guide on how to properly attach trim to your kitchen cabinets.
Page Contents
- 1 What You’ll Need
- 2 Prep the Cabinets
- 3 Cut the Trim
- 4 Attach the Trim
- 5 Tips for Attaching Trim
- 6 Maintaining Trim
- 7 Cost to Install Cabinet Trim
- 8 Frequently Asked Questions
- 8.1 What’s the best way to cut trim pieces evenly and accurately?
- 8.2 Should cabinet trim be pre-painted before installing?
- 8.3 What’s the best way to get tight seams between trim pieces?
- 8.4 Should I nail or glue trim pieces for best results?
- 8.5 What type of saw blade is best for cutting trim?
- 8.6 Can I use pre-primed MDF trim?
- 9 Conclusion
What You’ll Need
Before getting started, you’ll want to make sure you have all the necessary supplies on hand. Here’s what you’ll need:
- Trim pieces – Choose trim that matches or complements your cabinet style and color. Popular options include wood, PVC, or MDF.
- Finishing nails – 1 1/4″ to 2″ nails are best for attaching trim to cabinets.
- Hammer
- Miter saw – For cutting trim pieces to size.
- Carpenter’s glue
- Caulk/wood filler
- Sandpaper
- Primer & paint – If your trim isn’t pre-primed or pre-painted.
- Painter’s tape
- Stud finder – Helpful for finding studs to nail into.
- Laser level – To ensure your trim pieces are installed evenly.
- Pry bar – For removing existing trim, if necessary.
Prep the Cabinets
Before installing any new trim, you’ll want to remove any existing trim pieces and prepare the cabinet surfaces:
- Use a pry bar to gently remove any old trim from the cabinets. Take care not to damage the cabinets.
- Inspect the cabinet edges and use caulk or wood filler to patch any holes, cracks, or uneven spots.
- Sand the cabinet edges smooth. Carefully vacuum up any dust.
- Apply painter’s tape along the wall about 1/8″ to 1/4″ from the cabinet edges. This protects the walls from getting marked up during installation.
Cut the Trim
With your cabinets prepped, you can start cutting the trim pieces to size:
- Measure each cabinet section and mark where you’ll need to make cuts.
- Use a miter saw to cut your trim pieces to size. Cut pieces a few inches longer than measured to allow for adjustments.
- For corners and vertical edges, cut the trim at 45 degree angles to create neat seams where pieces join together.
- Dry fit the trim pieces to ensure they fit correctly before attaching them.
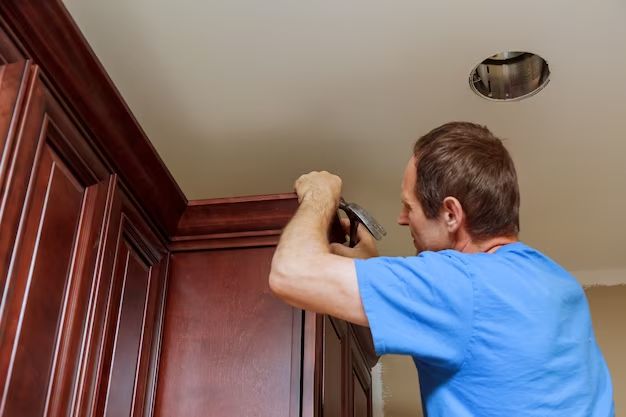
Attach the Trim
You’re now ready to permanently attach the trim to the cabinets. Follow these steps:
- Run a small bead of carpenter’s glue on the backside of each trim piece.
- Position the trim piece in place against the cabinet edge. Use a level or laser guide to ensure the piece is straight.
- Secure the trim in place by nailing through it into the underlying cabinet frame. Aim for wall studs whenever possible. Nails should be spaced 8-12 inches apart.
- At corners or seams, apply glue and gently tap pieces together for a tight fit before nailing in place.
- Fill nail holes with wood filler and let dry completely.
- Carefully remove painter’s tape from walls.
- Sand and finish trim as desired – with paint, stain, etc.
Tips for Attaching Trim
Follow these tips for getting clean, professional results:
- Work slowly and methodically – measure twice, cut once.
- Use a pneumatic nail gun rather than hammer if you have access to one.
- Pre-drill trim if necessary to prevent splitting.
- Fill gaps with small wood shims if trim pieces don’t sit flush.
- Use wood putty to fill visible nail holes before finishing.
- Go over trimmed edges lightly with fine sandpaper before painting or staining.
- Apply painter’s tape to walls and cabinets to prevent overspray if spraying finish.
- Finish or seal trim pieces before installing for easiest coverage.
Maintaining Trim
With proper installation and finishing, your cabinet trim should last for years before needing repair. However, trim can deteriorate over time due to moisture damage, impact dings, sun fading, and general wear and tear. Be sure to inspect trim annually and make repairs as needed to keep your kitchen looking its best.
Some tips for maintaining cabinet trim:
- Use painter’s caulk to recaulk any gaps that develop over time.
- Fill dents or gouges with wood filler and repaint.
- Lightly sand and repaint trim when it starts looking faded or worn.
- Replace any trim pieces that become damaged beyond repair.
- Keep trim free of grease and grime to prevent buildup.
- Consider covering oft-used lower trim pieces with bumpers to prevent impact damage.
Cost to Install Cabinet Trim
If you’re not comfortable tackling a trim installation yourself, hiring a professional is a great option. The cost to install kitchen cabinet trim will vary based on factors like:
- Amount of trim needed (linear feet)
- Trim material and profile – wood vs. PVC or MDF, decorative vs. simple
- Cabinet prep work required
- Complexity of the job and ease of access
- Local labor rates
On average, expect to pay anywhere from $5 – $15 per linear foot for basic cabinet trim installation. More complex jobs or premium materials can be $25 per linear foot or higher. Get estimates from several contractors before hiring to ensure you get a fair price.
Frequently Asked Questions
What’s the best way to cut trim pieces evenly and accurately?
The best tool for cutting trim is a power miter saw. This allows you to adjust and lock in precise angle cuts. Take your time measuring and marking the trim, and cut slowly for clean edges. Using a miter saw stand helps stabilize long pieces.
Should cabinet trim be pre-painted before installing?
Pre-finishing your trim with paint or stain prior to installing generally provides the most seamless, uniform appearance. This allows you to coat all edges evenly. However, you can also paint after installing if you take care to tape off surfaces and use a small trim brush.
What’s the best way to get tight seams between trim pieces?
Apply carpenter’s glue to the joining edges before tapping pieces together. Let set for several hours. Fill any remaining tiny gaps with painter’s caulk, then sand and paint for a seamless look.
Should I nail or glue trim pieces for best results?
Using both glue and nails is recommended. The nails provide immediate hold while the glue bonds over time. Nailing into wall studs also provides a very secure attachment. Space nails every 8-12 inches along the length of each trim piece.
What type of saw blade is best for cutting trim?
A fine-tooth finishing blade is ideal, as it leaves clean, smooth edge cuts in trim pieces. Carbide-tipped blades also stay sharper longer. For tight corners, a coping saw is handy.
Can I use pre-primed MDF trim?
Yes, pre-primed MDF is a great option for trim. It’s inexpensive, smooth, consistent, and accepts paint very well. Look for moisture-resistant MDF trim for kitchens and baths.
Conclusion
Installing trim brings a refined, built-in look to DIY and custom kitchen cabinetry. While it requires careful measuring, cutting, and installation, it’s a project most homeowners can tackle successfully with the right materials and patience. Preparing your cabinets properly and taking care with the finishing details will result in long-lasting trim that makes your kitchen look professionally done.