Building a natural beach pool, also known as a swimming pond, can be a fun and rewarding project. Natural pools use the regenerative powers of plants and microorganisms to clean the water instead of harsh chemicals. This creates a beautiful, eco-friendly place to swim right in your own backyard. Constructing a DIY natural pool does take time, effort, and a bit of expertise, but the end result is well worth it. Here is a step-by-step guide on how to build your own natural beach pool from start to finish.
Page Contents
What is a Natural Beach Pool?
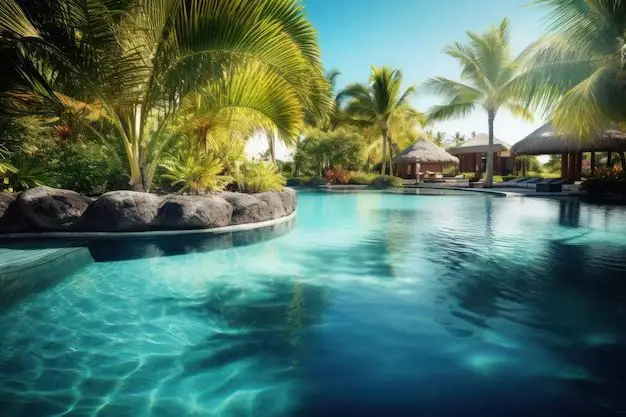
A natural beach pool, or swimming pond, is a man-made body of water that is filtered naturally without the use of chemicals. The design replicates a natural pond ecosystem using plants, rocks, gravel, and regenerative filtration to keep the water clean and swimmable. Unlike a traditional swimming pool, beach pools do not require chlorine or other harsh chemicals. The plants and microbes remove pollutants and prevent algae growth. This creates a healthy environment for plants, wildlife, and people. Natural beach pools have clear water with a natural bottom, so no plastic liner is required. They are often designed to blend into the surrounding landscape for a beautiful, eco-friendly backyard oasis.
Benefits of Natural Beach Pools
There are many advantages to choosing a natural beach pool over a traditional pool:
- No harsh chemicals – The water is kept clean through natural filtration so there is no need for chlorine or other chemicals. This creates a healthy swimming environment.
- Eco-friendly – Natural pools conserve water, energy, and resources compared to traditional pools. The ecosystem filters the water naturally without electricity or chemicals.
- Healthier for skin, hair, and eyes – The water has a silky, soft feel without chemical irritation. There are no chlorine odors either.
- Lower maintenance – Once established, natural pools require less maintenance than traditional pools since they largely care for themselves.
- Attracts wildlife – The plants and clear water attract beautiful dragonflies, frogs, and other beneficial wildlife to your yard.
- Good for the environment – Natural pools conserve water, provide wildlife habitat, and protect the local ecosystem.
- Aesthetically pleasing – Natural pools blend beautifully into the landscape for an organic, nature-inspired look.
If you want a clean swimming pond without chemicals, natural beach pools offer the perfect solution. Building your own natural pool does require time and skill, but the results are well worth the investment.
Planning and Design
Constructing a natural beach pool takes thoughtful planning and design. Here are some key steps for designing your DIY swimming pond:
Choose a Site
Pick a spot for your pool that gets at least 6 hours of direct sunlight per day for the plants. Look for a relatively flat area without too many trees that is at least 50 ft from large trees to prevent roots from invading. Make sure you have enough room for the size pool you want. Allow space around the edges for planting shelves, waterfalls, stairs, etc. Consider views from the pool and the house when picking your site.
Decide on a Shape and Size
Consider the shape and dimensions carefully. Long, narrow pools are easiest for swimming laps. Kidney bean shapes add visual interest. Allow 15-20 sq ft of surface area per swimmer. Size ranges from 150-1000+ sq ft for backyard pools. Remember, larger pools are harder to make and maintain naturally so only make it as big as needed.
Design Zones
A natural pool has 3 distinct zones:
- Swimming area – This is the deepest section for swimming and soaking. Allow 4-6 ft depth for swimming.
- Regeneration zone – Shallow area planted with aquatic plants that filter the water. Needs at least 6 hrs of sun.
- Buffer zone – Gravel-filled shallow moat around the edges to protect plant roots. Helps prevent erosion.
Make sure to factor in enough space for each zone in your design. The regeneration zone should cover at least 30% of the total surface area.
Pick a Location
Consider sunlight, views, distance to the house, soil type, slope, trees, access for machinery, and local building codes when picking the site. Hire contractors to check for underground pipes or wires if needed. Pick a spot with full sun and minimal trees or shade.
Get Expert Input
Consult with landscapers, contractors, or natural pool designers to help design and engineer your dream pool properly. They can assess the site, offer design ideas, handle permits, and ensure proper construction. This is a complex project so don’t skip the expert help.
Create a Realistic Budget
Factor in costs for equipment rentals, materials, contractors, plants, etc. Most natural pools cost $25,000-$60,000 but very elaborate designs can cost over $100,000. Be realistic about what you can spend.
Secure Permits
Check with your city about zoning laws and construction permits for pools. You may need an electrician, plumber, or contractor depending on local requirements. Better to know the rules upfront.
Thorough planning and design ensures your DIY natural pool will meet your needs, suit the landscape, and fit your budget. Take time to design it right before you start moving dirt!
Construction Process
Once you have a design, you can start the exciting process of building your very own natural beach pool! Construction typically takes 4-6 weeks with the right equipment and crew. Here are the key steps:
Mark Layout and Excavate
Mark the outline with spray paint or stakes and remove grass or plants from the area. Rent an excavator to dig out the pool according to your dimensions. Slope the sides and dig drainage pipes or channels if needed.
Install Plumbing
Add any necessary plumbing like water lines, drainage, electrical, and solar components now before the soil is covered up. Consult an electrician if needed.
Shape the Pool
Use the excavator to sculpt the final shape including swimming area, shelves, etc. Slope the walls around 2:1 or 3:1 for stability. Add horseshoe shaped coves if desired.
Add Liner and Underlayment
Line the bottom with river rock and protective underlay fabric. Some pools have clay liners, but no plastic! Liners help seal and stabilize the soil.
Build Structures
Construct stairs, bridges, waterfalls, etc. from rocks and gravel. Use rebar to reinforce rocks or concrete as needed. This adds aesthetics and access into the pool.
Backfill Around the Sides
Replace soil around the outer walls and pack it down firmly. Construct the regeneration zone shelves around the inside perimeter.
Add Rock and Gravel
Cover the bottom and walls with different sizes of washed river rock and gravel. Build the gravel buffer zone between regeneration areas and pool walls.
Plant Aquatic Plants
Add native, non-invasive plants to the shelves and regeneration zones. Choose a mix of species for diversity and coverage.
Fill the Pool
Start filling slowly with a garden hose. Check for leaks and repair any seepage before completely filling. Let the pool fill and stabilize for 1-2 weeks before swimming.
Test and Adjust Water
Test pH, nutrients, and clarity. Make adjustments as needed to get the biology stabilized for clear, clean water. May take 4-6 weeks for the ecosystem to balance.
With the right tools and hard work, you can create a gorgeous natural pool in your own yard. Just be patient during the initial balancing phase – the results are worth it!
Water Quality and Maintenance
Maintaining proper water quality is crucial for a healthy, thriving natural pool ecosystem. Here are some tips:
Test Water Weekly
Use test strips or kits to check pH, alkalinity, and nutrients weekly at first. Once stable, test every 2-4 weeks. Adjust as needed to maintain the optimal balance.
Remove Debris
Skim leaves, debris, and dead bugs regularly to prevent excess organic matter from accumulating.
Clean the Filter
If you install a pump and filter to move water, clean it 1-2 times per month as needed. Well-filtered water prevents issues.
Manage Plants
Trim plants back when they get overgrown and remove invasive weeds. Fertilize carefully – plants need minimal nutrients in a balanced pool.
Shock with Hydrogen Peroxide
Use 35% food-grade hydrogen peroxide to occasionally shock the pool if algae appears. Start with small doses to avoid harming plants and wildlife.
Check Water Level
Refill periodically to replace lost water. Level will drop over time from splash out and absorption. Top up as needed.
Clean the Pool
Remove debris from the bottom with a net or pond vac. Hand pull weeds. Skim the surface daily during peak season when the pool gets heavy use.
Maintain Proper pH and Nutrient Levels
The table below shows optimal water chemistry parameters. Test and correct accordingly.
| Water Parameter | Ideal Range |
|---|---|
| pH | 7.0 – 8.0 |
| Alkalinity | 80 – 120 ppm |
| Phosphates | 0 ppm |
| Nitrates | 5 – 15 ppm |
| Ammonia | 0 – 0.5 ppm |
| Calcium | 60 – 120 ppm |
| Iron | 0 – 0.3 ppm |
With regular care and testing, your natural pool will provide a balanced, healthy swimming habitat for years to come. Be patient – this ecosystem may take a while to mature fully.
Troubleshooting Common Issues
Even well-built natural pools can occasionally have problems. Here are some common issues and how to remedy them:
Green or Cloudy Water
Green water is caused by algae growth due to excess nutrients. Check phosphate and nitrate levels. Reduce nutrients, shock with hydrogen peroxide, and clean filters until clear.
Poor Water Quality
If the balance is off, the water may not clean itself well. Test and correct pH, alkalinity, and nutrient levels. Reduce bather load until the system recovers.
Leaking or Seeping
If you notice the water level dropping rapidly, check for leaks. Repair with sealant or an impermeable liner. Top up the water level until fixed.
Incorrect Water Chemistry
Improper pH, low oxygen, or poor filtration can cause issues. Test and restore proper balance. Increase aeration and circulation. Reduce bather load until fixed.
Not Cleaning Itself
If debris or sediment accumulates, the plants and microbes aren’t keeping up. Correct any water chemistry issues. Clean excess debris and dead plant matter manually.
Too Much Algae
Reduce phosphates and nitrates. Remove excess leaves/debris. Shade the pool if it gets too much sun. Add more plants. Manually remove algae, then shock with hydrogen peroxide.
Swimmer’s Itch
Parasitic larvae can sometimes infect pools, especially with waterfowl use. Drain half the water to interrupt the life cycle. Prevent bird access if needed.
Stay vigilant with regular maintenance and testing to catch any problems early before they escalate. Your local pool professional can also provide troubleshooting help for any tricky issues.
Conclusion
Building your own natural beach pool creates a gorgeous, eco-friendly swimming oasis in your backyard. Follow the planning, design, and construction steps outlined here combined with good maintenance practices for sparkling clear water. Patience is required as the ecology balances and matures over the first few months. Test the water quality regularly and troubleshoot any issues immediately. With some hard work upfront, your custom swimming pond will provide an amazing place to relax, exercise, and enjoy nature for years to come. Soon you’ll forget you ever wanted a traditional pool! Constructing your own natural beach pool is very rewarding and worth the investment of time, effort, and money for countless afternoons of swimming in a beautiful, natural setting.