Building a screened in porch can increase your living space and allow you to enjoy the outdoors without dealing with bugs or harsh weather. A basic screened in porch is relatively easy for a handy homeowner to construct. With some planning and basic carpentry skills, you can create a functional and stylish screened porch. In this article, we will walk through the steps for building a simple screened in porch.
Page Contents
- 1 What is the purpose of a screened in porch?
- 2 Planning your screened in porch
- 3 Construct the foundation
- 4 Add structural framing
- 5 Install decking
- 6 Install roof framing
- 7 Add exterior siding and trim
- 8 Install insect screening
- 9 Add finishing touches
- 10 Constructing the porch
- 11 Cost to build
- 12 DIY or hire a contractor?
- 13 Enjoy your new screened porch!
- 14 Frequently Asked Questions
What is the purpose of a screened in porch?
A screened in porch provides ventilation and views of the outdoors while keeping out insects, leaves, pollen and other debris. Screened porches create a buffer zone between indoor and outdoor living spaces. They allow you to enjoy fresh air without being bothered by mosquitos, flies and wasps. Screened porches are often used for:
– Outdoor dining spaces
– Lounging areas
– Playrooms for kids
– Storage for outdoor furniture/accessories
– Protecting outdoor seating areas from weather
– Extending living space at a lower cost than adding on a sunroom
With screened in porches, you get much of the openness of an open deck along with the protection from a fully enclosed room. Screened porches allow more air flow than a solid patio cover or enclosed sunroom.
Planning your screened in porch
The first step is to determine the size, placement and features of your screened porch. Consider the following:
– Size – Typical widths range from 8-20 feet deep and 12-40 feet wide. Make sure to check local building codes for requirements. Consider how you want to use the space. Allow room for seating areas, dining tables, circulation, etc.
– Placement – Screened porches can extend off the back or side of a house. Consider sun exposure, views, access to the yard and more.
– Foundation – Will your porch be freestanding or attached to the house? Attached porches will need footings that extend below the frost line while freestanding ones use shallow footings.
– Access – You’ll need an exterior door or large opening to access the porch from the house. This requires framing a new door opening if adding on.
– Screening – Fiberglass, aluminum and stainless steel are common screening materials. Each has pros and cons.
– Roof style – Consider a gable, shed or hip roof based on your home’s design. You can match or complement the existing roof line.
– Materials – Decking, framing, siding and trim can match or accent your home’s exterior. Pressure treated lumber is common.
Take measurements and draw up plans to visualize the finished porch. Obtain any required building permits before starting construction.
Construct the foundation
The foundation supports the weight of the porch and keeps everything level. Here are some foundation options:
– Concrete slab – A poured concrete slab provides a sturdy foundation. Dig down about 6 inches, frame the perimeter with lumber and fill with a layer of gravel and 3-4 inches of concrete.
– Concrete footings – Footings around the perimeter support wood posts or framing. Dig holes 12-24 inches around and 24-36 inches deep based on soil type. Fill with concrete and embed anchors for attaching posts.
– Concrete piers – Piers placed every 4-6 feet support a wood subfloor. Dig holes, pour concrete and use metal post anchors.
– Raised foundation – This uses a wood frame built on top of concrete footings around the perimeter. Enclose underneath for storage.
– Existing slab or deck – Screened porch can be built right on top of a patio slab, porch foundation or deck.
Choose the foundation style based on porch size, weight, attachment to home, budget and terrain.
Add structural framing
The porch framing provides the structural support for the roof, walls, screening and decking. Here are the basics:
– Footers – Anchor the framing into the footings using galvanized brackets and bolts
– Posts – 4×4 or 6×6 pressure treated posts spaced 6-8 feet apart support the beam
– Beam – Double or triple 2×8, 2×10 or 2×12 boards sandwich together over posts
– Joists – 2×6, 2×8 or 2×10 joists 16″ on center span from beam to ledger board
– Ledger – Bolted securely to house rim joist to support outer joists
– Additional framing – Sistered joists, extra blocking as needed based on span
Use corrosion resistant hardware and water safe preserved lumber rated for ground contact. Check requirements for wind and snow load. Overbuild the framing for longterm sturdiness.
Install decking
The decking provides the floor for your screened in porch. Pressure treated pine is affordable and ages to a silver-gray color. Cedar and redwood are naturally resistant to insects and decay. Composite decking is splinter-free and low maintenance. Choose the decking material based on budget, appearance and durability needs.
Here are some decking tips:
– Allow 1/4″ gap between boards for drainage
– Stagger end joints between rows
– Use hidden fasteners or stainless steel screws
– Miter cut ends for a finished look
– Add trim around perimeter to finish off edges
The flat porch floor sets the stage for furnishings like chairs, tables, swings and more. Make sure the decking is level and securely fastened.
Install roof framing
The roof protects the interior space from rain, snow and sun. Hip, gable and shed style roofs are common for screened porches.
Important roof framing components include:
– Rafters – Spaced 16-24″ apart depending on load
– Ridge board – Joins the tops of the rafters at the peak
– Collar ties – Help stabilize rafters
– Knee braces – Triangular bracing for extra strength
– Horizontal bracing – Blocking between rafters
Use closely spaced rafters to create a minimal slope for rain runoff. Include roof venting for airflow. If attaching to house, make sure roofing integrates properly with existing roof.
Add exterior siding and trim
Skirt around the porch foundation with trim boards or siding panels to give it a finished look. This also closes in the area underneath.
Some siding options include:
– Pine or cedar boards or plywood
– Fiber cement siding
– Vinyl siding
– Stucco or stone veneer
Match existing siding for a cohesive look or use an accent material to add interest.
Trim out corners, rafter tails, doors and openings for a polished look:
– Corner boards
– Door and window trim
– Fascia and rake boards
– Vertical skirting trim
Paint or stain trim and siding to match the house or in a complementary color.
Install insect screening
Screening is what defines a screened in porch and provides the biggest benefit. Pick tight-weaved screening that offers ventilation while keeping out tiny insects.
Common screening options:
– Fiberglass – Low cost option available in various mesh sizes and colors
– Aluminum – Durable and easy to work with; prone to deformation
– Stainless steel – High strength with smaller holes; higher cost
– Nylon – Very durable fabric often used for pet screening
– Vinyl coated – Fiberglass with a protective vinyl coating
Cut screening panels slightly larger than framing bays. Staple or spline along edges. Trim excess. Minimal framing maximizes views and airflow. Use screen doors at entries.
Add finishing touches
Finishing details take your porch from a framed structure to a usable living space:
– Railings – Protect open sides with railings and balusters. Match style to your home.
– Ceiling – Close in the ceiling with tongue and groove boards, drywall or outdoor paneling.
– Paint/stain – Coat all wood surfaces with protective exterior stain or paint.
– Lights – Install recessed or pendant lights. Hardwire or use solar.
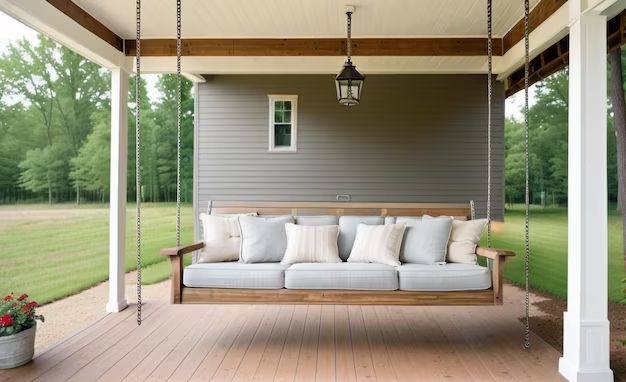
– Furniture – Comfortable outdoor sofas, chairs, tables, swings and more.
– Plants – Potted plants, vines and flowers liven up the space.
– Fans – Add circulating fans for comfort on hot days.
– Storage – Use decorative bins, cabinets and lockers to store cushions, blankets and accessories when not in use.
Personalize with ceiling fans, speakers, a TV or fireplace to suit your needs. The finishing details make your porch unique.
Constructing the porch
Now that we’ve covered all the components, let’s go through the basic porch construction process from start to finish:
1. Choose location and size based on home placement.
2. Draw up plans for layout, dimensions and structural requirements.
3. Obtain required permits and have utilities marked if necessary.
4. Prepare site area and excavate for concrete footings.
5. Pour footings and install anchoring hardware. Let cure fully.
6. Set posts, beam, joists and ledger into footing anchors.
7. Complete framing – rafters, collar ties, knee braces, blocking.
8. Add decking starting in corner and working out. Leave room for screen panels.
9. Frame roof and add sheathing like plywood or OSB. Roof over frame.
10. Install siding around foundation perimeter.
11. Cut and attach insect screening panels with spline, staples or tracks.
12. Attach all exterior trim boards. Install railings.
13. Close in ceiling with boards, drywall or panels. Insulate if desired.
14. Paint or stain all wood framing and trim.
15. Add lighting, ceiling fans and any wiring.
16. Furnish and decorate! Add plants, storage and final touches.
Work carefully and follow all building codes. Inspect frequently to ensure structurally sound. Creating a well-built foundation and frame is key. The rest of the project goes smoothly once the underlying structure is complete.
Cost to build
The cost to build a screened in porch ranges from $6,000-15,000 or more depending on the size, features and location. Here is a rough breakdown of costs:
– Permit fees – $100-$500
– Concrete – $3-8/square foot
– Framing lumber – $1000-$3000
– Decking – $800-$2000
– Roofing – $1000-$2000
– Screening – $500-$1500
– Siding/trim – $500-$2000
– Doors – $300-$1000
– Hardware – $200-$500
– Paint/stain – $100-$300
– Lighting – $300-$1000
– Ceiling – $500-$1500
– Labor fees – $1000-$5000
Simplify the design to reduce costs like opting for a plywood ceiling instead of tongue and groove. Get several bids and look for carpenters who offer package deals on screened porches.
DIY or hire a contractor?
With proper skills, tools and time, it’s possible for many homeowners to construct a basic screened porch DIY style. Key considerations:
DIY Pros:
– Less expensive than hiring out
– Learn useful skills
– Customize to your preferences
– Sense of accomplishment
DIY Cons:
– Lots of complex carpentry work
– Physical labor intensive
– Managing waste disposal
– Slow process working solo
– Permitting/codes tricky
Hiring a contractor is easier but costs more. Consider a handyman for just framing and roofing then finishing DIY. Or hire out completely but get quotes from 3+ screened porch builders.
Enjoy your new screened porch!
A well-built screened in porch offers a comfortable place to relax outdoors in any weather. Follow the steps and choose quality materials when constructing your porch. Nail down flashing and screen details to prevent leaks or insect entry. Adding amenities like fans, lighting and furniture complete the cozy hangout space. With some carpentry skills and patience, you can create the perfect porch oasis for your home. Invite over friends and family to maximize enjoyment of your new screened in retreat!
Frequently Asked Questions
What size should I build?
This depends on your space constraints and how you want to use the porch. Allow for furnishings like seating, dining tables, etc. Most homeowners choose 12×16 ft up to 12×40 ft designs. Make sure to check local building code allowances.
How much does a 10×12 screened porch cost?
A 10×12 ft screened porch will cost $6000-$10000 on average. The final cost depends on foundation type, roof style, materials and finishes. Simpler designs cost less.
What kind of foundation is best?
Concrete footings around the perimeter that support the framing above offer a sturdy foundation. This allows screening down to the ground while keeping the structure elevated. Piers or an existing slab can also work.
Should I use a metal or shingle roof?
Either material will work fine. Metal roofs have a longer lifespan but cost more. Asphalt shingles are affordable and easy to install. Use a subtle color that matches your home.
How difficult is DIY construction?
It’s a moderately challenging DIY project requiring carpentry skills. The foundation and roof framing steps are the most labor intensive. Get professional help just for framing if needed.