Having a storm shelter in your home can provide an extra level of safety and security when severe weather strikes. If you already have a basement, you may consider turning part of it into a sturdy and reliable storm shelter. Converting part of your basement into a storm shelter takes some work, but it can be a worthwhile project that provides peace of mind. In this article, we will walk through the steps for how to build a storm shelter in an existing basement.
Page Contents
- 1 Benefits of a Basement Storm Shelter
- 2 Choosing a Location in the Basement
- 3 Gather Supplies
- 4 Prepare the Floor
- 5 Reinforce the Walls
- 6 Build a Reinforced Ceiling
- 7 Install a Door
- 8 Ventilation
- 9 Gather Essential Supplies
- 10 Electricity and Lighting
- 11 Communications
- 12 Final Touches
- 13 Practice Emergency Drills
- 14 Maintenance
- 15 Conclusion
Benefits of a Basement Storm Shelter
There are several advantages to building a storm shelter in your basement:
– Cost Effective – Since the basement is already dug out and constructed, building a shelter within it is cheaper than constructing an underground or above ground shelter from scratch. You won’t have to pay for excavation work.
– Space – Basements provide ample room for a shelter compared to building a small external shelter. You can build a large fortified area suitable for multiple people.
– Accessibility – A basement shelter is incorporated into your home, making it easy to access quickly as opposed to external shelters. You don’t have to go outside during dangerous weather.
– Temperature – Since basements are underground, they stay cooler in summer and warmer in winter than outside. This makes a basement shelter more comfortable than external shelters prone to temperature extremes.
– Added Value – Adding a storm shelter to your basement boosts your home’s value and appeal to buyers if you ever sell. It’s an attractive extra feature.
Choosing a Location in the Basement
Pick an area of your basement to convert into a storm shelter. The best spot is in the center of the basement, away from exterior walls. This puts more layers of protection between you and dangerous weather outside. Avoid areas with windows or under the staircase.
Identify the walls you plan to reinforce around the shelter area. They should form a small interior room that keeps everyone safe. Mark the shelter footprint with tape to visualize the space.
Make sure your planned shelter location won’t interfere with utility lines or equipment in the basement like electrical, plumbing, the water heater, HVAC equipment, etc. Work around these installed systems.
Gather Supplies
Building a storm shelter requires various construction supplies. Here are the main items needed:
– Plywood – To strengthen walls and build a ceiling
– Steel studs – For added structural reinforcement
– Concrete anchors – For bolting items to the floor
– Lag screws – To connect wood pieces together
– Eye and J-bolts – For anchoring items overhead
– Heavy plywood or steel door – For the shelter entrance
– Door hinges and latch – For the door installation
– Concrete fortifying agent – For hardening the floor
– First aid kit/emergency supplies – For furnishing the shelter
You may also need tools like a drill, sledgehammer, saw, and screwdriver. Buy all materials and tools in advance so they are ready to go.
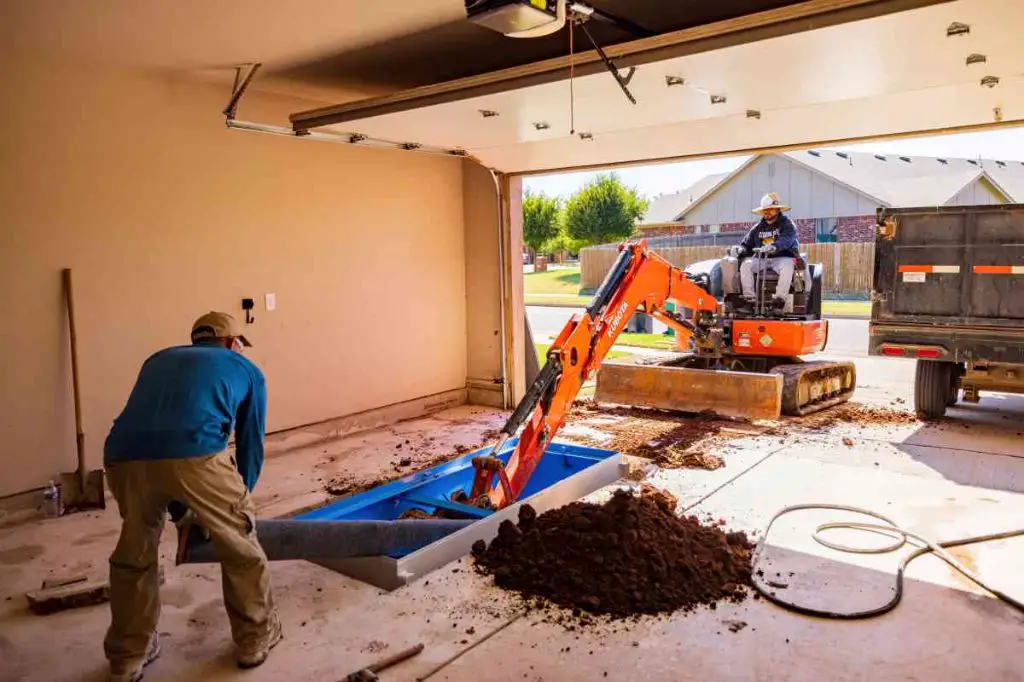
Prepare the Floor
Start by preparing the basement floor in the area for the shelter:
1. Clear out all items stored in the intended shelter space. Remove any furniture or boxes so the area is empty.
2. Use a concrete fortifying agent, available at hardware stores, to harden and strengthen the concrete floor. Sweep the area clean so the surface is ready for the agent. Mix and apply the fortifying agent per the product instructions. Let it fully cure.
3. The fortified floor will now better withstand blast shockwaves and flying/falling debris.
Reinforce the Walls
Next, reinforce the basement walls that will surround and support the shelter:
1. Inspect the perimeter walls and remove any materials covering them like drywall panels or paneling. Expose the bare foundation walls.
2. Cut sheets of plywood to match the height of each wall area. Secure these with tapcon concrete screws drilled into the foundation approximately every 12 inches. The plywood strengthens the walls.
3. For extremely reinforced walls, attach vertical steel studs over the plywood at 16-24 inch intervals. Screw the studs into the foundation and sandwich the plywood between the studs and foundation.
4. Consider applying a vapor barrier over the reinforced walls to prevent moisture collection behind the new wall surface.
5. Install finishing wall surface material, ideally heavy duty panels, over the reinforced walls. Secure well with screws.
Build a Reinforced Ceiling
Construct a protected ceiling over the shelter space:
1. Measure the shelter area’s length and width. Cut sheets of sturdy plywood to match these dimensions.
2. Bolt 2×4 or 2×6 beams across the ceiling area walls to provide attachment support for the plywood ceiling. Space beams every 2 feet.
3. Use 3-4 beams parallel on each wall side. Anchor beams with concrete screws.
4. Lift and fasten the plywood sheets to the support beams with screws or bolts. Cut holes for any lighting fixtures as needed.
5. Optional for maximum protection – Place steel joists atop the plywood sheets spaced every 2 feet. Top with an additional plywood layer screwed into the joists.
6. The reinforced ceiling shields occupants from falling debris.
Install a Door
You need a sturdy door to seal off the shelter space:
1. Buy a steel door at least 1 3⁄4 inches thick or a heavy bulletproof style solid core door. Hollow core doors easily fail against extreme winds.
2. Mark and cut an opening in the shelter wall for the door size.
3. Set the new steel door in the framed opening. Install heavy duty hinges for attaching the door.
4. Use shims around the door perimeter to level it in the frame if needed.
5. Drill holes around the door frame and use long lag screws to anchor the door frame firmly to the wall structure.
6. Attach a sturdy sliding bolt or deadbolt lock on the inside of the door. Have a way to open it from both inside and out.
7. Seal around the door perimeter with weather stripping to prevent air and moisture getting in.
Ventilation
The shelter needs ventilation ductwork to circulate fresh air:
1. Cut an opening near the ceiling on one side of the shelter. Run rigid ductwork from the opening vertically up through the basement ceiling/main floor.
2. The ductwork should vent to the outdoors or another portion of the basement for airflow.
3. Cover the lower shelter opening with a duct grill or steel mesh to prevent objects dropping in.
4. For air return, cut another vent opening near the floor on the opposite side. Connect it via ductwork back to the main basement area.
5. Optional: Include an inline duct fan to forcefully circulate air. Run wiring to control the fan.
Proper ventilation removes dangerous fumes and lets breathable air in during shelter use. Open the door periodically as well if safe for added airflow.
Gather Essential Supplies
Stock the storm shelter with basic supplies for staying for extended periods:
– Emergency food and water
– Battery powered lights and radio
– Solar/hand crank charger for devices
– First aid kit and medications
– Blankets, towels, and clothing
– Sanitation supplies
– Tools like a crowbar, hammer, duct tape, ropes
– Gas masks and protective equipment
– Games, books, playing cards to pass time
Make sure supplies are fresh and replenish as needed. Have enough stored for your family size and needs. Also pre-plan for any pets.
Electricity and Lighting
Have backup lighting options in case power is lost:
– Install battery powered motion sensor lights activated when the shelter is entered. They automatically provide light.
– Run wiring and add connectors to hook up portable generators or solar panels. This powers lights and ventilation fans if no main power.
– Keep battery powered lanterns, flashlights and headlamps in the shelter along with extra batteries. Chemical glow sticks also work.
– Mark all entrances/exits with photoluminescent or self-powered exit signs for visibility.
Communications
Maintain contact with the outside:
– Keep a battery powered radio to get weather and emergency broadcast updates. Choose one with NOAA channels.
– Store extra batteries for the radio. Consider a hand crank and/or solar powered model.
– If cellular service works, use mobile phones to communicate. Consider a signal booster.
– A landline phone connected to the home network lets you contact outside numbers when functional.
– Two-way radios provide communication between the house and shelter without infrastructure.
Final Touches
Finish the storm shelter with these final touches:
– Label the door and entrance area with shelter and occupancy limit signs. Post emergency instructions.
– Bolt benches or secure shelving to the interior walls for seating and storage.
– Consider connecting a carbon monoxide detector and fire extinguisher.
– Build storage cubbies to organize supplies like food, water, tools, and first aid essentials.
– Install a sump pump if the space is prone to collecting water.
– Camouflage the shelter door or disguise it as a bookcase if desired for stealth.
Practice Emergency Drills
Hold periodic emergency drills with your family to practice using the shelter effectively. This ensures everyone knows what to do when real weather emergencies occur.
– Time how long it takes to securely get everyone inside the shelter with essential supplies.
– Test all equipment like lights, ventilation, radio, and any generators or solar connections.
– Review where all emergency items are located and how to access and use them.
– Ensure all contact information is up to date if you need to reach family members.
– Teach children the importance of remaining in the shelter until danger passes.
– Replenish any expired or missing supplies that are identified.
Maintenance
Maintain your storm shelter for best protection:
– Check the shelter at least annually for any needed repairs or reinforcements.
– Ensure the door seals tightly and locks securely. Lubricate the hinges.
– Keep ventilation ducts clear of debris or obstructions to maintain airflow.
– Update emergency supplies with fresh food, water, batteries, first aid kits, tools, etc.
– Inspect all structural connections and anchors for rust or loosening. Tighten or replace as required.
– Review emergency plans and procedures with family members.
– Consider an annual inspection by a qualified contractor.
Conclusion
Adding a dedicated storm shelter inside your existing basement provides an excellent way to add life-protecting safety to your home. Follow the steps outlined for reinforcing the walls, ceiling, and door to create a secure space able to withstand violent storms and flying debris. This process requires time, effort, and building materials, but the result is a sturdy shelter providing critical protection when you need it most. Maintain and update the shelter regularly so it is ready for emergency use. Having your own basement storm shelter brings valuable peace of mind knowing your family has an emergency refuge during severe weather.