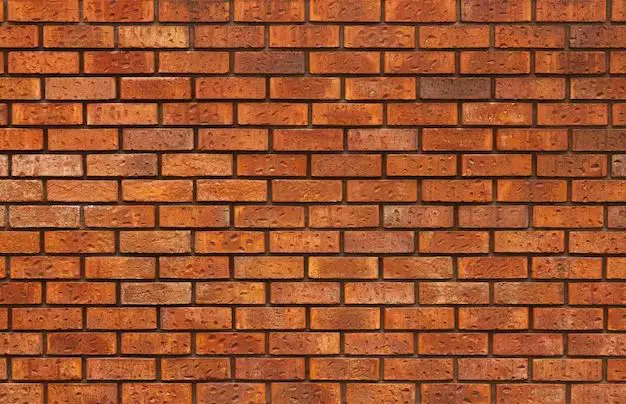
Changing the color of brick on a house or building can completely transform its aesthetic and curb appeal. Going from a bold red brick to a more subtle gray can modernize the look or help the structure blend in rather than stand out. However, unlike just painting over wood or siding, changing the color of brick is not quite as straightforward. Brick is a porous material that will resist and absorb paint to a degree. So the process requires some preparation and the right materials to ensure proper adhesion and lasting results.
Page Contents
- 1 Can you paint over red brick?
- 2 Cleaning and preparing the brick surface
- 3 Priming the brick
- 4 Choosing an exterior paint
- 5 Application tips
- 6 How long does painted brick last?
- 7 How much does it cost to paint brick?
- 8 Can you paint over red brick yourself?
- 9 Hiring a professional vs. DIY brick painting
- 10 Conclusion
Can you paint over red brick?
The short answer is yes, you can paint over red brick to change its color. However, there are some important steps involved in preparing the bricks first before painting. Simply applying exterior paint to untreated brick may result in the paint peeling, chipping or rubbing off relatively quickly. This is due to the porous, abrasive texture of brick that will resist paint adhesion. So the brick needs to be properly sealed and primed before applying the final coats of exterior paint.
With the right preparation using specialty bonding primers and sealers, almost any type of brick can be painted to achieve the desired finished color. The process does take some time and effort, but it can dramatically change the look of a red brick structure.
Cleaning and preparing the brick surface
Before painting brick, the first step is making sure the existing brick surface is properly cleaned and prepared. Here are the key steps involved:
Cleaning the brick
It’s important to thoroughly clean the brick to remove any dirt, grime, efflorescence (a white powdery mineral deposit), mold, mildew and other contaminants that can interfere with proper paint adhesion. Pressure washing is typically needed to adequately clean and rinse the brick.
Repairing any cracks or damage
Inspect the brick surface and use caulk or mortar repair compounds to fill any cracks, spalls or damaged areas that could impact the finished appearance after painting. Any repairs should be allowed to fully cure before priming and painting.
Removing any loose paint
If the brick already has been painted in the past, you’ll need to remove any loose, flaking or peeling paint using wire brushing, scraping, pressure washing and/or chemical paint strippers if needed. Get rid of any paint that isn’t tightly bonded.
Neutralizing alkalinity
Brick contains alkaline compounds that can interact negatively with paint, preventing proper adhesion. After thoroughly cleaning, the bricks should be treated with an alkaline-resistant pre-treatment solution specifically designed to neutralize alkalinity and improve paint bonding.
Priming the brick
The next crucial step is applying a primer coat designed for masonry. Priming serves several important purposes:
- It seals the porous brick surface.
- It provides an additional uniform surface for the new paint to adhere to.
- It contains binders to improve adhesion and durability.
- It blocks stains from bleeding through the new paint.
Using the right primer is key – it should specifically state on the product label that it is recommended for use on brick and masonry. Options include:
- Acrylic latex bonding primers.
- Alkyd-based primers.
- Epoxy primers.
- Polyurethane primers.
Two coats of primer are typically needed for proper sealing and coverage. Apply using a brush, roller or paint sprayer per the manufacturer’s recommendations. Allow each coat to fully dry before adding the next one.
Choosing an exterior paint
Once the brick is properly primed, you can apply at least two finish coats of exterior paint specially formulated for masonry surfaces. For best results, use a high-quality 100% acrylic latex paint, which will expand and contract along with temperature changes in the brick. Paint with an elastomeric resin binder will also add flexibility and weather resistance.
Consider a paint containing silicone or silicone dioxide, which will further improve water resistance. Stay away from cheaper vinyl acrylic paints, as they tend to have poor adhesion and durability on masonry.
Opt for a flat, satin or matte finish rather than high-gloss. The flatter paint finish will help cover minor imperfections and will be less prone to showing scratches over time.
Make sure to choose a paint color at least two to three shades lighter than your desired finished color. This is because the pigment will deepen and become more saturated as it absorbs into the brick, compared to how it looks on a regular paint sample card.
Application tips
When applying the finish coats of exterior paint to brick, follow these tips for getting the best results:
- Only paint in dry weather when temperatures are between 50-90°F.
- Use high-quality application tools – microfiber roller covers and angled paintbrushes work best.
- Apply in a consistent direction and avoid excess overlapping of strokes.
- Work section-by-section starting at the top and working downward.
- Allow the first coat to fully dry before adding the second coat.
- Add a third coat if needed for full, even coverage with no bleed-through.
- Let the paint cure for at least several days before cleaning, applying sealers or making contact.
Proper prep work, priming, paint selection and application technique will provide the best results for changing red brick to a custom gray color.
How long does painted brick last?
With the right preparation and paint system, painted brick can last for many years before needing to be redone. On average, painted brick will last approximately 10-20 years before showing signs of wear, fading or needing new coats of paint.
Proper maintenance and care will maximize the lifespan. Reapplying fresh coats whenever fading or cracks become visible can refresh the look. Avoiding damage from impact, heavy abrasion or harsh cleaners will also keep painted brick looking its best.
Here are some of the factors that will influence the long-term durability of painted brick:
- Quality of surface preparation and priming.
- Use of high-quality exterior paint designed specifically for masonry.
- The texture and porosity of the brick itself.
- Exposure to weathering – areas exposed to full sun and rain will wear faster.
- Regular cleaning, avoiding damage and reapplying paint as needed.
In ideal conditions, painted brick can last 20 years or longer before needing repainting. But expect to need at least minor touch-ups after 10 years or so. With proper maintenance and care, painted brick walls and structures can retain their fresh curb appeal for many years.
How much does it cost to paint brick?
Painting brick professionally will cost an average of $6 to $12 per square foot. So for a typical two-story home with approximately 2500 square feet of brick surface area, you can expect to pay between $15,000 and $30,000 for the job.
Here is a breakdown of the typical costs for painting brick:
- Surface cleaning and preparation – $0.50 to $1 per sq.ft.
- Priming – $1 to $2 per sq.ft.
- Two coats of paint – $2.50 to $6 per sq.ft.
- Sealers/clear coat (optional) – $.50 to $2 per sq.ft.
- Scaffolding rental – $300 to $1000
So for a 2500 sq.ft. home, expect to pay around:
- Cleaning/prep – $1250 to $2500
- Primer – $2500 to $5000
- Paint – $6250 to $15,000
- Sealer (optional) – $1250 to $5000
- Scaffolding – $300 to $1000
- Total – $10,500 to $26,500
Professional painters generally charge a minimum fee of $500 as well, regardless of project size. Always get multiple bids to compare. Larger commercial buildings with extensive brickwork will be at the highest end of the cost range.
Can you paint over red brick yourself?
While painting brick is labor intensive, it is possible for an experienced DIYer to tackle it as a do-it-yourself project and save substantially on the cost. With proper preparation, priming and technique, homeowners can paint their brick walls and achieve quality long-lasting results.
Be prepared that painting brick requires committing a full weekend or even longer for the project, especially when doing the entire exterior of a home. It also requires climbing up and down ladders frequently during the process. Safety is paramount when working at height.
Review the steps above to understand the entire process and techniques involved before starting. Gather all necessary supplies – cleaners, primers, paint, brushes, rollers, paint sprayer (optional), drop cloths, masking tape, etc. Budget approximately $2500 in materials for a typical 2500 sq.ft. home.
The most challenging aspects when painting brick yourself are adequately pressure washing, evenly applying primers and paint over the uneven surface, and having the endurance to complete the intensive project from start to finish.
So weigh your DIY skills and stamina before deciding if you can tackle changing the color of brick yourself. But with sufficient preparation and care, painting your own brick walls can certainly be accomplished.
Hiring a professional vs. DIY brick painting
Painting brick requires some demanding preparations like pressure washing, dealing with ladders and scaffolding, properly sealing and priming the uneven brick surface, and brushing/rolling multiple coats of paint. Here is a comparison of hiring a professional painter vs. DIY painting brick:
Professional painter
- Easier – no equipment rentals, setup, or messy preparations needed.
- Faster – typical home painted in 3-5 days.
- Experienced – pros are skilled at prepping and painting masonry.
- Reliable results – a quality contractor helps ensure a durable job.
- Labor warranty – professionals guarantee their workmanship.
- Safer – insured and licensed painters handle risky high work.
- More expensive – costs average $6000 to $15,000 for a full home exterior.
DIY painting
- Affordable – supplies cost $1000 to $3000 to paint yourself.
- Total control – choose every product and color.
- Learn new skills – gain valuable masonry painting experience.
- More time consuming – prepping and painting will take a full week or longer.
- Physically demanding – working on ladders, extensive prep work.
- Higher risk – improper prep can lead to peeling or other issues.
- No professional warranty – results fully dependent on your work.
So weigh the pros and cons of both approaches when deciding how to proceed with a brick painting project. For most homeowners, having a professional handle the challenging preparations and entire painting process is worth the additional cost for excellent, long-lasting results. But a DIY approach can be fulfilling and save thousands if done properly.
Conclusion
Changing the color of brick from red to gray can completely transform the curb appeal and style of a home or building. While painting brick requires careful preparation and technique, it can be an very effective way to alter the look of a brick structure. With proper cleaning, priming, paint selection and application, the brick will take on a fresh gray color that retains its adhesion and durability for years. Consider having the project professionally completed for optimal results, or take it on as a DIY project to save substantially on cost. With some effort and care, it is possible to successfully paint over red brick and change it to the desired gray color.