Electrical wiring problems in a vehicle can cause a variety of issues from minor annoyances to major safety hazards. A bad wire can cause anything from flickering headlights to a complete electrical system failure. Fortunately, you can easily check for faulty wires yourself using a basic multimeter.
A multimeter is an inexpensive and easy to operate tool that allows you to check electrical circuits and components. By testing various points along a wire, you can isolate breaks, shorts, resistance problems and other issues. With just a simple multimeter test, you’ll be able to pinpoint bad wires and make needed repairs.
Page Contents
What You’ll Need
To check for bad wires, you’ll need the following equipment:
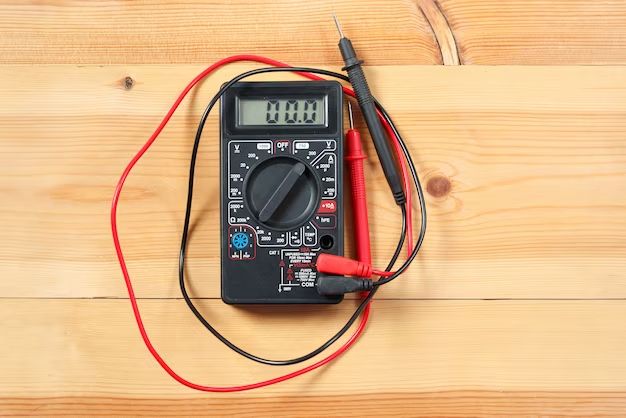
- Multimeter – This is the main tool you’ll use to diagnose wiring issues. An inexpensive basic multimeter that tests voltage, resistance and continuity is ideal.
- Wiring schematic – This shows how the wiring system is laid out and helps you find test points.
- Repair manual – This provides voltages and resistance values for troubleshooting.
- Wire crimpers and strippers – Used to access wire test points.
- Replacement wires and connectors – For any needed repairs.
You’ll want to ensure the multimeter has a current battery and test leads in good condition. It’s also a good idea to have basic electrical safety gear like insulated gloves and eye protection.
How to Test Wires with a Multimeter
There are a few different tests you can perform with a multimeter to diagnose bad wires:
Voltage Drop Test
This test checks for excessive voltage drop along a wire or at connections. Voltage drop occurs when current passes through a resistance in a wire, causing a reduced amount of voltage to reach the component.
Here’s how to perform a voltage drop test:
- Consult the wiring diagram and repair manual to determine the specified voltage for the wire you want to test.
- Turn on electrical devices and accessories to provide a load current.
- Set the multimeter to DC voltage mode.
- Touch the black probe to a known good ground point.
- Touch the red probe to the wire at its source (i.e. the battery). Note this voltage reading.
- Move the red probe to the end of the wire where it connects to the component. Note this voltage reading.
- Compare the two voltages. There should be less than 0.5V difference between the two. A larger drop indicates resistance in the wire.
If you find excessive voltage drop, the wire or connections likely have corrosion or damage causing resistance.
Resistance Test
You can specifically test the resistance in a wire using the multimeter’s ohms setting. Here’s how:
- Unplug the wire if possible. If not, disable components and turn off electrical loads.
- Set the multimeter to the lowest ohms range.
- Touch the meter probes to both ends of the wire you want to test. It may help to expose some bare wire if the ends are not accessible.
- Check the multimeter reading. Consult repair manuals for the factory specified resistance. Any deviation indicates a problem.
High resistance means corrosion or damage in the wire or connectors. Low resistance can indicate a short circuit between wires.
Continuity Test
A continuity test checks if current can pass uninterrupted through a wire from end to end. Here’s how to test:
- Unplug the wire to isolate it from the vehicle’s electrical system.
- Set the multimeter to continuity test mode – this tests resistance and beeps when a complete circuit is detected.
- Touch one probe to one end of the wire, and the other probe to the opposite end.
- The multimeter should beep if there is continuity. No beep indicates a break somewhere in the wire.
A lack of continuity means there is a complete break in the wire that needs to be repaired.
Tips for Diagnosing Wires
Here are some helpful tips when testing wires with a multimeter:
- Refer to a wiring diagram to understand the wire layout and test relevant points.
- Label wires as you test to avoid confusion.
- To isolate a wire, unplug it from devices and junctions if possible.
- Test wires under normal operating loads when possible.
- Compare readings to repair manual specs to identify issues.
- Inspect wires, connectors, and terminals for visible damage as you test.
- Always disable or disconnect power before handling wires.
Focus your tests on wires that power components with electrical issues to start diagnosing problems efficiently.
Repairing Bad Wires
Once you’ve identified a faulty wire with your multimeter tests, you’ll need to take steps to get it repaired:
Fixing Voltage Drop Issues
If a wire or connection has excessive resistance causing voltage drop, here are some repair options:
- Clean or replace damaged connectors and terminals.
- Solder and seal any loose wire connections.
- Replace corroded or undersized wires.
Fixing Resistance Problems
For wires with incorrect resistance readings, you can:
- Splice wire sections with damage or corrosion.
- Repair or apply sealant to damaged wire insulation.
- Replace wire sections as needed if repairs aren’t possible.
Fixing Continuity Breaks
If a wire has a complete break with no continuity, repair options include:
- Properly splice any severed wires.
- Replace wire sections with noticeable copper breakage.
- Repair crimps, connectors, or terminals causing opens.
Replacing Wires
If wires are too damaged to splice or repair, complete replacement may be necessary. Here are some tips when replacing wires:
- Run new wires along the same path as the old wires.
- Consult diagrams to duplicate the old wiring layout.
- Use appropriate gauge and insulation for replacement wires.
- Solder and seal connections for reliable conductivity.
- Secure new wires using grommets, clips and straps.
- Wrap repairs with protective tape or conduit.
Safety Tips
Use the following safety tips when testing and handling electrical wires:
- Wear insulating gloves and eye protection.
- Disable the vehicle battery or unplug wires before testing.
- Avoid touching bare metal and both probe tips at once.
- Turn off all electrical components on the circuit you are testing.
- Keep flammable materials away from electrical components.
- Use properly insulated tools when splicing or crimping wires.
When to Call a Professional
While DIY electrical testing and repairs can save money, more complex issues are best left to professional auto electricians. Seek help if:
- You can’t isolate the issue through testing.
- The problem involves computer modules or specialty systems.
- Fixing it requires removing dash components or running new wiring harnesses.
- You don’t have the knowledge, tools, diagrams or repair specs.
- The issue causes a safety hazard like non-working brakelights.
Professionals have advanced diagnostic tools and the expertise to correctly trace and pinpoint elusive electrical gremlins. They can also safely handle complicated repairs.
Conclusion
Knowing how to check for bad wires with a multimeter is an invaluable skill for DIY auto electrical diagnosis. By using voltage drop, resistance and continuity tests, you can quickly find faulty wires causing electrical issues. Make sure to use proper safety precautions, and don’t hesitate to turn to a professional for complex or safety-related repairs. With the right approach, you can easily troubleshoot wiring problems and get your vehicle back to full electrical health.