Keeping your vehicle’s air intake system clean is an important part of regular maintenance. A dirty air intake system can negatively impact engine performance and fuel efficiency. Over time, debris, dirt and dust can build up inside the air intake piping, air filter housing and air filter element. This restricts airflow to the engine, reducing power output. Additionally, clogged air filters allow more contaminants to enter the engine, accelerating wear and tear. Fortunately, cleaning an air intake system is a straightforward process that most vehicle owners can tackle themselves. In this comprehensive guide, we will walk through the step-by-step process for cleaning all components of the air intake system.
Page Contents
- 1 When to Clean the Air Intake System
- 2 Supplies Needed
- 3 Safety Tips
- 4 Finding the Air Intake System Components
- 5 Inspecting the Intake Piping
- 6 Removing the Air Filter Housing
- 7 Inspecting the Air Filter Element
- 8 Cleaning the Air Filter Element
- 9 Cleaning the MAF Sensor
- 10 Cleaning the Intake Piping
- 11 Cleaning the Throttle Body
- 12 Reassembling the Intake System
- 13 Conclusion
When to Clean the Air Intake System
The frequency for cleaning your air intake system will vary depending on driving conditions and local environmental factors. As a general guideline:
- Clean the air filter element annually or every 15,000 – 30,000 miles.
- Thoroughly clean the entire air intake system every 3-5 years or 45,000 – 75,000 miles.
However, if you frequently drive on dirt roads, through construction zones or in areas with high airborne dust/debris, you may need to clean the system more often. Warning signs that indicate it’s time to service the air intake include:
- Decreased engine performance and acceleration.
- Increased exhaust emissions.
- Reduced fuel economy.
- Engine sounds more airy or noisy.
- The Check Engine light is illuminated.
Diagnostic trouble codes related to the mass air flow (MAF) sensor, manifold absolute pressure (MAP) sensor or throttle body indicate a contaminated air intake. Don’t delay cleaning any longer if you notice these warning signs. Continued driving with a clogged air intake system risks expensive engine damage.
Supplies Needed
Cleaning the entire air intake system is largely a straightforward DIY job. A few basic hand tools and cleaning supplies are all you need:
- New air filter element (check manufacturer guidelines for recommended service interval).
- Flashlight
- Cleaning cloths, paper towels or shop rags.
- Gloves
- Safety glasses
- 10 mm socket or nut driver
- 8 mm socket
- Ratchet wrench and extension
- Pliers
- Flat head screwdriver
- Mass airflow sensor cleaner spray
- Throttle body/intake cleaner spray
- Compressed air
The air filter element, mass airflow sensor cleaner spray and throttle body/intake cleaner spray can be purchased from your local auto parts store or dealer. Having these supplies on hand will make the job much easier.
Safety Tips
When working on any vehicle system, following basic safety precautions is important:
- Allow the engine and exhaust system to fully cool before beginning work.
- Wear protective gloves and eye wear when spraying cleaners.
- Review all product instructions before use.
- Work in a well ventilated area.
- Disconnect the battery ground cable if directly cleaning the throttle body.
- Never start or run the engine without the air filter installed.
Taking a few minutes to set up a safe workspace will help the air intake cleaning job go smoothly.
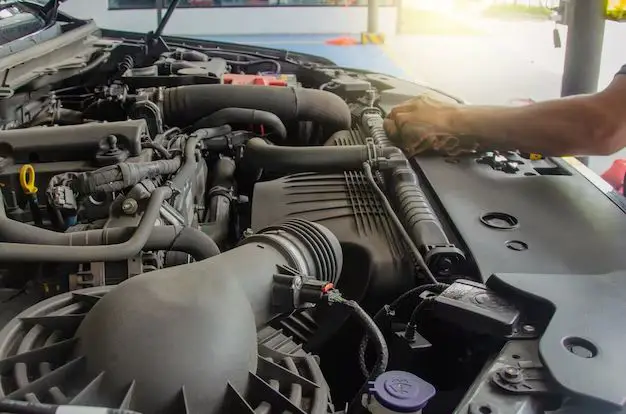
Finding the Air Intake System Components
The specific location and layout of air intake components varies across vehicle makes and models. However, the main pieces are generally similar:
- Air filter housing – Plastic case that encloses the air filter element. Usually located in the engine compartment.
- Air filter element – Paper or cotton gauze filter inside the housing. This is the main service item.
- Intake tubing – Rubber or plastic piping that runs from the air filter housing to the throttle body/intake manifold.
- Throttle body – Controls airflow into the intake manifold and engine. Often located at the end of the intake tubing.
- MAF sensor – Measures incoming air volume. Mounted in the intake piping.
Before beginning, take a few minutes to visually trace the intake piping in your engine bay. Locate the components and identify any clamps, bolts or electrical connectors that will need to be detached. Having a clear mental plan of where each piece is located will help the cleaning process go smoothly.
Inspecting the Intake Piping
Start by inspecting the visible portions of the intake piping leading from the air filter housing to the throttle body or intake manifold. Look for:
- Cracks or loose connections in the intake tubing. These can allow unmetered air to enter the system.
- Build up of dirt, debris or oily residue inside the piping. This restricts airflow.
- Corrosion on metal piping or connections. This weakens the integrity of the system.
If the intake piping is damaged or excessively dirty, it should be replaced. Cracks or loose piping can lead to serious intake leaks.
Removing the Air Filter Housing
Next, locate the air filter housing. In most vehicles, the housing is secured to the inner fender or chassis with bolts, clips or retaining screws. The exact fastener locations vary across vehicle applications. Refer to your owner’s manual or service manual for the specifics on your make and model.
Use the appropriate hand tools to detach any fasteners or retaining clips securing the air filter housing cover. Carefully separate the housing cover from the base. Lift the cover away and set it aside.
With the housing open, you now have access to inspect the air filter element.
Inspecting the Air Filter Element
Visually check the condition of the air filter element:
- Look for dirt accumulation on the clean side of the filter. This indicates the element needs replacement.
- Inspect for tears, holes or cracks in the filter media. Damaged areas allow unfiltered air to pass.
- Check for an overly oily filter element. This can occur from using the wrong air filter oil.
An excessively dirty, damaged or oil soaked air filter must be replaced. Follow your vehicle manufacturer’s recommendations for the service interval, typically every 15,000 – 30,000 miles.
If the air filter looks to be in good shape, it can likely be cleaned and reinstalled. Reference the next section for instructions on cleaning and re-oiling the air filter element.
Cleaning the Air Filter Element
For lightly dusty air filters in otherwise good condition, cleaning and re-oiling is an option. This extends the service life versus automatically replacing.
Here is the process for properly cleaning and re-oiling an air filter element:
- Carefully remove the air filter element from the housing. Make note of the original orientation.
- Use a shop towel or rag to wipe dirt and debris from the inside of the air filter housing.
- Lightly tap the air filter against a hard surface to dislodge any loose dirt.
- Spray the filter element with air filter cleaner and allow it to soak for 5 minutes.
- Rinse the filter with cool running water from the clean side out. Flush until the water runs clear.
- Gently shake the air filter to remove excess water. Do not wring or twist.
- Allow the air filter to fully air dry. Never re-install a wet filter.
- Apply air filter oil according to the product instructions. Lightly oil the filter media.
- Allow the freshly oiled filter to sit for 5-10 minutes. This allows the oil to fully penetrate the cotton filter media.
- Reinstall the air filter in the original orientation. Replace the housing cover.
When re-oiling, avoid using too much filter oil. This can lead to excess oil being drawn into the intake and fouling the MAF sensor. Follow the product instructions. If you’re unsure of the filter’s condition, play it safe by installing a new replacement element.
Cleaning the MAF Sensor
The mass air flow (MAF) sensor is a critical engine management component. It measures the volume of incoming air. A dirty MAF sensor can cause incorrect airflow readings, Check Engine lights, performance issues and reduced fuel economy.
When cleaning the air intake system, take a moment to clean the MAF sensor:
- Locate the MAF sensor mounted in the intake piping. It often features a wire mesh sensing element or series of sensing elements.
- Use compressed air or MAF sensor cleaner spray to dislodge and remove dirt and debris from the sensor.
- Avoid touching the delicate sensor element. Never use abrasive cleaners.
- Allow the freshly cleaned MAF sensor to fully dry before reconnecting piping or electrical connectors.
Take care not to bend or damage the sensing element. Compressed air and MAF sensor cleaner are the best methods for cleaning this sensitive component.
Cleaning the Intake Piping
With the air filter housing removed, you have full access to clean the interior of the intake piping:
- Use a flexible vacuum hose to remove loose debris in the intake piping.
- Spray throttle body/intake cleaner liberally along the full length of the intake tubes.
- Let the cleaner soak for 5-10 minutes. This allows it to dissolve oil, dirt and carbon deposits.
- Wipe the inside of the intake tubes with clean shop rags or paper towels.
- Be sure to clean all the way to the throttle body. Take extra care around any intake flow sensors.
Inspect the intake piping as you work. Damaged, loose or severely restricted intake tubes should be replaced.
Cleaning the Throttle Body
The throttle body is one of the most common places for oily residue and carbon deposits to accumulate. A dirty throttle body restricts air flow, hurts performance and fuel mileage.
Use these steps to clean the throttle body:
- Detach the negative battery cable before starting to disable the electrical system.
- Disconnect the electrical connector from the throttle body. Also detach any coolant lines if necessary.
- Use throttle body cleaner and a brush to loosen and dissolve stubborn deposits.
- Avoid using any abrasive tools. Do not forcefully scrape or gouge the housing.
- Wipe with clean shop rags until all carbon build up and oily residue is removed.
- Carefully clean the throttle valve and plate. Avoid damaging them.
- Make sure all areas are fully dry before reconnecting hoses, cables and electrical connectors.
Cleaning the throttle body helps restore proper airflow and engine performance. Take care not to damage any gaskets or electrical components. Work slowly and methodically.
Reassembling the Intake System
Once cleaning of the individual air intake components is complete, it’s time for reassembly:
- Reinstall the fully dried air filter element in the correct orientation.
- Carefully inspect all intake piping and hoses for cracks or damage. Replace components as needed.
- Make sure all clamps and connections are fully secured.
- Reconnect the battery cable and any other electrical connectors.
- Start the vehicle and check for intake leaks.
- Reset any error codes with an OBD-II scanner.
- Take a short test drive. Accelerate through the RPM range. The engine should respond crisply.
Proper reassembly is critical to avoid intake leaks or loose components that could lead to future engine damage. If you notice any issues post-service, immediately investigate the cause. Your air intake system is now clean and ready for miles of optimal engine performance.
Conclusion
From inspecting intake piping to cleaning the delicate MAF sensor, this step-by-step guide covers the full air intake cleaning process. While individual air intake configurations vary, the general service procedures are quite similar across most vehicles. With the right basic tools and supplies, this is a DIY service project most vehicle owners can manage themselves. Just be sure to always take the proper safety precautions and follow component manufacturer guidelines. Keeping your air intake system free of dirt, debris and carbon deposits is one of the most important maintenance items for good engine health. Following the outlined steps will restore peak airflow and performance. Your engine will thank you.