Converting a wood-burning fire pit to propane is a great way to make your outdoor space more convenient and environmentally friendly. Propane fire pits provide the ambiance of a real wood fire without the smoke, sparks, and hassle of dealing with firewood. They ignite instantly, provide adjustable heat output, and can be easily turned off when not in use.
Converting an existing wood-burning fire pit to propane requires some simple modifications. This involves installing a propane burner kit suited for your fire pit size, running a gas line to the fire pit, and making some minor safety additions. With a few tools and proper safety precautions, you can complete the propane fire pit conversion project in a weekend.
Page Contents
Benefits of Converting to a Propane Fire Pit
Here are some of the top advantages of switching from wood to propane:
– Convenience – Propane fire pits light instantly with the turn of a key or push of a button. There’s no need to stack wood, clean up ashes, or wait for coals to form.
– Adjustable heat – Propane burners allow you to control the flame height and heat output. Turn it up for warmth or down for ambiance.
– No smoke or sparks – Propane burns clean without emitting smoke or throwing off sparks like real wood. This makes it safer and less messy.
– Less maintenance – No more hauling firewood or sweeping up ashes. Just connect the propane tank and ignite as needed.
– Portability – Many propane fire pits use standard 20 lb tanks that can be swapped out easily. This allows you to move your fire pit around the yard.
– Safety features – Propane fire pits often include auto shut-off valves and tip-over protection for added safety.
– Environmental benefits – Propane emits less carbon and other pollutants than burning real wood.
What You’ll Need
Converting a wood-burning fire pit requires a few key supplies. Here’s an overview of the equipment you’ll need:
– Propane fire pit burner – This is the heart of your propane fire pit system. Look for a UL listed burner designed for the size of your existing fire pit.
– Gas line and fittings – You’ll need copper tubing or stainless steel flex line to run propane to your fire pit from the tank. Include any necessary fittings and valves.
– Propane tank – A standard 20 lb tank is ideal for mobility. Make sure it includes the hose and regulator required to connect to your burner.
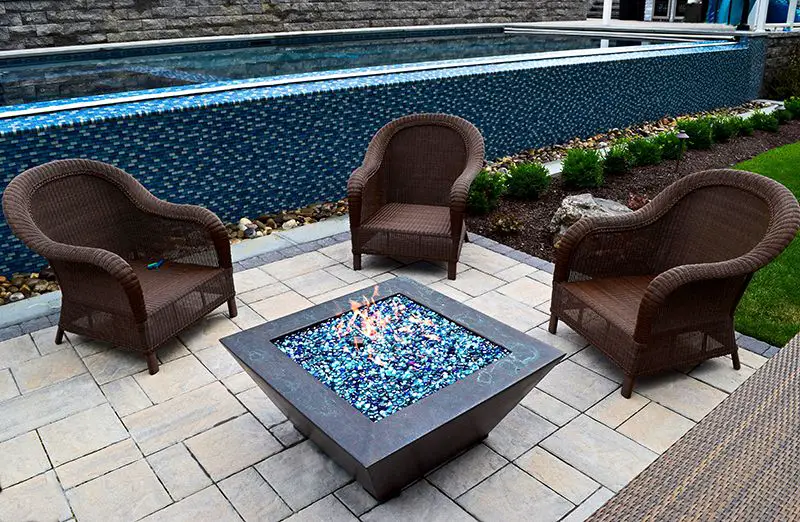
– Fire pit media – Crushed glass, lava rock, or ceramic logs create an attractive flame bed and hide the burner.
– Fire pit conversion kit – Optional kits include everything for the conversion in one package.
– Tools – Have pipe sealant, wrenches, drill, screwdriver, and other tools to complete the project.
– Fire pit liner – A liner protects the fire pit walls from heat damage. Reflective metal or brick liners work best.
How to Convert a Wood Fire Pit to Propane
Converting a wood-burning fire pit to propane use involves 5 key steps:
Step 1: Choose a Proper Burner
Select a UL listed propane burner designed for the shape and size of your existing fire pit. Round burners work for round pits, while rectangular burners fit into square/rectangular shapes. The burner must evenly distribute heat without exceeding the fire pit dimensions. Overhang can lead to overheating the surrounding walls.
Most propane burner kits include the burner, frame, regulator with hose, and inline valve. Look for a kit with a burner output (in BTUs) appropriate for your pit size:
– Small pits (less than 36 inches): 30,000 – 50,000 BTUs
– Medium pits (36 – 44 inches): 50,000 – 80,000 BTUs
– Large pits (over 44 inches): 80,000 – 120,000+ BTUs
You want a burner that leaves 12-18 inches of clearance between the flame and surrounding walls. This prevents overheating and damage.
Step 2: Install a Gas Line
You need to install a gas line to deliver propane from the tank to the burner. Use copper tubing or stainless steel gas line marked for use with propane. Run the line underground wherever possible for protection.
Some key gas line installation tips:
– Use approved pipe sealant made for gas connections on all fitting threads.
– Avoid tight bends and kinks by using elbow fittings when needed.
– Place a shutoff valve close to the burner to easily turn off gas flow.
– Flare male fittings at each end of line using proper flaring tools.
– Perform a leak test before burying line and using fire pit.
The gas line size depends on the BTU output and length of run:
| BTU Output | 0-10ft Run | 10-40ft Run | 40-100ft Run |
| Up to 65,000 BTU | 1/2 in. | 1/2 in. | 1/2 in. |
| 65,000-100,000 BTU | 1/2 in. | 1/2 in. | 3/4 in. |
| 100,000-150,000 BTU | 1/2 in. | 3/4 in. | 3/4 in. |
| 150,000-200,000 BTU | 3/4 in. | 3/4 in. | 1 in. |
Bury the line a minimum of 8 to 12 inches underground for protection.
Step 3: Set Up the Propane Tank
A standard 20 lb propane tank works well for most home propane fire pits. Use these tips for setting up the tank:
– Place the tank within reach of gas line but at least 5 feet from fire pit.
– Position on a flat, stable surface and secure in place with strapping or anchors.
– Tank must remain upright for vapor withdrawal.
– Extend gas line from tank to fire pit location and connect to regulator.
– Ensure tank has required OPD valve for safety. This prevents overflow accidents.
– Apply tank retention strap so tank cannot tip over and break gas line fitting.
– Face tank valve outlet away from fire pit area.
You can connect your propane tank to existing home gas supply lines if they can provide enough output for the fire pit burner. This avoids refilling smaller tanks.
Step 4: Complete Propane Connections
With the gas line and tank set up, you can now make the final propane connections to your burner:
– Attach the regulator hose to the tank valve outlet. Make sure it’s snug.
– Connect the regulator to the gas line leading to the fire pit burner.
– Use pipe joint compound on regulator and line flare fittings for tight seal.
– Attach the control knob and burner to gas line using provided hardware.
– Perform a leak test on all propane connections before proceeding.
– Consider adding an inline shutoff valve near the burner to easily turn off gas flow when not in use.
Take time making proper gas connections to prevent dangerous leaks once the system is pressurized.
Step 5: Add Fire Media and Operate Safely
The final steps involve adding fire media, completing safety checks, and enjoying your new propane fire pit:
– Pour crushed glass, lava rock, or ceramic logs over the burner to create an attractive flame bed.
– Make sure not to overfill with media or block burner ports.
– Install a heat deflection liner or shield inside the pit if needed.
– Conduct a final leak test with media in place before igniting.
– Review safety guidelines before operating the propane fire pit.
– Use burner controls to adjust flame height and heat output.
– Turn off gas supply at the tank when not in use.
Always supervise the fire pit when in use and follow the manufacturer’s safety instructions. Your propane fire pit will provide years of warmth and ambiance with proper use and care.
Safety Tips for Propane Fire Pits
While propane fire pits are generally quite safe, you need to take some basic precautions when installing and operating one:
– Choose an appropriate UL listed burner and components designed for your fire pit.
– Install gas lines properly using approved fittings, sealant, and leak test.
– Set tank on a stable, level surface and secure in place.
– Keep propane tank at least 5 feet from fire pit during use.
– Perform leak tests on propane connections before lighting pit.
– Add media carefully to avoid blocking burner or overfilling pit.
– Keep fire pit away from structures, overhangs, and flammable materials.
– Supervise children and pets around the fire pit.
– Turn off gas supply at the tank when not using.
– Avoid putting combustibles in the fire pit.
– Inspect fire pit regularly for damage, debris, leaks, etc.
– Follow all manufacturer instructions for safe setup and operation.
Taking a few safety measures will allow you to enjoy your propane fire pit for years. But always put safety first when using fire.
Conclusion
Converting an existing wood-burning fire pit to propane is an achievable DIY project. With the right materials, proper gas connections, and safety checks, you can transform your fire pit into a convenient, clean-burning model. Just follow each step carefully and refer to codes and manufacturer instructions.
The result is an instant ambiance maker requiring no wood or mess. Your propane fire pit will provide on-demand warmth and beauty for your outdoor space. Just be sure to make safety your top priority during setup, operation, and maintenance. With reasonable care, your fire pit can provide many evenings of enjoyment for years to come.