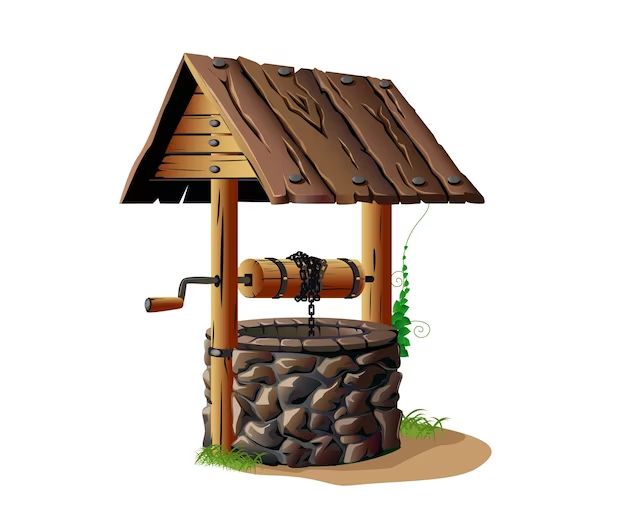
Covering an outside well serves several important purposes. First and foremost, a proper well cover protects the water supply from contamination. Without a secure cover, debris, animals, insects, and other pollutants could fall into the well and contaminate the water. A good cover also prevents unauthorized access to the well, which is a safety concern. Additionally, a well cover provides an extra layer of insulation, helping to regulate the temperature of the well water. There are several options for covering an outside well depending on the type of well, climate, and other factors. Read on to learn more about the best practices for covering your outdoor well.
Page Contents
- 1 Why is it important to cover an outdoor well?
- 2 What are the main options for covering an outdoor well?
- 3 How do you secure and seal a well cap?
- 4 How do you secure a well house cover?
- 5 What are important considerations for covering a dug well?
- 6 What are the most important steps for covering a drilled well correctly?
- 7 How often should you check or maintain a well cover?
- 8 Conclusion
Why is it important to cover an outdoor well?
There are several critical reasons to ensure your outdoor well has a proper cover:
Prevent contaminants from entering the well – Leaving a well uncovered provides an open passage for contaminants to enter the water supply. Dirt, leaves, bugs, small animals, and other pollutants can fall directly into an open well. Even rainwater can wash contaminants from the surrounding ground into the well if it is uncovered. A secure cover blocks these contaminants from infiltrating the well.
Limit access to the well – A locked well cover prevents unauthorized access, which is important for both safety and security reasons. An uncovered well is a falling hazard, especially for small children and animals. Locked covers help keep people and animals away from open wells. Locks also prevent trespassing and tampering that could compromise well equipment or water quality.
Regulate well temperature – Well covers provide insulation that moderates the temperature of the well and water supply. This helps prevent freezing in cold climates. Covers also provide shade over the top of the well, protecting it from direct sunlight that could heat the upper portion of the well and water. Temperature regulation promotes optimal conditions inside the well.
Protect well components – The pumping equipment, wiring, and other inner workings of a well need protection from the elements. Rain, snow, dirt, UV rays, and other external factors can damage well components if they are directly exposed. A well cover safeguards all the interior components of the well casing.
Prevent injury/liability – Open wells pose a major safety hazard, especially for children. A secure cover helps eliminate the risk of falls or other injuries associated with an unprotected well. Well covers also minimize the liability for the property owner in the event of an incident.
Properly covering outdoor wells is a simple but critical step in protecting the well, managing access, and optimizing water quality over the long term.
What are the main options for covering an outdoor well?
There are several suitable options for covering an outdoor well:
Well cap – A basic well cap sits on top of the well casing. Caps are often made of aluminum or galvanized steel. They may be dome-shaped or flat. A vented cap allows pressure changes while blocking debris. A waterproof seal is essential. Well caps are a simple and affordable option. However, they do not offer security or restrict access to the well.
Well house – Constructing a protective housing around the well provides security. Well houses are typically small sheds made of wood, concrete block, or brick. They have ventilation to prevent humidity buildup. A lockable door allows authorized access only. Well houses protect the equipment and safeguard water quality. But they are more expensive than basic caps.
Well vault – Concrete or fiberglass well vaults are like underground bunkers for wells. The well is recessed into the ground and the vault is built over it from the ground up. Vaults provide ample protection and security. But they are pricey to construct and challenging to access for maintenance.
Pitless adapter – This configuration allows the well casing to terminate below the frost line. Water pipes connect to the well below ground level. An at-grade cover provides protection at ground level without the need for an above-ground housing. However, the well head is still vulnerable to contaminants.
Sanitary seal – For driven well points, a pitless adapter may not be feasible. A sanitary seal is an alternative. The well pipe terminates in a sloped concrete mound called a seal. The seal prevents contaminant ingress. However, the well point has minimal physical protection.
The optimal cover solution depends on the well type, climate, codes, cost, and security needs. Many wells have caps or houses combined with pitless adapters or sanitary seals for maximum protection.
How do you secure and seal a well cap?
Proper installation is key to creating a secure, watertight well cap seal:
– Clean the top of the well casing to remove dirt and debris. Level the surface if needed.
– Ensure the cap fits snugly onto the casing. It should not rock or shift after placement. The cap’s curvature should match the casing’s diameter.
– Set the cap in place, pressing down firmly to seat it properly on the casing. There should be no gaps or overhang.
– Fasten the cap securely using the provided bolt holes and hardware. Tighten bolts gradually in a crisscross pattern. Do not overtighten.
– Seal the sides and top edge of the cap with silicone caulk. Smooth the bead of caulk with a finger to ensure a tight seal.
– For vented caps, apply caulk around the base of the vent. Do not block the vent passage when sealing.
– Consider applying a second ring of caulk or specialized well sealant around the outer perimeter for extra waterproofing. Press the sealant into gaps.
– Allow the caulk to fully cure before accessing the well. Check periodically for cracks or gaps in the seal. Reapply caulk as needed to maintain a tight barrier. A secure seal is critical.
Following the manufacturer’s specific instructions can also help ensure proper cap installation and sealing. Take care to cover outdoor well caps correctly to maximize the well’s security and lifespan. Monitor and maintain the caulk seal regularly.
How do you secure a well house cover?
Well houses provide sturdy protective coverings around well equipment. Follow these guidelines for proper well house cover security:
– Construct the well house walls from long-lasting materials like brick, concrete block, or rot-resistant lumber. The house should be durable against weather andanimals.
– Build the well house cover from a wooden beam frame with hinged fiberglass or metal doors. The doors should be large enough to allow equipment access.
– Ensure the doors seal tightly when closed. Install weatherstripping around the door perimeter to block moistureand pests.
– Add hasps and tamper-proof latches on the doors allowing them to be padlocked. Locks restrict unauthorized entrywhile permitting access for maintenance.
– Install ventilation at the top of the house and under the roof eve. This prevents humidity buildup inside the house that could damage equipment. But ventilation openings should be screened to blockanimals and debris.
– Seal all gaps and cracks in the walls, roof, doors, and ventilation with caulk or foam. This keeps rodents and insect out while sealing off moisture.
– Extend the well house cover out past the well casing by at least 12 inches on all sides. This prevents contamination from seeping into the edges.
– Build a concrete pad sloped away from the well house to prevent surface water running under the walls.
– Consider wired security alarms on doors to be notified of unauthorized entry.
Taking steps to properly seal and secure the cover will help the well house optimally protect the wellhead. Inspect the well house periodically to ensure it remains in good condition. Perform maintenance as needed to prevent deterioration over time.
What are important considerations for covering a dug well?
Dug wells are bored into the ground and lined with rock, brick, tile, or concrete. When covering this type of well, key factors include:
– The cover must be sturdy enough to prevent physical damage or debris falling into the well. Wood, metal, or concrete covers are suitablematerials.
– Any openings in the cover, like access hatches, should have tightly closing lids with latches to secure them. This prevents accidental entry.
– The cover should include a raised mound around the top to divert surface water away from the well. Diversion keeps runoff from entering the well.
– Ventilation both under the lid and through the sides of the cover provides airflow to balance humidity and prevent condensation inside the well. Too much moisture damages the well masonry over time.
– The cover should extend at least 12 inches past the exterior edges of the well casing or lining to prevent seepage of groundwater into the well from the surrounding soil.
– If the well has a pump, the cover needs to accommodate the pump housing and piping without exposing the well contents.
– Locks, alarms, or other security measures help protect the well from trespassers who could tamper with the well or water supply.
– Any wood used on the cover should be rot and insect resistant. Treat it to limit deterioration.
A properly constructed well cover is essential for keeping dug wells functional and the water clean. Always have a qualified well contractor create or update your dug well cover.
What are the most important steps for covering a drilled well correctly?
Drilled wells penetrate deep into the groundwater supply. Proper coverage is vital:
– Install a sanitary seal or pitless adapter – This keeps the well casing subsurface and connects plumbing below frost level. No dug pit is needed.
– Ensure the well cap fully seals the casing – Bolt the cap on tightly and seal the edges with waterproof caulk. This prevents contaminant ingress.
– Slope the ground away from the well – Grade the soil to prevent ponding of surface water around the wellhead. Good drainage is key.
– Keep it accessible – The cap location should allow convenient access for maintenance, testing, treatment, etc. Don’t bury it.
– Protect the piping – Insulate and heat trace above ground pipes if needed to prevent freezing. Bury pipes below frost level.
– Restrict access – Use locks, alarms, fences, or well houses to control access and prevent damage or tampering. Do not make the wellhead easily accessible.
– Check periodically – Inspect the wellhead, cap, seals, and piping regularly. Repair cracks, gaps, or weaknesses immediately to prevent issues.
– Have a pro install it – Hire a qualified well contractor to ensure it’s done right. Don’t take chances with improper DIY well coverage.
Taking the time to correctly cover and secure your drilled well ensures protection for the well itself and the health of the water supply. Never skip this critical aspect of well management.
How often should you check or maintain a well cover?
It’s important to periodically inspect and service well covers:
– Twice a year – Visually examine the well cover, seals, vents, and hardware. Check for damage, cracks, gaps, loose parts, etc. Do a basic functional test.
– Annually – Perform a thorough cover inspection and maintenance. service hinges, latches, caulk seals, screens, etc. Replace any worn parts. Reseal as needed.
– After severe storms – Check the cover for damage from major weather events like high winds, hail, ice storms, etc. Make repairs immediately as needed.
– Following intrusion attempts – Inspect the cover thoroughly if there are signs someone tried to access the well. Check for vandalism or sabotage. Improve security measures.
– When installing new equipment – Any time new pump components are installed, examine the cover condition and ensure it still fits and functions properly.
– At first sign of trouble – If any potential contamination sources arise nearby, inspect the cover seals and security immediately to ensure the well is protected.
Proper maintenance means well covers can last for decades. But lack of maintenance leads to failure, water quality issues, and expensive damage. Set a regular schedule for checking and servicing covers to keep your well safe all year long.
Conclusion
Well covers are an essential component in securing and maintaining water quality from outdoor wells. From simple well caps to full well houses, covers need to completely seal the well, restrict access, divert surface water, and facilitate maintenance. Regular upkeep preserves the cover’s integrity and prevents avoidable issues with well functionality or contamination down the line. By understanding best practices in well cover selection, installation, and maintenance, anyone relying on well water can take proactive steps to defend this invaluable resource. Protect your outdoor well with a properly secured cover suitable to its construction and your local climate. Then routinely check and care for that cover as a key part of responsible water well management. With some care and effort up front, a high-quality well cover will provide years of reliable protection for your well.