Cutting a perfect circle without a bandsaw can seem daunting, but with the right tools and technique, it is very achievable. In this comprehensive guide, we will walk through several methods for cutting circles, from simple options using just a jigsaw to more advanced techniques using a router. We’ll also provide tips for getting clean, accurate cuts no matter which tool you use.
Page Contents
- 1 Can You Cut a Circle Without a Bandsaw?
- 2 Cutting a Circle with a Jigsaw
- 3 Cutting Circles with a Circular Saw and Guide
- 4 Cutting Circles with a Hole Saw
- 5 Cutting Circles with a Router
- 6 Cutting Circles with a Scroll Saw
- 7 Cutting Circles with a Coping Saw
- 8 Cutting Out Circles by Drilling and Jigsawing
- 9 Cutting a Circle Freehand with a Jigsaw
- 10 Choosing the Best Method by Material
- 11 Tips for Clean, Accurate Circle Cuts
- 12 Achieving Precise Dimensions
- 13 Safety Tips for Cutting Circles
- 14 Conclusion
Can You Cut a Circle Without a Bandsaw?
The quick answer is yes, absolutely! While a bandsaw makes cutting circles easy with its continuous spinning blade, there are several other power tools and even manual options that allow you to cut circles or disks accurately.
Here are some of the most common options for cutting circles without a bandsaw:
- Jigsaw
- Circular saw with guide
- Hole saw or fly cutter
- Router with trammel
- Scroll saw
- Coping saw
- Drill multiple holes and use jigsaw to cut out
- Trace and use jigsaw freehand
The choice depends largely on the thickness and size of the material you need to cut, along with the desired precision. We’ll go through each of these options in more detail throughout this article.
Cutting a Circle with a Jigsaw
One of the simplest and most accessible tools for cutting circles is a standard jigsaw. While it won’t produce the smoothest cut, a jigsaw can cut circles or disks in wood, plastic, metal, and even ceramic tile.
Here are some tips for cutting circles with a jigsaw:
- Use a compass to trace your circle onto the material. Make the circle slightly larger than your finished size.
- Drill a starter hole inside the traced circle. This gives the jigsaw blade an entry point.
- Insert the jigsaw blade into the starter hole and begin cutting just inside the line.
- Take slow, smooth passes letting the jigsaw do the work. Don’t force or twist the jigsaw.
- Use a fine-tooth blade for tighter curves and a smooth cut.
- Support the underside of the material as you cut to prevent splintering and vibration.
- Finish the cut slightly outside the line, then sand to your final dimensions.
It takes practice to cut a clean circle with a jigsaw freehand. Using a circular guide can help immensely for accuracy. Here are two easy circular guides you can make for jigsawing circles:
Circular Jigsaw Guide with Nail
- Hammer a nail through a piece of scrap at the desired radius from the edge.
- Clamp the guide to your workpiece so the nail is centered on your circle.
- Cut along the edge of the guide with your jigsaw.
Notched Straightedge Guide
- Cut notches along one edge of a straight piece of scrap at regular intervals slightly less than your desired radius.
- Line up the notches over the center point of your circle.
- Cut along the opposite edge of the guide with your jigsaw.
These simple jigs ensure your circles are cut evenly. Always cut slightly outside your line to allow for final sanding to precise dimensions.
Cutting Circles with a Circular Saw and Guide
For cutting larger circles or arcs in thicker material like plywood or lumber, a circular saw with an improvised guide can do the job cleanly.
Here’s how to cut circles with a circular saw and guide:
- Make or purchase a circular saw guide track wider than your material thickness.
- Adjust the saw blade depth to no more than 1/4″ deeper than the material.
- Mark the circle center point on the material.
- Position the guide so the saw base will travel in an arc around the circle center.
- Clamp securely and check that the saw blade aligns with the waste side of the cut line.
- Make incremental cuts, pivoting the saw along the guide into the material.
- Leave the center attached until the last pass to prevent breaking.
With care, this method can achieve smooth, accurate curved cuts using a standard circular saw. A shorter saw guide works best for tighter radii. Let the saw cut through the material without forcing to ensure clean cuts.
Cutting Circles with a Hole Saw
Hole saws, also called fly cutters, are an easy way to cut a circle in thinner materials with a drill. Available in many sizes, hole saws have a detachable pilot bit in the center and serrated edge for cutting. They excel at boring clean circular holes in materials under 2″ thick.
Follow these steps when using a hole saw:
- Mark the center of your desired hole on the material.
- Use a center punch or awl to make an indentation at the center point.
- Clamp the material securely or use a drill press if cutting through thicker material.
- Select the appropriate size hole saw for your circle.
- Insert the pilot bit into the hole saw arbor.
- Align the hole saw over your center point and begin drilling slowly.
- Make sure the hole saw is perpendicular to the material as you cut.
- Let the tool do the cutting, don’t force or twist the hole saw.
- Use light oil as lubricant when cutting metal.
The clean bored holes from a hole saw are perfect circles. With multiple holes cut tangent to one another, you can create crescent moon shapes and other circular patterns.
Cutting Circles with a Router
For precise curved cuts, a router and trammel setup is hard to beat. The trammel acts as a pivoting guide arm that allows the router to be moved in a perfect radial path. This achieves flawless circles with a clean, routed edge.
Here are some tips for cutting circles with a router:
- Construct a trammel arm with two pivot points equal to the circle’s radius.
- Mount the trammel horizontally to a worksurface with one pivot over the circle’s center.
- Attach your router with a straight bit to the trammel arm.
- Adjust the router cut depth for a shallow pass.
- Pivot the router around both points of the trammel arm to cut the full circle.
- Make multiple light passes to cut progressively deeper.
With care, router trammels can cut circles of any size to a high level of accuracy. A well-made trammel and sharp bit will produce an exceptionally smooth cut.
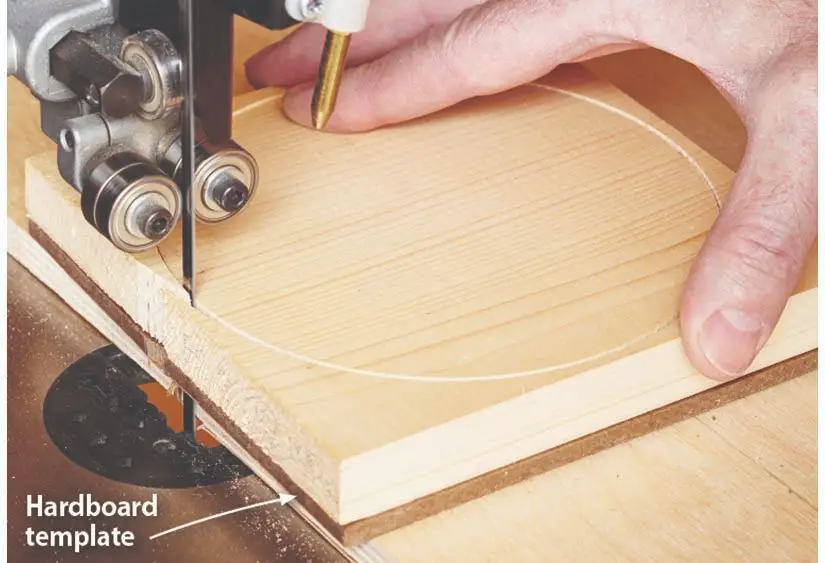
Cutting Circles with a Scroll Saw
A scroll saw is designed for making detailed curved cuts in wood. With a very thin, short blade, the scroll saw can maneuver tight radii with ease. This makes scroll saws ideal for fretwork, inlays, and other intricate woodworking projects.
Follow these guidelines when using a scroll saw to cut circles:
- Select a narrow blade with fine teeth for tight curves.
- Outline the circle on your wood using a template or compass.
- Affix the wood to the saw table, lining up the blade over the circle center.
- Adjust the blade perpendicular to the table and hold the wood flat.
- Cut slowly along the circle line without twisting the wood.
- Make relief cuts just outside the line to allow freer blade movement.
- Back up the wood frequently to clear sawdust.
Scroll saws can achieve intricate curved cuts in wood up to 2 inches thick. Use a steady hand and let the blade cut smoothly for best results.
Cutting Circles with a Coping Saw
For cutting shapes in thinner materials, a coping saw is ideal. The thin blade removes material on the pull stroke and can cut precise curves with practice. It’s perfect for cutting circles in wood, plastic, or metal under 1 inch thick.
Here are some tips when using a coping saw for circles:
- Select a blade with a fine tooth pattern to reduce tearing.
- outline where to cut and clamp your material securely.
- Keep the blade perpendicular to the cutting line.
- Cut on the pull stroke and release pressure on the push.
- Pivot the material rather than twisting the saw frame.
- Cut just outside your line to allow for final sanding.
- Back up frequently to clear sawdust and prevent binding.
It takes practice to master a coping saw’s narrow blade. Go slow, letting the blade do the cutting. Precise circles are possible in thin materials with good technique.
Cutting Out Circles by Drilling and Jigsawing
For occasional circle cutting in thick material, try this quick hybrid approach using just a drill and jigsaw:
- Outline your circle dimensions on the material.
- Drill a series of closely spaced holes just inside the line using a drill bit slightly narrower than your jigsaw blade.
- Insert the jigsaw blade into one hole and cut along the web between holes to the next.
- Work clockwise around the circle to cut between the holes.
- Remove the center plug and smooth the rough edge with a file and sandpaper.
With careful hole placement, you can cut surprisingly clean circles this way. It works for occasional circle cutting when you don’t need perfection.
Cutting a Circle Freehand with a Jigsaw
For quick, rough circles, carefully tracing and cutting freehand with a jigsaw can work in a pinch. Here are some pointers:
- Use a fine-tooth blade and set a low orbital speed.
- Trace the circle lightly. Don’t cut exactly on the line.
- Drill a starter hole inside the circle.
- Cut slowly and steadily just outside the line.
- Keep the base plate flush against the material.
- Use a sanding block to smooth and shape the final edge.
Freehand jigsawing requires a very steady hand and patience. It inevitably produces imperfections but can work for informal projects or temporary circles.
Choosing the Best Method by Material
Certain circle cutting tools and methods work better with specific materials. Here are some recommendations on the best circle cutting approaches by material type:
Cutting Circles in Wood
- Hole saw or fly cutter for small diameters
- Jigsaw with circular guide
- Router with trammel
- Scroll saw
- Coping saw for thin wood
Cutting Circles in Plastic
- Hole saw or fly cutter
- Jigsaw
- Scroll saw
- Coping saw
Cutting Circles in Metal
- Hole saw or fly cutter with lubricant
- Jigsaw with metal-cutting blade
- Cut-off wheel on an angle grinder
- Plasma cutter
Cutting Circles in Tile or Masonry
- Specialized masonry hole saw
- Angle grinder with diamond tile blade
- Jigsaw with carbide grit blade
- Drill holes and chisel out circle
Consider the properties of the material along with thickness and desired precision when choosing a circle cutting method.
Tips for Clean, Accurate Circle Cuts
Perfect circles require careful technique and practice no matter the tool. Here are some universal tips for getting the best results:
- Use a compass and take time marking the circle accurately.
- Make relief cuts to corners to allow the blade to turn tighter radii.
- Cut slightly outside the line then sand or file to finished size.
- Work slowly and let the tool do the cutting without forcing.
- Keep the tool moving steadily without stopping mid-cut.
- Use backing support on the underside to reduce splintering and vibration.
- Apply lubricant when cutting metal to keep the blade cool.
- Use fine-toothed blades and change blades when dull.
- Make multiple light passes when routing for a clean cut.
Patience and care pays off for clean curved cuts. Rushing the process will show in uneven circles. Take your time and let the tool cut properly.
Achieving Precise Dimensions
Cutting a perfect circle to precise dimensions requires careful layout and measurement. Here are some techniques to ensure accuracy:
- Use a beam compass for large radii or trammel points for small radii when marking circles.
- account for the kerf width of the blade when tracing circle dimensions.
- Use a circle cutting jig or straightedge guide whenever possible.
- Verify dimensions often with calipers and adjust your cut accordingly.
- For rope molding, cut undersized then creep up on the final diameter.
- When routing, make the final pass climb cutting to avoid tear out.
- Use a sanding block or file to fine tune the edge to your measurements.
Checking progress frequently is key to achieving precision fit. A perfectly circular cut takes both tool control and careful attention to dimensions.
Safety Tips for Cutting Circles
As with any power tool operation, safety should be the top priority. Here are some important safety guidelines for circle cutting:
- Use eye and ear protection when running any power tool.
- Ensure the material is securely clamped or held in place.
- Keep hands clear of the blade and watch hand placement to avoid kickback.
- Unplug tools before changing blades or making adjustments.
- Avoid awkward hand positions that reduce control.
- Support large panels near the cut to prevent tipping from the torque.
- Use push sticks and maintain proper stance to handle kickback force.
- Make relief cuts in stages to prevent binding on the blade.
Don’t rush any cutting operation and stop to reposition if you feel unsafe. Staying in control of the tool and material is the best way to prevent accidents when circle cutting.
Conclusion
From simple jigsaws to advanced router trammels, there are many effective ways to cut circles without a bandsaw. Careful use of guides, templates, and the right blade for the material are key for clean, accurate cuts. With the proper tools and safe operation, precision circles can be made using standard workshop equipment. Just take your time, use good technique, and let the tool do the cutting.