Cutting an inspection hole in drywall allows you to access areas behind the wall without removing large sections of drywall. This can be useful for inspecting electrical wiring, plumbing, insulation, or structural components inside the wall. An inspection hole is often circular or square in shape and just large enough to peek inside the wall cavity.
Page Contents
- 1 When would you need to cut an inspection hole?
- 2 What tools and materials do you need?
- 3 How big should an inspection hole be?
- 4 Where should you cut an inspection hole?
- 5 How do you cut a round inspection hole?
- 6 How do you cut a square inspection hole?
- 7 How can you trace a round hole?
- 8 Can you cut an inspection hole with a drill?
- 9 What mistakes should you avoid when cutting inspection holes?
- 10 What’s the best way to patch an inspection hole?
- 11 Conclusion
When would you need to cut an inspection hole?
Here are some common reasons you may need to cut an inspection hole in drywall:
- Inspecting electrical wiring – If you need to check for wire damage, replace wires, or add new wiring.
- Inspecting plumbing – To check for leaks, clogs, or to access pipes for repairs.
- Checking insulation – To verify insulation coverage and depth inside the wall cavity.
- Inspecting framing – To look for structural issues like sagging headers or compromised fireblocking.
- Locating wall studs – Opening a small hole can help you find stud locations.
- Installing wall anchors – To see inside the wall before drilling and anchoring into a stud.
An inspection hole allows you to diagnose and resolve issues without damaging large sections of drywall.
What tools and materials do you need?
Cutting a clean, rounded inspection hole requires the right tools and supplies:
- Drywall saw – A drywall saw with a rounded blade makes smooth curved cuts.
- Keyhole saw – Allows you to start an inspection cut from the middle of the wall.
- Drywall circle cutter – A circle cutter kit lets you trace perfect circles.
- Jab saw – Great for accessing tight spots and finishing tight rounded corners.
- Utility knife – Useful for scoring the drywall paper before cutting the gypsum underneath.
- Drill – For drilling pilot holes and accessing confined spaces.
- Flashlight – To illuminate the work area and see inside the hole.
- Stud finder – Helps avoid cutting into framing or utilities.
- Tracing template – A template helps trace uniform holes.
- Eye protection – Safety glasses prevent eye injuries from debris.
- Dust mask – Reduces inhalation of drywall dust.
Having the right tools for the job will make cutting inspection holes faster, safer, and provide cleaner results.
How big should an inspection hole be?
An inspection hole should be large enough to accomplish the intended purpose, but as small as possible to minimize drywall repair later. Here are some typical inspection hole sizes:
- 4-6 inches – Good size for quick visual inspections.
- 8-12 inches – Allows you to insert a small camera into the hole.
- 14 inches or larger – Allows access for your hands to reach inside the wall cavity.
The location may also dictate size. If you need to avoid wiring, plumbing, or framing members, a smaller hole placed carefully may be required. Consider starting with a smaller hole, then enlarging as needed.
Where should you cut an inspection hole?
Ideal inspection hole placement depends on your specific needs:
- Near the issue – Place the hole as close as possible to the location you need to access. This minimizes intrusion into the wall cavity.
- In a concealed spot – Cut the hole where it will be hidden by furniture or out of sight. Once repaired, the hole will be less noticeable.
- Low on the wall – Keeping holes near the floor reduces cutting into utilities that run higher up on walls.
- Away from framing – Use a stud finder to avoid cutting into framing. Studs often have utilities attached.
- Higher than outlets – Electrical boxes usually extend 14-18 inches above outlets. Keep holes above this range.
Careful hole placement will make your inspection easier while also simplifying patching later on.
How do you cut a round inspection hole?
Follow these key steps to cut a clean, round inspection hole:
- Map utilities – Use a stud finder or tap along the wall to find potential wiring, plumbing, or framing.
- Select location – Choose an optimal hole location based on room layout, furnishings, and the area needing access.
- Mark the hole – Use a template or trace a circle the desired size on the drywall.
- Score the drywall – Use a utility knife to cut through the outer paper layer along the circle line.
- Start cutout – Drill pilot holes or use a keyhole saw to pierce the drywall at the midpoint of the circle.
- Make cutout – Use a drywall saw or circle cutter to cut along the circular line through the wallboard.
- Inspect – Carefully remove the cutout section of drywall and shine a light inside the cavity.
- Complete task – Do the needed electrical, plumbing, or structural work inside the wall.
- Replace drywall – Put the round drywall piece back into the hole when finished.
Follow these steps carefully to achieve a clean opening with rounded edges. Rounded holes are easier to patch later on.
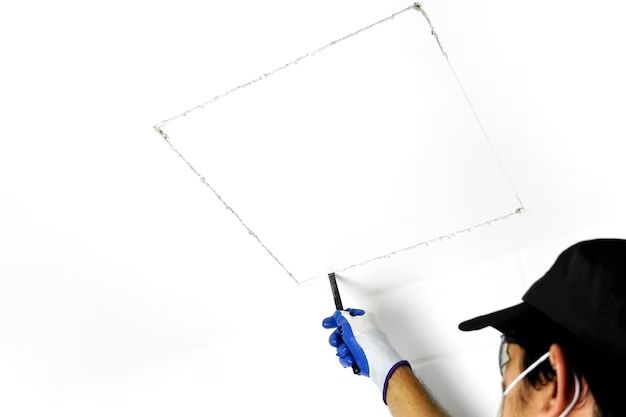
How do you cut a square inspection hole?
Square inspection holes allow full access to insert your hands or tools into a wall cavity. Follow these steps:
- Map the area – Identify potential obstructions like wiring, pipes, or framing inside the wall space.
- Choose location – Pick an area free of utilities where you need access.
- Mark opening – Measure and mark cutting lines for a square hole. Typically 8×8 inches or larger.
- Score drywall – Use a utility knife to cut through the outer paper layer along the cutting lines.
- Cut drywall – Use a drywall saw to cut along the lines through the inner gypsum layer.
- Inspect – Remove the cutout drywall and shine a light inside to clearly see the space.
- Complete work – Do the needed electrical, plumbing, framing, or insulation work inside the bay.
- Replace drywall – Put the square drywall piece back into the hole when finished.
Make sure to keep cut lines straight and square. This will make drywall patching easier.
How can you trace a round hole?
Tracing a perfectly round hole is easy with the right tools:
- Large can or bucket – Trace around the circumference of a canned good, bucket, or other cylindrical object.
- Round templates – Use cardboard or plastic templates with common hole sizes marked.
- Compass – Adjust a compass to your desired radius and scribe a circle into the drywall.
- String and pencil – Hammer a nail in the wall, tie string to desired radius length, attach a pencil, and pivot to draw a circle.
- Hole saw – Press the tip of a hole saw into the wall and rotate to imprint a circular line.
No matter the method, make sure to trace a complete circle before attempting to cut. This will provide clean, rounded edges for a professional look.
Can you cut an inspection hole with a drill?
While it’s possible to cut a crude inspection hole with just a drill, this method has significant downsides:
- Hole edges will be jagged and irregular.
- Likely to damage wall studs, wiring, or plumbing.
- Drywall damage will be larger than necessary.
- Difficult to get clean openings into confined spaces.
- Excessive drywall dust and debris.
- Hole will be very difficult to patch neatly.
Specialized drywall saws are engineered to cut the paper and gypsum layers cleanly and efficiently. For best results, use the proper drywall tools.
What mistakes should you avoid when cutting inspection holes?
Here are some common mistakes to avoid with inspection holes:
- Cutting into concealed utilities – Always thoroughly map for wiring, plumbing, etc first.
- Making excessively large holes – Keep holes as small as possible.
- Forget to mark stud locations – This can lead to unsafe subsequent drilling/nailing.
- Failing to account for wall thickness – Adjust hole size based on single vs double layer drywall.
- Cutting into fireblocking – This compromises fire safety.
- Creating irregular holes – Use templates and tracers for clean openings.
- Leaving debris inside walls – Vacuum thoroughly before closing up.
- Not replacing cutouts – Drywall pieces should fit right back into place.
A bit of care and preparation goes a long way to prevent problems down the road.
What’s the best way to patch an inspection hole?
Follow these tips for seamlessly patching inspection holes:
- Save cutout drywall – Use the original drywall circle or square when possible.
- Butter drywall edges – Spread drywall joint compound along the backside edges.
- Secure drywall – Use drywall screws to pull the patch piece tight to the existing wall.
- Apply tape – Place paper drywall tape over the seams and embed into compound.
- Feather compound – Spread widening layers of joint compound over the tape for a smooth blend.
- Sand between coats – Lightly sand each coat before applying the next layer.
- Match texture – Duplicate the surrounding wall texture and paint sheen.
Take care to minimize visible seams and make texture as consistent as possible. With attention to detail, repaired inspection holes can be nearly invisible.
Conclusion
Cutting well-placed inspection holes provides necessary access behind walls while minimizing damage and repairs. With the right tools and techniques, inspection holes can be made quickly and cleanly. Pay close attention to hole location and size based on your specific needs. Then utilize specialized drywall saws to get professional looking rounded or square openings. Use care when patching to match surrounding drywall seamlessly. With some practice and care, inspection holes can be an easy process that prevents excessive demolition and drywall replacement.