Cutting drywall around outlets is a crucial part of the drywall installation process. Properly cutting around outlets ensures the outlets are accessible, the drywall is securely mounted, and the installation has a professional finish. While cutting drywall can be challenging for beginners, following some simple steps makes cutting outlet holes much easier.
Page Contents
- 1 What Tools Do You Need to Cut Drywall Around Outlets?
- 2 How To Cut Outlet Holes in Drywall
- 3 Cutting Drywall for Duplex Outlets
- 4 Cutting Drywall for Light Switches
- 5 Cutting Electrical Box Holes through Wall Studs
- 6 Professional Tips for Cutting Drywall Openings
- 7 How to Patch Small Drywall Holes Around Outlets
- 8 Conclusion
What Tools Do You Need to Cut Drywall Around Outlets?
Having the right tools makes cutting drywall around outlets safer and easier. Here are the basic tools you need:
- Utility knife – A sharp utility knife with fresh blades cuts cleanly through drywall.
- Keyhole saw – The pointed end of a keyhole or drywall saw easily cuts outlet holes.
- Drywall rasp – A drywall rasp files down rough edges left from cutting.
- Drywall square – A square helps mark straight, accurate lines.
- Pencil – A pencil marks cutting lines on the drywall.
- Safety gear – Wearing goggles, gloves, and a mask prevents dust inhalation.
You may also want a drywall T-square, small pry bar, and drywall screws on hand. Having these basic tools nearby makes it much simpler to accurately and cleanly cut outlet holes.
How To Cut Outlet Holes in Drywall
The technique for cutting electrical outlet holes in drywall involves marking, scoring, cutting, and filing the hole. Here are the steps:
- Mark the outlet location – Hold the drywall square against the outlet box and trace lines to mark the cutout size, usually 2-3/4″ wide by 4-1/2″ tall. Mark the height about 1/8″ below the outlet box.
- Score the outline – Use the utility knife to lightly score cut lines on the front and back paper of the drywall. Don’t try cutting through just yet.
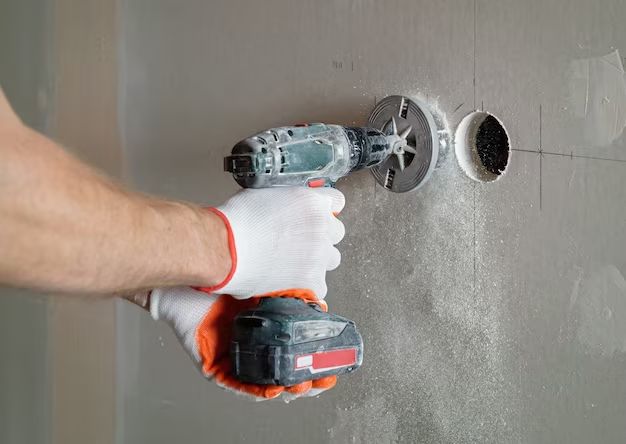
- Cut the hole – Carefully cut along the scored lines using the keyhole saw. Cut at a 45° angle through the paper into the gypsum core. Cut out the hole working from the center out.
- File the edges – Use the drywall rasp to file off any paper burrs or rough edges around the hole.
- Test fit – Set the drywall sheet and confirm the outlet box fits neatly into the cutout hole.
By scoring the outline before cutting all the way through, you reduce the risk of tearing the drywall paper. Take care when cutting near the corners of the hole. Work slowly to avoid over-cutting. If the hole ends up slightly small, re-insert the keyhole saw and gently cut outward to enlarge it. Use a utility knife or rasp to fine-tune the hole size as needed.
Cutting Drywall for Duplex Outlets
When an electrical box contains a duplex outlet with two receptacles, the drywall needs a larger rectangular cutout. The steps are basically the same:
- Mark the cutout area 4-3/4″ wide by 4-1/2″ tall. Allow 1/8″ below the box.
- Score the paper around this larger rectangle.
- Cut out the hole with a keyhole saw.
- File the opening smooth and straight.
- Test fit the drywall over the box.
For a duplex outlet, it is especially helpful to first cut the corners diagonally at the opening. This prevents tearing the paper at the corners. Cut small 45° triangles at each corner before cutting out the sides.
Cutting Drywall for Light Switches
Light switch boxes also install behind drywall. The process for cutting them out is the same:
- Mark the opening at 2-3/4″ wide by 4-1/2″ tall. Allow 1/8″ below the box.
- Score around this rectangle lightly.
- Cut out the hole starting from the center. Cut corners diagonally first.
- File the opening and check that it fits correctly.
The main difference is marking the height of the opening at 4-1/2″. Hold the drywall square against the switch box to outline the size needed. For dual or tandem switches, make the hole 6-3/4″ wide.
Cutting Electrical Box Holes through Wall Studs
Sometimes electrical boxes align with wall studs. You cannot cut through the stud to install the drywall. There are two ways to handle this:
- Notch the stud – Carefully cut away part of the stud using a jigsaw to open up space for the electrical box. Locate the stud first and notch it before installing drywall.
- Install a recessed box – Electrical code requires a minimum 1/4″ gap between a box and stud. Use a recessed box for stud placements. The box will sit back farther into the stud bay for drywall clearance.
Both options allow mounting the drywall while leaving proper clearance for the box location. Cutting the drywall is the same, just be cautious when cutting near a stud.
Professional Tips for Cutting Drywall Openings
Here are some helpful professional tips to get clean, accurate cuts around electrical boxes when installing drywall:
- Use sharp utility knife blades. Dull blades drag and tear drywall paper.
- Change knife blades often for best control.
- Score cut lines multiple times before cutting all the way through.
- Cut outlets before installing drywall for greater control.
- Back-cut electrical boxes 3/8″ for proper drywall clearance.
- Mark openings using the actual boxes as a guide.
- Cut holes 1/8″ below electrical box edges.
- Keep keyhole saw blades perpendicular to the wall surface.
- Rasp cut edges smooth with firm yet light pressure.
- Enlarge tight openings carefully to avoid over-cutting.
Remember that rushing leads to uneven cuts and damaged drywall. Take your time and make several light passes when scoring and cutting the drywall. Check each opening to ensure outlets and switches fit correctly. Neat, properly sized holes give your drywall application a quality finish.
How to Patch Small Drywall Holes Around Outlets
Despite your best cutting efforts, small gaps or openings can still occur around outlets. Patching them neatly is crucial for preventing cracks and maintaining fire safety. Here is how to patch small drywall holes:
- Cut a drywall patch slightly larger than the hole.
- Bevel the edges of the patch so it sits flush.
- Apply drywall joint compound around the hole edges.
- Position the patch over the hole and press it into the compound.
- Apply more compound over the patch seams.
- Feather and smooth the compound when dry.
- Prime and paint once dry.
Using joint tape over the patch as you apply compound gives added strength. For large gaps, insert blocking behind the drywall first to support the patch area. Allow compound to fully dry between coats. Lightly sanding between coats ensures a smooth finish.
Conclusion
Learning how to cut drywall openings correctly takes some practice, but the techniques are straightforward. Having sharp tools, tracing outlines accurately, and taking your time are the keys to success. Test fit all openings before mounting drywall sheets so you can adjust sizing as needed. Patience and care yields attractive electrical boxes that will look great once trim plates and covers are installed.