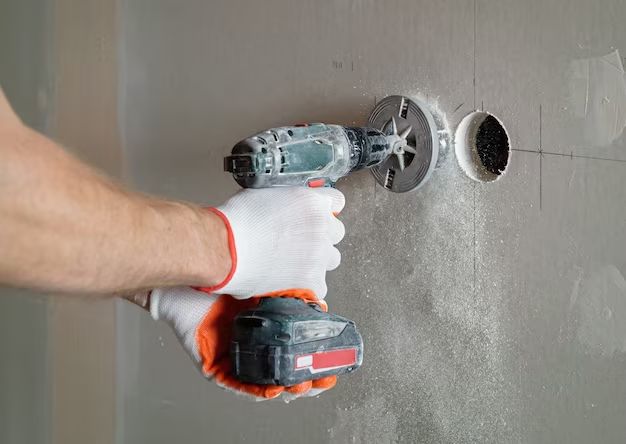
Cutting holes in drywall for electrical outlets is a common task for DIYers and electricians. Properly cutting these holes ensures the outlets will fit snugly and provide a safe installation. While it may seem intimidating, cutting outlet holes is easy with the right tools and technique.
In this comprehensive guide, we will cover everything you need to know about cutting holes in drywall for electrical outlets. We will discuss the tools needed, how to locate the studs, methods for cutting the holes, installing outlet boxes, and tips for a smooth installation. With these steps, you can securely mount outlets into any wall.
Page Contents
Tools Needed
Cutting clean holes in drywall requires just a few essential tools:
- Stud finder – For locating wood studs behind the drywall
- Pencil or marker – To mark the hole locations
- Drywall saw – A fine-toothed saw for clean cuts in drywall
- Utility knife – For scoring the drywall surface before cutting
- Drill/driver – For installing the outlet boxes
- Drywall screws – To secure the boxes
- Protective gear – Dust mask, gloves, eyewear
These basic tools are all that’s needed for the job. Having the right supplies makes cutting outlet holes quick and easy.
Find the Studs
Before cutting, the first step is locating the wood studs behind the wall. Outlets should always be mounted securely into the studs. Here’s how to find them:
- Take your electronic stud finder and run it vertically along the wall at your desired outlet location. Note where it detects studs.
- Make small marks with a pencil at the edges of each stud the finder detects.
- To double check, knock gently along the wall and listen for a solid “thud” sound at the stud locations.
- Use your pencil to connect the stud edges and mark the overall position.
Be sure to locate two adjacent studs to center the outlet box directly over. Having the outlets aligned with the hidden studs provides the necessary strength and support.
Methods for Cutting Outlet Holes
With the studs marked, you’re ready to cut the outlet holes. There are two main methods: using a drywall saw or a rotary tool.
Drywall Saw
The traditional method uses a drywall saw with fine teeth, specially designed for clean cuts:
- Mark the hole using your pencil, approximately 4 inches vertically and 2.5 inches wide.
- Use a utility knife to lightly score the outline of the holes. This helps prevent cracking as you cut.
- Position the drywall saw inside the outline and carefully cut along the lines.
- Make additional cuts inside the hole outline to remove the drywall. Saw slowly to avoid cracks.
- Break off the cutout drywall with pliers and smooth the edges with sandpaper.
Cutting the hole this way provides a clean, professional result. Just take care to cut slowly and carefully follow the hole marks.
Rotary Tool
A quicker method uses a rotary tool like a RotoZip:
- Mark the desired hole location with a pencil.
- Place the RotoZip bit at one corner of the outline and plunge into the drywall.
- Slowly cut along the marks til you reach the starting corner.
- Make another cut to remove the outlet hole section.
- Smooth and clean up the edges with sandpaper.
Power tools allow cutting the drywall hole much faster. However, special care must be taken to control the tool and avoid cracking around the hole.
Installing the Outlet Box
Once the hole is cut, it’s time to install the outlet box:
- Feed the electrical wires through the outlet box.
- Position the box in the hole, centered on the stud marks.
- Use a level to ensure the box is plumb and properly oriented.
- Pre-drill screw holes through the box into the stud.
- Drive drywall screws through the box into the stud to secure everything tightly.
Attaching directly to the stud provides sturdy support for the receptacle. Take care not to over-tighten the screws to prevent cracking the drywall around the box.
Tips for Smooth Installation
Follow these tips for clean, professional results:
- Cut holes 1/8″ larger than the outlet box size to allow room for adjustments.
- Wear safety glasses and a dust mask – drywall dust gets everywhere!
- Double check for wires or pipes before cutting into any wall.
- Use sharp blades and take it slow for clean cuts.
- Secure boxes solidly to studs to support plugs and prevent wobbling.
- Clean up all drywall dust before continuing with the outlet installation.
Taking a careful, methodical approach ensures your outlets will mount cleanly and securely inside the walls.
Conclusion
While cutting outlet holes may seem tricky, it just takes the right tools and techniques for a professional result. By marking studs, carefully cutting the holes, and solidly mounting the boxes, you can make outlets look like they came installed with the walls. Just be sure to wear safety gear, measure twice, and cut once.
We’ve covered the complete process including:
- Gathering drywall cutting tools like a stud finder, saw, and utility knife.
- Locating and marking the wood studs in the wall.
- Using a drywall saw or rotary tool to neatly cut the holes.
- Installing outlet boxes securely into the studs.
- Helpful tips for clean openings without cracks or dust.
Now you have all the information to safely, confidently cut outlet holes. So grab those tools and start prepping for your next wiring project!
