Mosaic tiles can add a unique and beautiful touch to any home decor project. While mosaic tiles are often thought of as tricky and requiring special tools, there are actually several easy ways to cut mosaic tiles yourself at home. With some basic supplies and a bit of practice, you’ll be cutting mosaic like a pro in no time.
In this comprehensive guide, we will cover everything you need to know about how to cut mosaic tiles at home. We’ll discuss the basic supplies you need, the different cutting methods, how to make precise cuts, as well as grouting and installing your finished mosaic tiles.
Page Contents
What Supplies Will You Need?
Cutting mosaic tiles doesn’t require any fancy tools. Here are the basic supplies you’ll need:
- Mosaic tiles – Pick up a sheet of mesh-backed mosaic tiles from any home improvement store. The mesh backing helps hold the small tiles in place for easier cutting.
- Nippers – Small clipper pliers designed to cleanly clip away tile.
- Wet saw – A compact tabletop saw with a diamond blade designed to cut tile and stone. Make sure it has a tray to catch water.
- Glass cutter – If cutting glass mosaic tiles, you’ll need a small handheld glass cutter.
- Dust mask – To protect yourself from inhaling tile dust when cutting.
- Marking pen – To mark cutting lines on tile or mesh backing.
- Ruler – For measuring and marking cut lines.
- Grout float – For applying grout between mosaic tiles.
- Sponge – For wiping away grout residue.
These simple tools are all most DIYers will need to cut mosaic tiles at home. You may also want to pick up some extra protective equipment like goggles and gloves. Now let’s get into the different cutting methods!
Nipper Method
One of the easiest ways to cut mosaic tiles at home is by using nippers. Nippers provide precision control for cleanly nipping away small sections of tile.
How to Use Nippers to Cut Mosaic Tiles:
- Mark your cut line on the paper or mesh backing using a ruler and marking pen.
- Position the nippers so one jaw lines up precisely with the cut line.
- Squeeze the nippers firmly to nip away a small section of tile along the cut line.
- Rotate the nippers around the line, nibbling away tile with several small nips.
- Go slowly and nibble patiently for a clean edge along the cut line.
Nippers won’t work for making long cuts or curves. But for small precision cuts on straight lines, nippers provide reliable control. Practice on tile scraps until you get the hang of the nibbling motion.
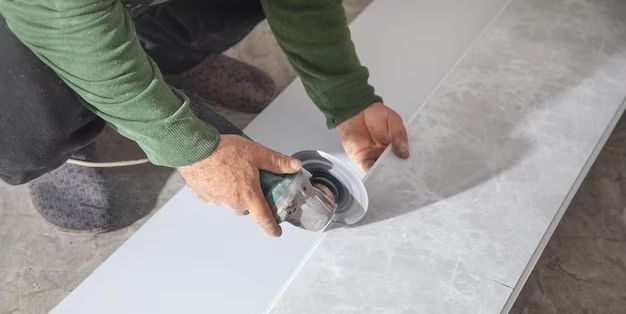
Wet Saw Method
For longer, more complex cuts, a wet saw is the best tool for cutting mosaic tiles at home. The diamond blade and water tray prevents dust and overheating while cutting.
How to Cut Mosaic Tiles Using a Wet Saw:
- Mark your cut lines – Use a ruler and marker to draw lines on the mesh where you want to cut.
- Fill the tray – Fill the water tray to submerge the tile while cutting.
- Align and cut – Align your straight edge or mark to the blade and gently push the tile through the blade along your mark.
- Make curved cuts – For curves, gently pivot the tile into the blade while moving along the line.
- Clean up – Rinse tiles when finished and wipe down the saw.
Go slow with a steady hand so the blade cleanly cuts along the lines. Let the blade do the work without excessive pressure. When cutting thicker tiles, you may need to flip and repeat on the other side.
Glass Cutter Method
For glass mosaic tiles, a glass cutter is the best tool to get clean, precise cuts. Glass cutters have small cutting wheels that score the glass surface.
How to Cut Glass Mosaic Tiles with a Glass Cutter:
- Mark your cut line – Use a straight edge and marker to draw your cutting line.
- Score the glass – Position the cutter’s wheel right over the line and drag firmly along the mark. Press hard enough the score the surface but not completely cut through.
- Snap along the score – Position your thumbs along the score line with fingers spread out. Firmly press down to snap the glass along the scored line.
- Smooth the edges – File the edges smooth with sandpaper or a rubbing stone.
Always wear gloves when handling scored glass to avoid cuts. A perfectly straight score line is key for the glass to have a clean snap. Practice scoring on scraps until you get clean breaking cuts.
Tile Nipper Method
For irregular cuts, tile nippers can nibble away small sections of a mosaic tile sheet. Tile nippers have a flat cutting jaw, unlike the pointed nippers used for detail work.
How to Use Tile Nippers to Cut Mosaic Sheets:
- Mark the outline – Trace the shape or line where you want to cut the sheet.
- Nibble along the line – Position the nippers’ jaw right over the line and gently squeeze to nibble off a small section, working gradually along the line.
- Cut out the shape – Nibble away all sections inside the marked outline to cut out the shape.
- Clean up rough edges – Use sandpaper or a rubbing stone to smooth any rough edges.
Take it slow and steady, nibbling off small bits at a time for best control. Tile nippers take practice to handle properly, so try them out on scrap pieces first.
Cutting Tips and Tricks
Follow these helpful tips when cutting mosaic tiles for the cleanest cuts:
- Use a new sharp blade – Dull blades can chip, crack, or fray tiles.
- Cut with water – Water prevents dust and overheating when wet sawing.
- Mark clearly with pencil – Dark marker ensures lines are visible.
- Cut on a level surface – Any tilt causes crooked cuts.
- Support larger sheets – Don’t let sheet bend or torque when cutting.
- Move slowly and steadily – Rushed cuts look sloppy.
- Start cuts from the front – Cut into the finished side first for clean entry/exit cuts.
- Practice first! – Get a feel on scraps before cutting final pieces.
Follow these tips when using any mosaic tile cutting method for professional looking results. With practice, you’ll be able to perfectly cut mosaic tiles for any project.
Grouting Your Mosaic Tiles
Once your mosaic tiles are cut, it’s time to install them in your project and apply grout. Here are some tips for grouting mosaic tiles:
- Apply tile adhesive – Stick tiles to the surface using tile mastic or thinset mortar adhesive.
- Mix grout – Mix grout powder with water to a thick peanut butter consistency.
- Force grout into gaps – Press grout firmly between tiles with a grout float or rubber grout tool.
- Wipe away excess – Drag a damp sponge diagonally across tiles to clean grout residue.
- Blurring effects – For a mottled look, wipe a damp sponge lightly across the tiles.
- Seal when dry – Apply grout sealer once fully cured for stain protection.
Applying grout takes some finesse. Go slowly and wipe carefully to avoid pulling tiles out of place. Once your grout has cured, your mosaic tiles are ready to enjoy!
Conclusion
While cutting mosaic tiles may seem daunting, with the right tools and techniques, you can easily cut mosaic tiles yourself at home. Here are some final tips to recap how to cut mosaic tiles:
- Use nippers for detail cuts, a wet saw for long cuts, and a glass cutter for glass.
- Mark all cut lines clearly and cut on a flat, stable surface.
- Cut slowly and steadily for clean edges. Let the tool do the work.
- Smooth rough edges with sandpaper or a rubbing stone.
- Apply grout carefully between finished tiles and wipe cleanly.
With practice and the right approach, you’ll be able to cut mosaic tiles like a pro. So don’t be afraid to try cutting mosaic tiles yourself for your next home project!