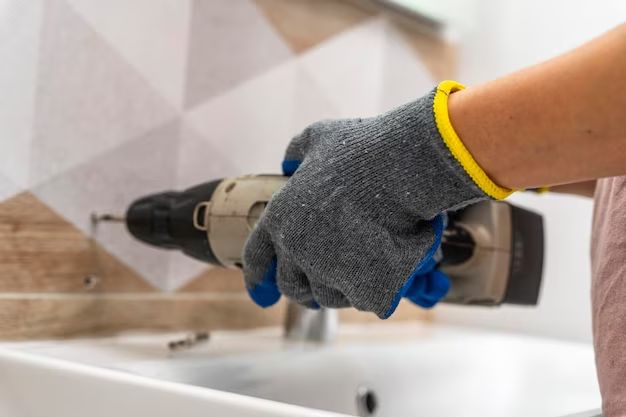
Drilling holes in tile can be tricky. If done incorrectly, the tile can crack, chip or break altogether. However, with the right tools, technique and preparation, holes can be drilled into tiles successfully. The key things to consider are: using the appropriate drill bit, going slowly, using water as a coolant/lubricant, and placing tape over the area to be drilled.
Page Contents
What You’ll Need
- Ceramic tile bit – Use a diamond-grit ceramic drill bit made specifically for drilling through tile. Carbide bits for masonry are more likely to crack the tile.
- Electric drill – A regular electric drill on a low setting will work. Variable speed is best to start slowly and increase speed as you drill.
- Masking tape – To cover the area being drilled and prevent cracks from spreading.
- Water – To keep the tile drill bit cool during drilling to prevent overheating.
- Rag – For wiping away excess water and slurry during drilling.
- Safety glasses – For eye protection from debris.
How to Drill into Tile Without Breaking
Here are the step-by-step instructions for smoothly drilling into tile:
- Prepare the tile surface – Make sure the area for drilling is free of dirt, grease and debris. Smooth any rough grout lines around the hole location.
- Mark the hole location – Use a marker or center punch to mark the exact spot for the hole. This will prevent the drill from wandering.
- Apply masking tape – Cover the marked hole location thoroughly with masking tape. Apply several overlapping layers. This helps minimize cracking.
- Prepare a basin of water – Have a basin or bucket of room temperature water ready to dip the tile bit into while drilling. This cools the bit and tile to prevent overheating and cracking.
- Use the ceramic tile drill bit – Secure the ceramic tile drill bit in the electric drill. Start with a low speed setting.
- Make a guide indent – Place the drill bit over the marked hole location without pressing too hard. Slowly drill to make a guide indent. This keeps the bit from slipping.
- Drill slowly – Dip the tile bit in water periodically to cool it. Apply light, even pressure. Let the drill do the work, advancing slowly through the tile.
- Use steady speed – Increase drill speed gradually as the hole deepens. Too much speed can burn the tile or bit. Too little speed won’t drill efficiently.
- Pause periodically – Stop every minute or so to wipe away excess water and tile debris. Check that the hole remains straight.
- Drill through the tile – Once you break through the glazed tile top, drilling should speed up through the softer backing layer.
- Smooth the hole edges – Use a sharpening stone or sandpaper to smooth any rough edges around the freshly drilled hole.
- Remove masking tape – Carefully peel away the masking tape to reveal the completed hole. Wipe away any remaining residue.
Tips for Drilling into Tile
Here are some additional tips to help ensure clean and precise tile drilling:
- Use a new tile bit – Old, worn bits are more likely to crack the tile. Start with a fresh, sharp ceramic tile bit.
- Drill at slow speeds – High drill speeds can overheat and damage the bit and tile. Start between 600-1,000 RPM for optimal control.
- Minimize pressure – Let the drill do the work by gently guiding it. Too much pressure risks cracking the tile or drill bit.
- Keep the bit lubricated – Dip the bit in water every 30 seconds or so. Insufficient cooling and lubricating can cause excessive heat.
- Back out periodically – Every 1/2 inch or so, back the drill bit partially out to clear dust and debris from the hole.
- Drill vertically straight – Angling the drill applies uneven pressure and can cause cracking at the hole edges.
- Clean holes thoroughly – Remove all debris, fragments and water from freshly drilled holes before inserting anchors or screws.
How to Choose the Right Tile Drill Bit
Not all drill bits are well-suited for drilling into tile. Here’s how to select the best option:
- Material – Carbide or diamond grit. Diamond grit lasts longer than carbide before needing replacement.
- Coating – Bits with a titanium coating stay sharper longer vs. black oxide coated or bare carbide.
- Size – Match bit size to the desired hole size. Most tile drill bits are available in standard sizes from 1/8” to 3/8”.
- Length – Longer bits measuring 3-6 inches allow you to apply less pressure during drilling.
- Design – A spear point tip helps prevent sliding or walking across tiles during drilling.
The best approach is to consult the tile drill bit packaging or manufacturer website for optimal use recommendations based on tile type and thickness.
Types of Tile Drill Bits
There are several types of drill bits specialized for tiles:
- Ceramic tile bit – The most common type, with diamond grit that grinds through tile cleanly. Use for ceramic, porcelain, mosaic, quarry and natural stone tiles.
- Glass and tile bit – Contains tungsten carbide grits suited for drilling into glass or smooth glazed tiles. Use slow speeds to avoid cracking.
- Diamond core bit – Hollow core design circulates water to the cutting edges for cooling. Allows higher drill speeds.
- Jigsaw tile blade – For intricate curved cuts in tile. Requires a jigsaw power tool.
The basic ceramic tile drill bit is suitable for most tile drilling needs. Just be sure to select the proper size and tip shape for the project.
Troubleshooting Tile Drilling Problems
If you encounter issues drilling into tile, try these troubleshooting tips:
| Problem | Possible Causes | Solutions |
|---|---|---|
| Tile cracking | Drilling at too high speed | Use lower drill speed, 600-1000 RPM |
| Too much pressure applied | Minimize downward pressure, let drill do the work | |
| Bit/tile overheating | Dip bit in water frequently for cooling | |
| Worn or dull tile bit | Replace with a new sharp tile bit | |
| Hole edges chipping | Applying pressure at angle | Drill straight up and down without angling |
| Rough grout line edges | Smooth grout lines around hole location beforehand | |
| Bit walking or slipping | No guide indent to start | Make a guide indent on marked hole location |
| Worn tile bit | Use a new sharp tile bit | |
| Insufficient water lubrication | Dip bit in water every 30 seconds |
How to Finish Holes in Tile
Once your tile holes are neatly drilled, finishing them properly provides a clean, professional look:
- Clean the holes thoroughly – Remove all debris, drill residue and fragments using a vacuum, brush or pipe cleaner.
- Smooth rough edges – Use a sharpening stone or sandpaper around hole edges to prevent sharpness.
- Wash tile surface – Wipe away any drill slurry or water spots using a damp sponge and towel.
- Apply sealant – Coat any exposed inner tile layers with acrylic sealant to prevent moisture damage.
- Insert hardware – Mount anchors, sleeves or hardware using silicone adhesive designed for tiles.
- Fill accessory holes – Use a tile caulk in matching grout color to fill any accessory drill holes.
- Check alignment – Verify fixtures or accessories are level, plumb and aligned properly.
- Remove tape adhesive – Take away any remaining masking tape adhesive using cleaner or oil.
Taking these finishing steps makes tile holes look neat, clean and professionally drilled.
Conclusion
Drilling smooth holes in tile is possible with the right tile drill bits, preparations, and techniques. Critical tips include drilling at slow speeds with tile submerged in water, minimizing pressure, and using masking tape to prevent cracks from spreading. Appropriate finishing ensures the holes have clean edges and surfaces. With care and patience, holes can be drilled into even delicate tile without breakage. Follow these best practices, take it slowly, and soon you’ll be drilling perfect tile holes for installing accessories and fixtures.