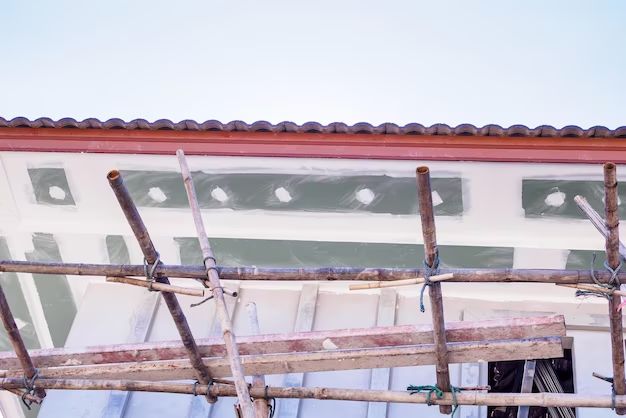
Soffit panels are an important part of any home’s exterior finish. Properly installed soffit panels help protect the eaves of the house from moisture, insects, and excess heat or cold. They also provide an aesthetic finish to the underside of the home’s roof overhang. Installing soffit panels correctly is crucial to get the benefits they provide. Here’s a step-by-step guide on how to properly fasten soffit panels.
Page Contents
What You Need
Before starting any soffit panel installation project, you’ll need to gather the right materials and tools. Here’s what you’ll need:
- Soffit panels – These come in vinyl, aluminum, or fiber cement. Make sure you have enough panels to cover the entire area you want to finish.
- Fascia board – A long, trim board that will support the soffit panels.
- J-channel – Vinyl or aluminum trim with a J-shaped cross section to mount soffit panels.
- F-channel – Molding with an F-shaped cross section to mount soffit panels at corners or wall ends.
- Soffit vents – Ventilated soffit panels or vents to provide airflow through the eaves.
- Screws – 1 5/8″ exterior screws for securing fascia and J-channel.
- Nails – Corrosion resistant nailer nails, galvanized finish nails.
- Hammer
- Drill with driver bits
- Tin snips
- Utility knife
- Level
- Tape measure
- Pry bar
- Ladder or scaffolding
Preparing the Eaves
Before installing any soffit panels, you need to make sure the eaves are ready to support them properly. Here are the steps for prep work:
- Remove any existing soffit panels, fascia boards, or trim pieces from the installation area.
- Inspect the area for any damaged, rotted or deteriorated roof framing, sheathing, or lookouts.
- Make any necessary repairs to ensure the structure is solid.
- Check for level along the roof line and rafter tails. Shim and brace any unlevel areas.
- Install 1×4 or 2×4 lookouts around the perimeter to support panel edges.
- Cover exposed rafter tails with roof flashing for moisture protection.
Once the area is prepped, you can move on to installing the fascia and mounting channels that will hold the soffit panels.
Installing the Fascia
The fascia board provides an anchor for the soffit panels and finishes the outer roof edge. Follow these steps:
- Measure and cut fascia boards to length for each side.
- Place the board against the end rafter tails and tack it in place with a few nails temporarily.
- Check that the bottom edge is perfectly level and make any adjustments.
- Predrill holes through the fascia at each rafter tail location.
- Drive screws into the rafter end through the fascia to secure it.
- Use trim head screws and countersink for a cleaner look.
- Maintain a 1/4″ hanging distance from the bottom of the roof sheathing.
- Repeat for the remaining sides and corners.
Mounting the J-Channel
J-channel creates a mounting track for the edge of the soffit panels. Follow these steps to install it:
- Measure and cut J-channel pieces to length for each fascia side.
- Hold the channel against the fascia with the bottom edge about 1/4″ below the fascia bottom.
- Predrill pilot holes through the channel 2 inches from each end and spaced every 16 inches between.
- Drive screws at an angle through the channel and into the fascia at each pilot hole.
- Repeat this along the full length, keeping the J-channel bottom edge even.
Adding F-Channel at Corners
Use F-channel molding to provide a trim finishing edge where soffit panels meet at corners. Install it as follows:
- Measure and cut F-channel pieces to length for each corner.
- Position the piece at the corner with the top edge aligned with the J-channel previously installed.
- Predrill pilot holes through the F-channel 2 inches from each end and spaced every 16 inches between.
- Drive screws through the F-channel at an angle into the wall corner and fascia.
- Install screw clips between screws to further secure the F-channel.
- Miter cut joining pieces at 45-degree angles for clean transitions.
Installing the Soffit Panels
With the mounting channels in place, you’re finally ready to install the soffit panels themselves:
- Measure the distance between the wall and fascia board.
- For vinyl panels, cut them to length with tin snips by scoring and snapping.
- For aluminum or fiber cement, cut with a circular saw with fine tooth blade.
- Insert the first panel end into the wall F-channel, then push up into the J-channel.
- Continue working outward, placing tongue into groove locks as you go.
- Use aluminum nails or screws to connect panel joints for extra stability.
- Install vented soffit panels evenly spaced between solid ones for airflow.
- Trim panels to fit at corners and ends using snips. Use F-channel here.
- Complete final trim and caulk work for clean finished edges.
Follow the manufacturer’s specific instructions for proper installation and spacing for the type of soffit panels you use.
Tips for Successful Installation
Here are some helpful tips to ensure your soffit panels get mounted correctly and securely:
- Keep bottom edges aligned – This gives a consistent look along the eaves.
- Overhang corners 1/2″ – Allows for cleaner overlaps at mitered joints.
- Nail every 10″- 12″ – Prevents buckling, warping, and sagging.
- Use spacers to leave ventilation gaps.
- Caulk edges for waterproofing.
- Prime and paint as needed for finished look.
Conclusion
Installing soffit panels is a multi-step process that requires careful prep work, precise installation of mounting channels, and proper panel fastening. Following the instructions above and using the recommended materials and tools will allow you to securely fasten soffit panels to protect and beautify your home’s eaves. Take particular care to keep bottom edges level, overhang corners, provide adequate ventilation, and caulk edges. With attention to detail, you can complete a soffit installation that will hold up for years to come.