Having a gap between your kitchen cabinets and the ceiling is a common issue that many homeowners face. This gap can make your kitchen look unfinished and cluttered. Luckily, there are several easy and affordable ways to fill this gap and give your kitchen a polished, complete look.
Page Contents
What causes a gap between cabinets and ceiling?
There are a few reasons why a gap may exist between your upper cabinets and ceiling:
- Your cabinets may not have been installed high enough to meet the ceiling. Cabinets are typically installed about 18 inches below the ceiling, but this can vary.
- You have 9 ft or shorter ceilings. Standard cabinet heights are designed for homes with 8 ft ceilings. If you have a lower ceiling height, there will naturally be more of a gap.
- The previous homeowners lowered the ceiling. Sometimes drop ceilings are installed lower than the original height.
- Your ceiling may not be perfectly level, creating an inconsistent gap.
Regardless of what caused it, this gap is an eyesore that makes your kitchen look incomplete. The good news is that it can be fixed relatively easily.
Should you fill the gap between cabinets and ceiling?
In most cases, yes, you should fill the gap between your cabinets and ceiling. Here are some of the benefits of filling this space:
- It gives your kitchen a polished, finished look. The tall cabinets will appear more built-in and intentional.
- It minimizes dust and grease accumulation. Open gaps allow dust and grime to build up on top of your cabinets.
- It reduces clutter appearance. The gap often looks messy with visible wires, lights, etc. Filling it hides unsightly clutter.
- It improves energy efficiency. Sealing the gap helps insulate your kitchen and prevent air leaks.
- It makes the space feel more closed in. Exposed rafters can make a kitchen feel cavernous.
Unless you’re intentionally going for an open, airy aesthetic, filling the gap is highly recommended in most kitchens.
How to Measure the Cabinet Gap
Before filling the gap, you’ll need to measure it. Here are some tips for accurately measuring:
- Use a tape measure, yardstick or ruler. Laser measures can be tricky to use overhead.
- Measure from the top of the cabinet to the ceiling in several spots. Make note of the smallest and largest gaps.
- Account for uneven ceilings by measuring at each end of the cabinet run and in the middle.
- Record the shortest and longest measurements. You want to fill the gap based on the longest size.
- Snap a few photos of the gap for reference later on.
Having accurate measurements ensures you get materials sized and cut properly for a perfect fit.
How to Fill a Cabinet Gap
There are several good options for filling the gap above your kitchen cabinets. Here are some of the most popular methods:
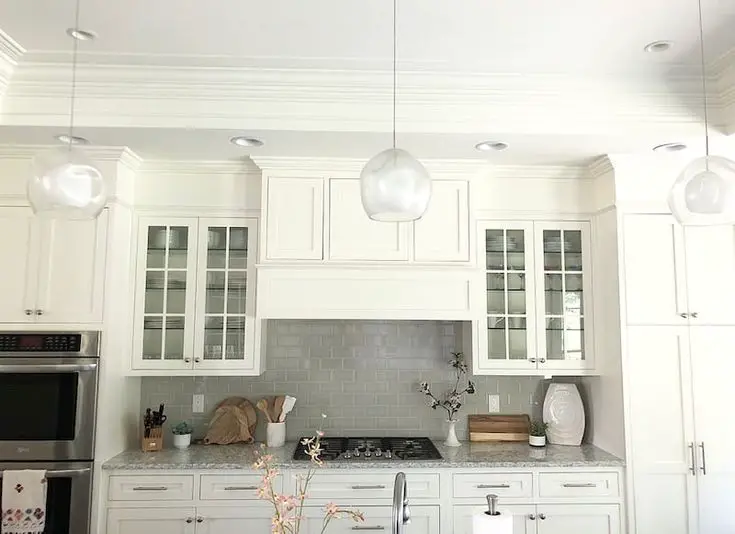
Crown Molding
Installing crown molding is one of the most elegant ways to fill the gap. Crown molding comes in different sizes, so you can get a piece wide enough to cover the gap completely. If the gap is very large, you may need extra-wide custom molding.
Benefits of using crown molding:
- Provides an attractive finish with no exposed edges.
- Comes in many styles to match your kitchen’s décor.
- Larger molding can cover wider gaps.
- Can be painted any color to coordinate with your cabinetry.
The downside is that professional installation can be expensive. Precision cutting and fitting is required for seamless results. DIY installation is possible but tricky for beginners.
Filler Panel
A filler panel is a simple board cut to size that fits into the gap. Plywood, MDF, beadboard or panels matching your cabinetry can be used.
Benefits of a filler panel:
- Straightforward DIY installation. Simply cut a panel to size and slip it in.
- Affordable option using common materials.
- Trim can be added to edges for a finished look.
- Panels can be painted to match your décor.
The main downside is that edges remain visible. Filler strips or extra trim work can provide a more seamless fill.
Valance
A fabric valance offers a soft, decorative treatment for the gap space. Valances come in standard sizes or can be custom made to your specifications.
Benefits of using a valance:
- Wide selection of fabrics like lace, linen, cotton.
- Custom sizing for a perfect fit.
- Softens hard cabinet edges for a warmer aesthetic.
- Inexpensive DIY option if sewing your own.
Be sure to account for depth if cabinets protrude. Dust and grime can collect behind fabric as well.
LED Lighting
If you want to highlight the gap rather than hide it, install attractive lighting. LED strip lights or puck lights add ambient lighting with a clean, modern look. Accent lighting can make the space seem intentional rather than haphazard.
Benefits of LED cabinet lighting:
- Creates a focal point and design element from the gap.
- Ambient lighting sets a warm, inviting mood.
- Very energy efficient long-lasting bulb options.
- Dimmable to control brightness as needed.
Hanging pendant lights or track lighting can also illuminate the space attractively. Just be sure lights have enough clearance from the top cabinets.
Shelving
Adding shelving units in the gap is an excellent way to utilize the space. You can install shelving matched to your cabinets or more decorative floating shelves.
Benefits of open shelving:
- Creates useful storage and display space.
- Wide range of shelving styles and finishes.
- Looks built-in for a polished result.
- Great for displaying decorative items you want visible.
Just be aware that open shelving will require more frequent dusting since they attract dust. Closed cabinetry keeps things cleaner.
How to Install Cabinet Gap Fillers
Once you’ve decided on the best filler option, here are some general installation guidelines:
Measure precisely
Take detailed measurements and have materials cut to an exact fit. Even slightly off measurements will keep your project from fitting correctly in the space.
Level the cabinets
Use shims under cabinets if necessary to level them properly. Any tilt can cause gaps between fillers and cabinets.
Secure tightly
Filler panels and molding should be screwed securely into wall studs and upper cabinets for sturdy long-term attachment.
Use adhesive if needed
Construction adhesive helps keep filler pieces firmly in place especially if attaching to the ceiling.
Fill edges and gaps
Use paintable caulk along the edges for a seamless fill. Take time to smooth and neaten the caulk lines.
Add trim
For a really finished look, install coordinating trim pieces around the edges. Miter corners carefully.
Prepare surfaces properly
Sand, patch, prime and paint the fillers to match your kitchen décor.
With attention to detail, you can achieve a beautiful custom built-in look in your kitchen. Take your time to do careful prep work for the best results filling cabinet gaps.
Cabinet Gap Filler Ideas
Here are some more great ideas for utilizing and filling awkward cabinet gaps:
Beadboard panels
Beadboard offers charming cottage style. The grooves add detail to make the panels more decorative.
Wallpaper
Use wallpaper or contact paper to cover filler panels. Tropical or floral prints can be fun.
Tin ceiling tiles
Tin ceiling tiles lend vintage character. Arrange in patterns or custom designs.
Wood planks
Overlapping reclaimed wood planks create rustic warmth. Stain or paint colors of your choosing.
Wainscoting
Classic wainscoting trim makes a stately frame for the space. Pair with a neutral filler panel.
Picture ledges
Stagger floating ledges to hold framed photos, art and decorative objects.
Plate rail
Hang a plate rail to display plates, cups or colorful ceramics in the gap.
Dish storage
Open shelving to neatly store dishes within easy reach. Try glass front cabinets.
Wine rack
Built-in wine racks make it easy to store and display wine collections.
Spice racks
Mounted wooden spice racks keep spices organized and accessible while filling space.
Floating desk
A narrow floating desk or vanity is perfect for a small work station or makeup area.
The possibilities are nearly endless for personalizing your cabinet gap fillers. Choose options that enhance your kitchen’s style and functions. With a little creativity, you can transform the gap into a unique design element.
Conclusion
Dealing with an awkward gap over your kitchen cabinets doesn’t need to be an eyesore or hassle. With some simple filler options, you can integrate the space into your kitchen design beautifully. Filler panels, molding, shelving and creative elements help maximize use of the space both functionally and aesthetically. Do accurate planning and measurements for the best results installing your gap fillers. In no time, you can take your kitchen from disjointed to an upscale custom look.