Scratches on hardwood floors are unavoidable over time. Furniture dragging, pets, heels, toys and dropping heavy or sharp objects can all cause unsightly scratches on your beautiful hardwood flooring. While scratches are impossible to completely erase, there are solutions to make them less noticeable. Filling in scratches can help restore the look of your hardwood floors.
Page Contents
- 1 What causes scratches on hardwood floors?
- 2 Should you refinish or spot fix scratches?
- 3 How to spot fix scratches
- 4 Tips for spot fixing success
- 5 Choosing the best filler products
- 6 Refinishing vs. spot fixing
- 7 Preventing new hardwood floor scratches
- 8 Professional scratch repair options
- 9 Frequently Asked Questions
- 10 Conclusion
What causes scratches on hardwood floors?
There are several common causes of scratches on hardwood floors:
- Dragging furniture or other heavy objects across the floor
- Pets with untrimmed nails walking across the floor
- High heels or other shoes with exposed metal or sharp edges
- Toys with sharp or rough edges being dragged across the floor
- Dropping heavy or sharp objects like tools or kitchen items
- Applying abrasive cleaners or scrubbing too aggressively
- Grit or debris getting under furniture legs and grinding into the floor when moved
Hardwood floors lack a protective top coat, so the wood itself is vulnerable to scratches and dents. The softer the wood, the more susceptible to scratching it becomes. Be mindful of dragging furniture, wearing shoes that can damage floors indoors, keeping pets nails trimmed, and removing debris from the floor regularly to prevent scratches.
Should you refinish or spot fix scratches?
For minor scratches, spot fixing is likely your best option. Deep gouges may require refinishing the entire floor to blend the repair. Consider these factors to decide if spot fixing or refinishing is needed:
- Depth of scratch – Shallow surface scratches can often be repaired while deep gouges may require refinishing
- Number of scratches – A few isolated scratches can be spot fixed but numerous scratches all over may warrant a full refinish
- Location of scratches – Highly visible areas like entryways may need complete refinishing for a seamless look
- Existing floor condition – If the floor is otherwise in good shape, spot fixing may suffice versus a worn floor needing refinishing
- Time and budget – Spot fixing is faster and more affordable than a full refinish
As a general rule, if the scratches are surface level and relatively contained, spot fixing is worth trying before undertaking a major refinishing project.
How to spot fix scratches
Spot fixing scratches involves applying a wood filler only to the scratched areas rather than sanding and refinishing the entire floor. This is a cost-effective and convenient solution for minor scratches. Follow these steps:
- Clean the floor – Remove any debris, dirt or dust from the scratched area using a broom and vacuum. Wash with a wood floor cleaner and let dry completely.
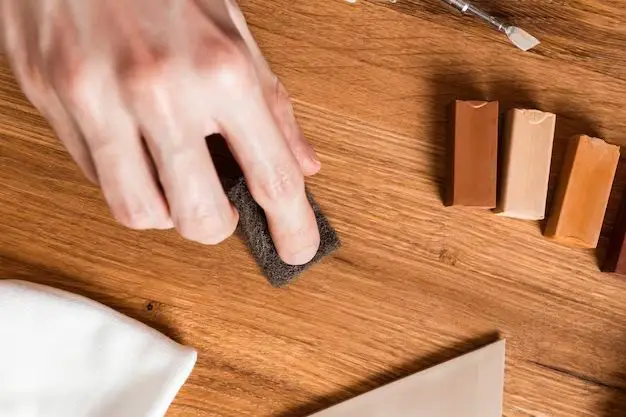
- Choose filler – Select a filler that matches the color of your floors. Options include wax sticks, putty sticks, wood fillers and touch up markers. Have several colors on hand to match different wood tones.
- Apply filler – Follow product instructions to fill scratches. Most fillers are applied by rubbing over scratches to fill them flush with the floor. Apply sparingly and buff off excess.
- Let dry – Allow filler to dry per manufacturer’s directions. Drying times vary from 30 minutes to overnight before buffing.
- Buff surface – Once dry, use a cloth or included buffer pad to buff away excess filler until smooth and flush with the floor.
- Add topcoat (optional) – Applying a matte polyurethane finish over the repaired spot will help blend it with the rest of the floor.
- Clean and maintain – Regular sweeping, vacuuming and damp mopping will help keep filled scratches looking their best.
With the right filler and technique, spot fixing can make scratches virtually disappear. It’s quick, easy and inexpensive compared to refinishing an entire wood floor.
Tips for spot fixing success
Follow these tips for optimal results when spot fixing scratches in hardwood floors:
- Clean floors thoroughly before applying filler to remove debris that can lead to an uneven fill.
- Test fillers in an inconspicuous area first to ensure color match and smooth results.
- Apply filler sparingly, forcing it into the scratch rather than globbing on top.
- Be patient – let filler dry completely before attempting to buff or it may smear and stain.
- Buff in direction of wood grain for a seamless blend.
- Consider adding a matte polyurethane over filler for added protection and sheen.
- Do not wet mop floor until filler has fully cured, usually 24-48 hours.
- Spot test cleaners on inconspicuous area before using on filled scratches.
Taking the time to properly clean, fill, buff and cure the scratches will lead to the most natural, undetectable repairs.
Choosing the best filler products
With many filler options on the market, choosing the right product is key to achieving optimal scratch filling results. Here are some top options:
| Filler Type | Pros | Cons |
|---|---|---|
| Putty sticks | Easy to apply, affordable | Drying time can be lengthy |
| Wax filler sticks | Quick application and drying | Not as durable as other fillers |
| Wood fillers | Matches wood tones, durable fill | Can dry out quickly in container |
| Color markers | Quick, matches wood color | Does not fill depth of scratch |
Things to consider when selecting a filler:
- Drying time – Faster drying makes for easier application in small areas
- Color match – Wood fillers and markers match wood tone better than basic putty
- Durability – Filler needs to stand up to foot traffic and cleaning
- Scratch depth – Deep gouges may require a more heavy duty filler
Having multiple options on hand allows you to use the right filler for each type of scratch.
Refinishing vs. spot fixing
In some cases, refinishing may be the best solution for scratched hardwood floors. Here is an overview of the pros and cons of spot fixing versus refinishing:
| Method | Pros | Cons |
|---|---|---|
| Spot Fixing |
|
|
| Refinishing |
|
|
For isolated light scratches, spot fixing provides a quick fix. When there are numerous deep scratches or overall wear and tear, refinishing may be the better solution despite the time and cost involved.
Preventing new hardwood floor scratches
An ounce of prevention is worth a pound of cure when it comes to scratches in hardwood flooring. Here are some proactive tips to avoid scratch damage:
- Sweep and vacuum floors regularly to prevent grit buildup.
- Place rugs under furniture legs and chair legs to prevent scuffing.
- Keep pet nails trimmed to avoid scratches.
- Lift heavy furniture or appliances rather than dragging across floors.
- Remove shoes with exposed metal or heels before walking on floors.
- Do not wear shoes with cleats or spikes indoors.
- Use felt pads under furniture legs and chair legs.
- Avoid abrasive cleaners or scouring pads.
- Do not let water or liquids sit on floors to prevent warping.
- Buff floors periodically with floor wax to protect surface.
By taking steps to protect floors from daily wear and tear, you can help minimize the scratches that require fixing and extend the life of your hardwood floors.
Professional scratch repair options
For extensive scratches or damage beyond DIY repair methods, consider hiring a professional hardwood flooring contractor. They offer services including:
- Refinishing – Sanding floors down to bare wood and applying new protective coats of polyurethane for a like-new appearance.
- Spot refinishing – Machine sanding and refinishing only damaged areas to match the rest of the flooring.
- Board replacement – Removing and replacing individual planks that are beyond refinishing.
- Scratch removal – Using specialized equipment to buff out minor scratches and restore wood texture.
Professionals have commercial grade equipment not available for home use. They also have the skills and experience to properly refinish hardwood floors for optimal, long-lasting results. Their services come at a cost but can be worthwhile for extensive damage or repairs beyond a DIY skill level.
Frequently Asked Questions
How do you buff out small scratches in hardwood floors?
For minor surface scratches, buffing can help smooth and blend the damaged area. Use a floor buffer or sanding block with progressively finer grit sandpaper, starting with 100-150 grit and working up to 220-240 grit. Sand lightly and be careful not to create deeper grooves. Vacuum dust between sanding. Finish by rubbing floor wax into the area using steel wool or lint-free cloths.
Can you use wood filler to fix scratches?
Yes, wood filler is an effective product for filling in light scratches and gouges in hardwood floors. Opt for a filler that matches the color of your floors for the most seamless results. Apply the filler into the scratches, allow to dry completely, then buff smooth and flush with the floor. Add a matte polyurethane over the top for added durability and sheen.
What is the fastest way to fix scratched wood floors?
The fastest fix for minor scratches is using a colored wax filler stick that matches your floor tone. Simply rub the stick over the scratches until filled and buff off any excess with a soft cloth. Wax fillers dry quickly within 30 minutes to an hour. Putty sticks are another fast-drying filler option suitable for small scratches.
Can you use olive oil to fix scratches on wood floors?
Olive oil is not an effective solution for filling in scratches and damage on hardwood floors. While it can provide some surface lubrication, it soaks into the wood too quickly rather than filling the scratch. It also leaves behind oil residue that attracts dirt in the scratch crevices. Stick to specially formulated wood fillers for the best scratch repair results.
How do you fill deep scratches in old wood floors?
For deep scratches and gouges in old, solid hardwood floors, use a paste wood filler product. Apply filler into the scratch by pressing and compacting it in with a putty knife. Overfill slightly and allow to dry completely. Once hardened, sand flush with the floor then vacuum away dust. Apply touch up stain markers followed by matte polyurethane if needed to blend repairs.
Conclusion
Scratches in beautiful hardwood floors are inevitable but do not necessitate replacing the flooring. With the right filler products and techniques, minor scratches can be spot fixed to become nearly invisible. For more extensive damage, professional refinishing may be warranted to renew the floor’s appearance. By taking steps to prevent scratches in the first place, you can limit the repairs needed and extend the lifespan of your investment in hardwood floors.