Sliding drawers are a great way to maximize storage space in kitchens, bathrooms, offices, and more. However, over time the moving parts of a sliding drawer can wear down or break, preventing the drawer from opening and closing properly. When a sliding drawer stops working correctly, it can be extremely frustrating. But there’s good news – most sliding drawer issues can be fixed with some basic tools and DIY troubleshooting.
In this comprehensive guide, we’ll walk through the steps for diagnosing and repairing common sliding drawer problems. We’ll cover how to fix issues with the slides, wheels, track, and more. With the right repairs, you can get your stubborn sliding drawer gliding smoothly once again.
Page Contents
- 1 Common Sliding Drawer Issues
- 2 Tools and Materials Needed
- 3 Diagnosing the Problem
- 4 Cleaning Sticky Slides
- 5 Fixing Broken Slides
- 6 Replacing Broken Wheels
- 7 Repairing Loose Mounting Screws
- 8 Adjusting Drawer Box Level
- 9 Adjusting the Self-Closing Mechanism
- 10 Realigning Misaligned Drawer Boxes
- 11 Replacing Broken Tracks
- 12 Repairing Loose Drawer Fronts
- 13 Adding Drawer Box Shims
- 14 Lubricating Stiff Drawers
- 15 Conclusion
Common Sliding Drawer Issues
Before we dive into repairs, let’s go over some of the most frequent sliding drawer malfunctions:
Drawer Won’t Open All the Way
If your drawer is stuck and won’t open fully, the problem is likely with the slides. Dirty or worn out slides prevent the drawer from extending to its full open position.
Drawer Won’t Close All the Way
Much like above, if a drawer won’t close completely, dirty or damaged slides are probably the culprit. Properly functioning slides allow drawers to close flush with the cabinet face frame.
Drawer Falls Off Track
Drawers that derail and fall off their tracks usually have broken or disconnected roller wheels. Roller wheels guide the drawer along the track. If they break, the drawer will come off the rails.
Drawer Rubs or Scrapes
Scraping noises when opening drawers indicate loose hardware or misalignment. The drawer may be sagging or crooked on the slides. This causes rubbing against the cabinet.
Drawer Won’t Stay Closed
Drawers that slide open on their own lack proper synchronization. Either the slides are disconnected or the self-closing mechanism needs adjustment.
Tools and Materials Needed
Gather the following tools and supplies before starting your sliding drawer repair:
– Flashlight – illuminates inside the drawer box
– Tape measure – measures drawer box dimensions
– Level – checks for drawer box alignment
– Screwdrivers – tightens loose screws
– Pliers – grips and pulls out drawers
– Lubricant (wax, silicone, etc) – lubes sticky slides
– Sandpaper – sands rough edges
– Replacement slides or wheels – repairs broken hardware
You likely won’t need every single item for your particular drawer fix. But having these supplies on hand ensures you’re prepared for any sliding drawer issue.
Diagnosing the Problem
Pinpointing the cause of your sticky, broken sliding drawer is the first step. Follow these tips to properly diagnose the problem:
1. Remove the Drawer
Pull the drawer completely out of the cabinet if possible. This allows you to thoroughly inspect the drawer box and slides. If the drawer is stuck, wiggle it loose or use pliers to pull it free.
2. Check the Slides
Examine each slide from top to bottom. Look for dirt buildup, cracks, breakage, or separation from the drawer or cabinet. Slides consist of an upper and lower track. Make sure these align and connect properly.
3. Inspect the Wheels
Spin the roller wheels on each slide to confirm they rotate freely. Broken wheels that don’t roll will prevent smooth drawer motion.
4. Test for Level
Place a level along the top edges of the drawer box. The box should sit level when extended. Any sagging or tilting indicates an underlying issue.
5. Check for Obstructions
Look inside the drawer box and cabinet compartment for anything obstructing movement or rubbing. Remove items like shelves, dividers or hardware knocking against the drawer.
6. Review Synchronization
Push the drawer closed, then pull it back open while listening. Well-synced slides will click simultaneously on both sides. If clicks aren’t evenly timed, the slides are misaligned.
Cleaning Sticky Slides
Often, fixing a sticky drawer slide is as simple as cleaning away grime buildup. Try these cleaning steps first before attempting repairs:
1. Remove the Drawer
As mentioned previously, fully extract the drawer to expose the slide hardware. This provides room for cleaning.
2. Vacuum the Slides
Use a handheld vacuum crevice tool to suck up dust and debris on the slide tracks. Run it along the upper and lower tracks on each side.
3. Wipe Down the Slides
Use a clean microfiber cloth to wipe down each slide from top to bottom. Remove stuck-on gunk with a bit of degreaser or mild soap if needed.
4. Apply Lubricant
Spray a dry lubricant like wax or silicone on the tracks. Avoid oily lubricants that can collect more dirt. The lubricant reduces friction for smoother sliding.
5. Operate the Drawer
Push the freshly cleaned and lubricated drawer back into the cabinet. Open and close it several times to distribute the lubricant. The movement should feel noticeably smoother now.
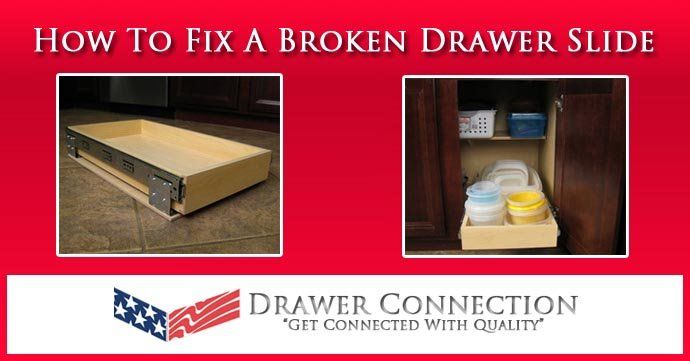
Fixing Broken Slides
Over time, sliding drawer hardware wears out and breaks. Replacing damaged slides is an easy DIY fix. Here’s how to swap out broken drawer slides:
1. Remove the Old Slides
Detach the broken slides from the drawer and cabinet. Start by fully extending the drawer and popping off the slide connectors.
2. Install New Slide Members
Attach one new slide member to the cabinet interior and the other to the drawer box. Screw them into the pre-drilled holes.
3. Connect the Slide Halves
Push the drawer closed to join the two slide halves. The connectors should click into place automatically when aligned.
4. Adjust the Fit
Pull out the drawer to test the slide motion. Adjust the slide placement as needed until the drawer glides smoothly.
Installing new slides realigns the drawer for smooth rolling in and out. Just be sure to measure properly so the drawer doesn’t extend past the cabinet face frame.
Replacing Broken Wheels
When roller wheels on the slides break, the drawer loses stability and falls off track. Follow these steps to swap out broken wheels:
1. Remove the Bad Wheels
Use pliers to detach the broken wheels from the slide track. Grip the base of the wheel tightly and unscrew the central pin.
2. Install New Wheels
Screw in replacement wheels in the same spots using the central pin. Make sure wheels on each side are vertically aligned.
3. Adjust the Height
Spin the new wheels by hand to check their height. They should just clear the bottom of the slide track. Adjust up or down if needed.
Properly aligned replacement wheels restore the drawer’s ability to stay on track during operation. Get all-metal or nylon wheels for longest durability.
Repairing Loose Mounting Screws
Drawers that rub, catch, or don’t open right typically have loose hardware. Tightening the mounting screws gets everything back in alignment.
1. Tighten Slide Screws
With the drawer removed, tighten all slide screw connections at the cabinet and drawer box. Don’t over tighten.
2. Tighten Rollers and Brackets
Check roller wheel brackets and other slide hardware pieces for loose screws. Carefully tighten any loose fasteners.
3. Reinstall the Drawer
Push the drawer back into the cabinet and test operation. Opening and closing should now feel smooth and even.
Take your time and tighten screws incrementally to find proper alignment. Uneven tightening can make matters worse.
Adjusting Drawer Box Level
If a drawer box doesn’t sit level within the cabinet, adjustment is needed for proper operation. Here are tips for leveling a drawer:
1. Loosen the Mounting Screws
With the drawer removed, slightly loosen the slide screws allowing the box to move freely. Don’t detach them completely.
2. Level the Drawer Box
Use shims beneath the drawer box to bring it back to level. Place shims under the corners to adjust height as needed.
3. Tighten the Mounting Screws
With the drawer box level, retighten the slide screws carefully to hold it in proper alignment.
4. Test Operation
Reinstall the level drawer box into the cabinet. Open and close the drawer to confirm it no longer rubs or scrapes.
Shimming is a handy trick for fixing sagging drawers that have shifted out of alignment over time. Adding a shim boosts the low side.
Adjusting the Self-Closing Mechanism
Some sliding drawers have a self-closing feature that uses spring-loaded slides. If adjusted wrong, these can prevent full closure. Here’s how to fix this:
1. Remove the Drawer
Pull out the drawer and locate the self-closing mechanism on the slides. Look for a small tension adjustment screw.
2. Adjust the Tension
Turn the adjustment screw to increase or decrease closing tension as needed. Too much tension prevents full closure.
3. Test the Closure
Push the drawer closed to check that it latches completely. Open it halfway then let go to allow self-closing. Repeat adjustments as needed.
4. Reinstall the Drawer
Once the self-closing action is smooth and the drawer latches fully, put it back in the cabinet. Enjoy hassle-free closing from now on.
A little fine tuning to the self-closing mechanism prevents drawers that bounce back open after closing. Just a quarter turn of the screw makes a big difference.
Realigning Misaligned Drawer Boxes
Over time, drawer boxes can slip out of alignment with the cabinet. This results in scraping and rubbing during use. Here are some tips for realigning a misaligned drawer:
1. Loosen the Slide Screws
With the drawer removed, loosen (do not remove) the slide mounting screws. This allows the slides to move freely.
2. Align the Drawer Box
Push the drawer box from side to side to align it with the cabinet opening. Use a level to ensure proper alignment.
3. Tighten the Slide Screws
With the drawer box aligned, tighten the mounting screws on the slides to hold it in the correct position.
4. Test the Movement
Carefully reinstall the realigned drawer. Open and close to test for smooth operation free of rubbing and catching.
Be very careful when realigning drawers – forcing them can damage the slides. Take your time and make minor alignment adjustments.
Replacing Broken Tracks
Under severe damage, the track portion of the slide may need replacement. Here are tips for replacing broken tracks:
1. Remove the Old Track
Detach both slide halves from the cabinet and drawer box. Unscrew the broken track from the slide member.
2. Install the New Track
Attach the replacement track piece to the slide member using the provided screws. Ensure a snug fit.
3. Reattach the Slides
Screw the slide halves with the new track back into the drawer and cabinet. Make sure connectors snap together smoothly.
4. Test the Operation
Fully extend the drawer with the new tracks to confirm smooth operation. Adjust as needed until operation is restored.
For best results, replace tracks in pairs. Worn or broken tracks prevent proper slide alignment and synchronization.
Repairing Loose Drawer Fronts
The drawer front slipping down and out of alignment is another common issue. Tightening the fasteners remedies this easily.
1. Remove the Drawer Front
Pull off the decorative drawer front to access the drawer box and slides underneath.
2. Tighten the Fasteners
Use a screwdriver to tighten the screws, cam lock, or other fasteners that hold the drawer front in place.
3. Reattach the Drawer Front
With fasteners tightened, reattach the drawer front to the underlying drawer box. Align evenly with cabinet edges.
4. Test Operation
Push in the drawer and open/close it to make sure the front stays properly aligned on the drawer box.
Be very careful not to overtighten the drawer front fasteners. Tighten just until the front stays aligned through use.
Adding Drawer Box Shims
Small wood shims can also be used to repair loose drawer boxes that rattle inside the cabinet. Here’s how:
1. Remove the Drawer
Extract the drawer box from the cabinet to access the sides and bottom panel.
2. Add Shims
Use small wood shims to fill any gaps between the drawer box and cabinet interior. This prevents excessive play.
3. Replace the Drawer
With shims applied to tighten up the fit, slide the drawer box back into the cabinet. Make sure it moves smoothly without scraping.
4. Test for Rattle
Open and close the drawer fully to check for noise and play. The shims should curtail any rattling sound and motion.
Tip: Adhesive-backed felt pads make quick shims for eliminating drawer rattle too!
Lubricating Stiff Drawers
Stiff, sticky drawers just need a little lubrication. Here are some lubricating tips:
– Wax or Silicone Sprays
Spray wax or silicone lubricants on the slides and wipe off any excess. Reapply every few months.
– Dry Graphite Powder
Use a brush to apply dry graphite powder on the tracks. It reduces friction without the mess of oils.
– Soap or Candle Wax
Old-fashioned soap bars or candles rubbed on tracks work in a pinch. Just wipe away residue.
– Cooking Oil
Lightly wipe cooking oil along slide tracks. Don’t overdo it or dust will stick.
– Teflon-Based Sprays
Specialized Teflon or PTFE sprays like 3-IN-ONE are great for lubricating slides.
Regular lubrication is key for smooth sliding motion over the long term. Avoid harsh chemicals or oil-based products that can damage slides.
Conclusion
Hopefully this guide has given you some helpful troubleshooting tips for diagnosing and repairing common sliding drawer malfunctions. With a few basic tools and DIY instructions, you can often get your stuck drawers sliding like new again. The key steps include:
– Thoroughly cleaning dirty slide tracks
– Replacing broken slide hardware like wheels
– Tightening loose fasteners and realigning components
– Adjusting self-closing mechanisms
– Adding shims and lubricating for smooth gliding
Don’t live with frustrating stick drawers – most issues can be fixed with simple repairs. And be sure to lubricate slides periodically to prevent problems in the first place. With proper care, your sliding drawers should operate reliably for years before needing work.