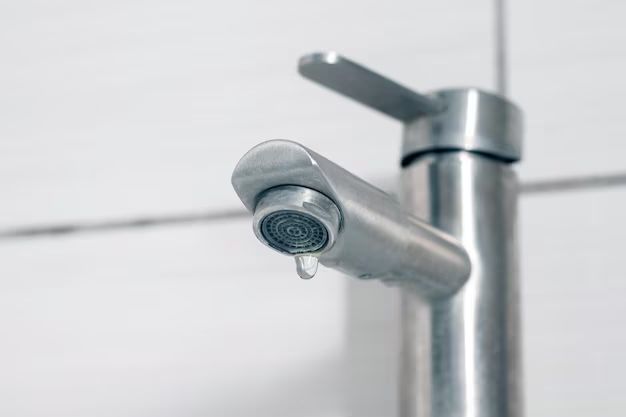
A dripping bathtub faucet can be annoying and waste water. Fortunately, it’s usually an easy fix. Here is a step-by-step guide on how to stop a bathtub faucet from dripping.
Page Contents
What causes a bathtub faucet to drip?
There are a few common causes of a dripping bathtub faucet:
- Worn washers – The washers are rubber seals that prevent water from leaking out around the valve stems. Over time, these can become brittle and misshapen, allowing water to drip out.
- Mineral buildup – Mineral deposits from hard water can collect on the valve seats and prevent them from sealing fully.
- Damaged valve seats – These are the areas that the washers seal against. If they become pitted or corroded, they can allow water to leak past the washers.
- Loose faucet handle – If the faucet handle is loose, it can cause the washers to wear unevenly and drip.
Gather your supplies
Before starting any repair, make sure you have the necessary supplies on hand. For a leaky bathtub faucet you will need:
- Basin wrench
- Adjustable wrench
- Replacement washers
- Silicone grease or petroleum jelly
- White vinegar
- Old toothbrush or rag
- Protective eyewear
The basin wrench is a specialized tool for getting to the faucet nuts that connect the faucet handles under the sink. You can find replacement washers and valve seats at your local hardware store. Make sure you know the make and model of your faucet to get the right replacement parts.
Turn off water supply
Before taking anything apart, make sure to shut off the water supply to the bathtub. There should be shutoff valves underneath the sink or behind an access panel. Turn them clockwise all the way to shut off the water.
Turn on the faucet briefly to release any built-up pressure. This will help prevent water from spraying out when you remove parts.
Remove faucet handle
Most bathtub faucet handles attach using an adjustable screw in the center. Use the adjustable wrench to loosen and remove this screw. Pull the handle up and off the faucet stem.
Some handles may have a decorative cap covering the screw. Pry this off with a small screwdriver before loosening the handle screw.
Remove faucet stem
With the handle removed, you’ll see the rounded faucet stem sticking up. This is attached using a faucet nut set down into the faucet body. Use the basin wrench to grip and loosen the nut.
Lefty loosey, righty tighty applies here – turn counterclockwise to loosen the nut. Once loosened, you can unscrew it the rest of the way by hand and pull the stem up and out.
Clean valve seat and stem
Examine the faucet stem and valve seat (the area the stem rests into) for any debris, mineral buildup, or damage. Scrub away any debris with a toothbrush and white vinegar or wipe down with a rag and mineral-removing cleaner.
If the valve seat is badly pitted or corroded, it may need to be replaced. Replacement seats come with sandpaper to smooth away any light damage before inserting the new seat.
Replace washers
Most leaky faucets just require new washers – or seals. Pull off the old washer near the bottom of the stem using pliers. Slide on the appropriate new washer and press it down firmly into place.
Make sure to get the exact same size and shape washer. Bathtub faucets typically take either cone-shaped or O-ring washers.
Reassemble faucet
Once any necessary parts have been replaced, you can reassemble the faucet. First, lightly lubricate the washers and stem with some silicone grease or petroleum jelly. This will help them slide into place and prevent sticking.
Insert the stem back into the valve seat. Thread the faucet nut back on by hand, then tighten with the basin wrench. Tighten firmly, but be careful not to overtighten.
Slide the faucet handle back on and secure with the handle screw. If it feels loose, you may need to remove and tighten the packing nut before reattaching the handle.
Turn water back on
Turn the water supply back on slowly. Check for any leaks around the packing nut or handle. Tighten if needed. Then turn on the faucet all the way to flush out any debris.
If the drip has stopped – congratulations, you’ve successfully repaired your bathtub faucet! If it’s still leaking, you may need to replace additional parts like the valve seats before the repair will hold.
Tips for preventing future drips
To help prevent leaks from returning, keep these maintenance tips in mind:
- Clean the faucet aerators regularly to remove mineral buildup.
- Lubricate the stem and washers with petroleum jelly when reassembling.
- Clean the showerhead regularly to prevent clogs.
- Replace washers at the first sign of leaks to prevent valve damage.
When to call a plumber
While most bathtub faucet leaks are DIY-friendly repairs, there are times it’s best to call in a professional:
- The leak is within the wall or under the tub itself.
- Replacing washers doesn’t stop the drip.
- You can’t remove stuck faucet parts.
- There are signs of significant valve, seat, or pipe damage.
Plumbers have the expertise and tools to fully diagnose and fix any stubborn tub faucet problems. The cost is often reasonable, especially compared to water damage from unfixed leaks.
Conclusion
A leaky bathtub faucet is one of the most common household plumbing issues. In most cases, the cause is worn out washers or valve seats, which are easy and inexpensive to replace. With some basic tools and replacement parts, you can often stop the annoying drip and avoid costly plumber fees. Paying attention to minor leaks and doing regular faucet maintenance can help prevent damage and make future repairs even easier.