Page Contents
- 1 What causes a car mirror to fall off?
- 2 How to temporarily fix a fallen car mirror
- 3 How to permanently reattach a fallen car mirror
- 4 When to replace a damaged car mirror
- 5 Conclusion
- 6 How to Choose the Right Adhesive for Car Mirror Repair
- 7 Factors to consider when selecting an automotive adhesive
- 8 Choosing between adhesive types
- 9 Conclusion
- 10 Step-by-Step Instructions for Repairing a Fallen Car Mirror
- 11 What you’ll need
- 12 Step 1: Remove the door panel
- 13 Step 2: Clean the mounting surface
- 14 Step 3: Prep and apply primer
- 15 Step 4: Apply the adhesive
- 16 Step 5: Mount the mirror
- 17 Step 6: Allow adhesive to cure
- 18 Step 7: Test and reinstall door panel
- 19 Additional tips
- 20 Conclusion
What causes a car mirror to fall off?
There are a few common reasons why a car’s side mirror may fall off or become loose:
Impact damage
One of the most common causes of a loose or detached mirror is impact from an accident or hitting an object. Even a minor fender bender or sideswipe can be enough to knock the mirror out of position or break the mounting parts.
Vibration
Prolonged vibration from driving on rough roads can also cause the mirror or its mounting parts to shake loose over time. The vibrations can loosen the adhesive or fasteners holding the mirror in place.
Melting adhesive
Many side mirror assemblies use adhesive to bond the mirror to the mounting arm. Over time, especially in hot climates, the adhesive can soften and the bond can fail, causing the mirror to detach.
Broken mounting parts
The mounting arm or swivel joints that connect the mirror can also crack or break from age and use. This will cause the mirror to sag or fall off completely.
Missing fasteners
The mounting nuts and bolts can also rust, fall out, or be knocked out in a collision, allowing the mirror to detach from the door.
How to temporarily fix a fallen car mirror
If your car mirror falls off while driving and you need a temporary solution to get home safely, there are a couple options:
Duct tape
You can use duct tape to tape the housing of the fallen mirror back onto the door mount. This creates a temporary hold with the sticky tape. Make sure the reflective surface is facing the right direction to see behind you.
Zip ties
Plastic cable zip ties can also secure the mirror back onto the mounting arm or door frame. Loop the ties around the mirror and through any holes in the door frame, then pull tight. Trim off any excess.
Of course these are just quick roadside fixes to get you home – the mirror will likely not stay in place for long. But it can work temporarily until you can properly repair the mirror.
How to permanently reattach a fallen car mirror
To properly reinstall a car’s side mirror that has fallen off, follow these steps:
Step 1: Remove the door panel
Start by removing the interior door panel. You’ll need to access the back side of the mirror mount. Removing the panel requires prying off any trim pieces and removing mounting screws. Consult your vehicle repair manual for the proper procedure.
Step 2: Clean the mounting area
With the door panel removed, clean the mirror mounting area with rubbing alcohol to remove any old adhesive, dirt and debris. Make sure it’s completely clean for optimal bonding.
Step 3: Reattach mounting hardware
If any mounting bolts or nuts came loose, reinsert and hand tighten them. Do not overtighten yet. This helps realign any broken or loose mounting parts.
Step 4: Apply adhesive
Apply a thin bead of automotive adhesive around the edge of the mirror housing where it contacts the mounting arm. Strong adhesives like urethane work best for a permanent bond.
| Adhesive Type | Dry Time | Strength |
|---|---|---|
| Double sided tape | 1 hour | Weak |
| Epoxy | 24 hours | Strong |
| Urethane | 12-24 hours | Very strong |
Step 5: Secure the mirror
Press the mirror firmly into place for at least 60 seconds to let the adhesive make full contact. Then tighten the mounting nuts and bolts to spec with a wrench or ratchet.
Step 6: Allow the adhesive to cure
Leave the adhesive undisturbed to fully harden and cure. This can take from 1-12 hours depending on the type used. The bond will get stronger over 24-48 hours. Refer to the product instructions.
Step 7: Test and reinstall door panel
Carefully test the mirror to ensure it stays firmly in place when moved. Then reinstall the interior door panel with all its mounting screws and trim pieces.
When to replace a damaged car mirror
If the mirror housing, internal elements, or mounting parts are too badly damaged, you may need to replace the entire mirror assembly. Signs you need a new side mirror include:
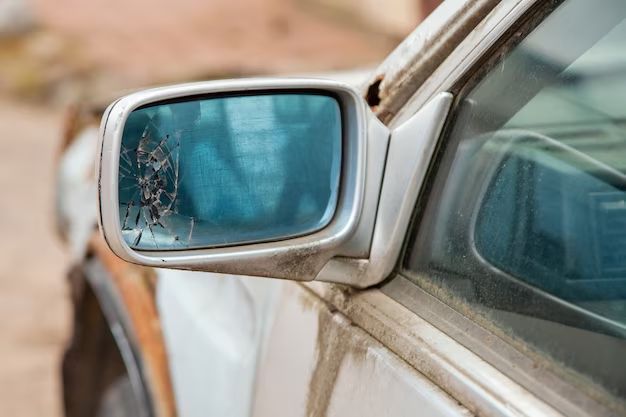
- Cracked or distorted mirror glass
- Broken internal components like motors or gears
- Damage or corrosion to the wiring harness
- Loose/sloppy mirror even after re-tightening fasteners
- Damage to the mirror housing preventing reattachment
Replacement mirrors can be ordered through aftermarket parts sites or the dealer. While not cheap, a new mirror will restore full appearance and adjustability.
Conclusion
Repairing a fallen car mirror is doable as a DIY project if the mount and housing are intact. Thoroughly cleaning the mounting area and using a strong adhesive is key for a lasting repair. Duct tape or zip ties can temporarily reattach the mirror long enough to drive home. But any looseness, slop or further damage will require replacing the entire side mirror assembly.
How to Choose the Right Adhesive for Car Mirror Repair
Factors to consider when selecting an automotive adhesive
Choosing the right adhesive is important when permanently reattaching a fallen car mirror. Here are some factors to consider when selecting an automotive adhesive:
Bonding materials
Ensure the adhesive is formulated to bond the mirror material (typically plastic, metal or glass) to the car body material (metal or composite). Adhesives like epoxy work on many materials.
Temperature resistance
The adhesive must withstand temperature extremes from seasonal changes without softening, deteriorating or losing bond strength. Look for adhesives rated for a wide temp range.
Cure time
Faster cure times are more convenient but may sacrifice bond strength. Look for the best combination of fast cure and high strength.
Water and weather resistance
Adhesives should maintain strong bonding even in wet weather, high humidity and through car washes. Moisture-resistant adhesives prevent re-failure.
Impact and vibration resistance
The vibration and impacts from everyday driving can weaken inferior adhesives over time. Use the most impact-resistant product within your budget.
Shear and tensile strength
Shear strength resists lateral mirror movement while tensile strength aids against sagging. High values in both indicate a more rugged adhesive less prone to failure.
| Adhesive Type | Shear Strength (PSI) | Tensile Strength (PSI) |
|---|---|---|
| Two-part epoxy | 2,000-3,500 | 2,000-6,000 |
| Acrylic | 500-1,500 | 1,000-2,500 |
| Urethane | 2,000-4,000 | 2,000-5,000 |
Choosing between adhesive types
Two-part epoxy
Epoxies offer very strong rigid bonds and resistance to temperature extremes and moisture. But they require precise mixing and have longer cure times.
Acrylic
Acrylic adhesives allow for more repositioning during application. They bond well but lack the strength of epoxies and urethanes.
Urethane
Urethanes provide extremely strong yet flexible bonds. They require more prep but can tolerate impacts and deformations that break more rigid epoxy bonds.
Conclusion
For most side mirror repairs, high-performance urethane adhesives provide the best combination of strength, flexibility and resistance to the elements. They allow a permanent fix that won’t re-fail from road vibrations or seasonal temperature swings. Just ensure the area is cleaned and prepped first.
Step-by-Step Instructions for Repairing a Fallen Car Mirror
What you’ll need
Supplies needed:
- Replacement automotive adhesive like urethane
- Adhesive primer
- Rubbing alcohol and rags
- Paint scraper
- Masking tape
- Safety glasses
- Wrenches
Optional:
- Replacement mirror
- Filler material
Step 1: Remove the door panel
The first step is to remove the interior door panel to access the mirror mount. Consult the repair manual for your make/model for the proper procedure. Key steps:
- Pry off trim pieces with padded tool
- Remove mounting screws
- Unplug any electrical connectors
- Detach clips securing panel
- Remove door panel
Tip
Protect painted surfaces with masking tape and use gentle prying motions. Save any loose screws or clips.
Step 2: Clean the mounting surface
Thoroughly clean the mirror mount and door area with rubbing alcohol. Use a paint scraper to remove any old adhesive. Get down to bare clean metal for the best bond.
Step 3: Prep and apply primer
Lightly scuff the mirror housing and mount area with sandpaper. Wipe away debris. Apply a thin coat of adhesive primer to both surfaces. Allow to dry per product instructions.
Step 4: Apply the adhesive
Run a 1/4″ bead of automotive adhesive around the edge of the mirror housing. Use a urethane or acrylic adhesive. Avoid globs and over-application.
| Adhesive Amount Guidelines | |
|---|---|
| Housing size | Adhesive bead size |
| Small | 1/8″ |
| Medium | 1/4″ |
| Large | 3/8″ |
Step 5: Mount the mirror
Press the mirror firmly to the door for 60 seconds minimum. Tighten any mounting bolts to spec with wrenches. Do not overtighten.
Step 6: Allow adhesive to cure
Follow cure times on product instructions. Most take 1-2 hours for initial bond but 24-48 hours to fully harden. Keep the vehicle stationary during this period.
Step 7: Test and reinstall door panel
Check that the mirror is solidly bonded before driving. Replace the door panel. Reconnect any electrical plugs and reinstall trim pieces. Test mirror movement.
Additional tips
- Use filler material if needed to fill any gaps in the mount
- Consider replacing the mirror if the housing is damaged
- Allow longer cure times in colder temperatures
- Wear protective eyewear and gloves when scraping
Conclusion
With the right supplies and proper technique, you can permanently reattach a fallen car mirror at home. Just work slowly and allow adequate cure time. See a professional if unsure.