Page Contents
- 1 What are some common problems with kitchen faucet sprayer heads?
- 2 How can you clean clogged or reduced flow sprayer heads?
- 3 How do you fix a leaky sprayer head connection?
- 4 Why won’t my sprayer head retract?
- 5 How to fix a sticky sprayer head button
- 6 How to repair a damaged sprayer hose
- 7 When should you replace a faulty sprayer head completely?
- 8 Tips for preventing future problems
- 9 Conclusion
What are some common problems with kitchen faucet sprayer heads?
Some common problems with kitchen faucet sprayer heads include:
- Clogged or reduced water flow – This can be caused by mineral deposits and sediment buildup in the sprayer head or hose.
- Leakage – Leaks can occur at the connections between the sprayer head and hose, or where the hose connects to the faucet body.
- Sprayer not retracting – Many pull-out/pull-down sprayer heads use a retraction mechanism that can become stuck or broken over time.
- Sprayer button sticks – The button or trigger that controls water flow can become sticky, hard to press, or not fully open/close.
- Damaged hose – The sprayer hose can develop kinks, cracks, or burst from regular use and manipulation over time.
Issues with water flow, leakage, and retraction problems are usually repairable, while a severely damaged hose will require full replacement.
How can you clean clogged or reduced flow sprayer heads?
If your sprayer head has reduced water flow, there are several DIY methods to try cleaning it:
- Run hot water through the sprayer head to dissolve and flush out mineral deposits.
- Unscrew the sprayer head and soak it in a bowl of hot vinegar or lime removal solution to break up sediment buildup.
- Use a small needle or pin to gently clean out the nozzle openings.
- Remove any attached flow restrictor and clean out the small inlet screen.
Avoid using any sharp metal tools to poke the nozzle holes as this can damage the sprayer head. Normally, some soaking and flushing with hot water or an anti-lime solution will clear out most clogged sprayer heads.
How do you fix a leaky sprayer head connection?
If the sprayer head leaks from the connection to the hose, try these fixes:
- Tighten the nut attaching the sprayer head to the hose by hand or with an adjustable wrench.
- Clean the threads on the sprayer neck and hose nut to remove any buildup.
- Wrap plumber’s tape around the sprayer head threads for a tighter seal.
- Replace any worn out gaskets or o-rings around the connections.
- Check for cracks or damage where the hose interacts with the sprayer neck.
Proper tightening is often all that is needed, but worn gaskets, damaged threads, or a cracked sprayer neck fitting will require replacing the affected parts. Avoid over-tightening connections as this can damage the plastic threading.
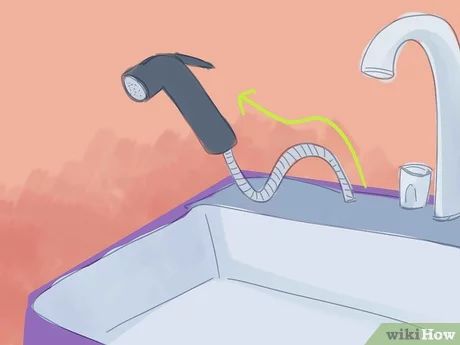
Why won’t my sprayer head retract?
If your kitchen sprayer head fails to retract back into the faucet spout after extending, here are some potential causes:
- Sediment or hard water deposits in the retraction mechanism
- Detached, worn out, or broken retraction spring
- Plastic tubing kinked or cracked inside the spout
- Magnet separated from sprayer head
- Divertor or other internal component broken
Start by cleaning the faucet interior and flushing it with hot water. Spray some lubricant like WD-40 into the spout. Pull firmly on the spray head to try forcing through any stuck buildup.
If cleaning doesn’t work, you’ll need to disconnect the sprayer and inspect all internal parts. Replace any broken springs, tubing, magnets, or other components. Test for smooth operation after reassembling.
If the button or trigger on your sprayer head becomes difficult to push or no longer fully opens/closes the water flow, try these troubleshooting tips:
- Flush with hot water and press the button repeatedly to clear sediment.
- Spray lubricant like WD-40 into the button assembly and depress it several times.
- Check and remove any visible debris or buildup on the button.
- Disassemble the button housing and clean out any stuck mineral deposits.
- Replace worn or swollen internal gaskets and o-rings.
In some cases, you may need to fully replace the button assembly if it is damaged or worn out internally. Avoid spraying lubricants into the water flow path as this could contaminate your water supply.
How to repair a damaged sprayer hose
If the braided metal hose attached to your sprayer head has developed kinks, cracks, or leaks, here are some tips:
- Try gently bending and straightening the hose to remove minor kinks.
- Seal small cracks or holes with hose sealant tape.
- Cut off severely damaged sections of hose and replace with a hose splice coupling.
- Replace the old hose with an entirely new sprayer hose kit.
Kinked hoses can often be straightened out unless the inner tubing is collapsed. Use sealant sparingly on small cracks. If damage is extensive, replacement is the best option for performance and safety. Be sure to purchase the correct replacement hose for your faucet model.
When should you replace a faulty sprayer head completely?
Here are some signs that indicate it’s time to replace the entire sprayer head assembly:
- Visible cracks, damage, or missing pieces on the spray face or connectors.
- Severely corroded, pitted, or discolored interior passages.
- Malfunctioning button/trigger unable to be disassembled and repaired.
- Leaking that persists after new seals and o-rings installed.
- Clogged or reduced flow unable to be cleared after thorough cleaning.
- Retraction failure due to broken internal parts.
Replacement sprayer head kits are relatively inexpensive for most faucet models. When internal corrosion, leaks, or broken components can’t be fixed, replacement is the best option to restore full function and convenience.
Tips for preventing future problems
Here are some tips to help prevent repeat issues with your kitchen sprayer head:
- Clean sprayer nozzles periodically with hot water to prevent mineral buildup.
- Extend the hose and check for kinks or damage every few months.
- Choose an anti-scale sprayer model if you live in a hard water area.
- Always retract the spray head gently to avoid damaging the hose.
- Avoid knocking or applying excess force to the sprayer head.
- Read the manufacturer instructions for proper operation and care.
Being attentive to periodic maintenance and careful daily use will help maximize the service life of your kitchen sprayer. Consider water softening solutions if hard water deposits are an ongoing issue in your home.
Conclusion
Kitchen sprayer heads are extremely convenient but prone to clogs, leaks, and wear over time. Following a good cleaning routine and making timely repairs can restore function and avoid the need for a full replacement. When problems do occur, there are several DIY troubleshooting steps related to flow, leakage, retraction, button sticks, and hose damage that may resolve common issues. If visible cracks, missing parts, or internal corrosion are present, replacing the entire sprayer head is the best permanent solution for ongoing performance and longevity. With proper care and maintenance, an adjustable kitchen sprayer can provide many years of reliable service.
| Problem | Potential Causes | Solutions |
|---|---|---|
| Clogged or reduced flow | Mineral deposits, sediment buildup | Clean with hot water, soak in vinegar, gently clear nozzle holes |
| Leaking connections | Loose nut, worn gasket/o-ring, cracked fitting | Tighten nut, replace gaskets, check for cracks |
| Sprayer not retracting | Buildup in retraction mechanism, broken spring, damaged tubing | Clean and lubricate retraction mechanism, replace any broken parts |
| Sticky button | Mineral deposits, worn gaskets | Clean button assembly, lubricate, replace gaskets |
| Damaged hose | Kinks, cracks, bursts | Straighten, seal cracks, splice or replace hose |