A toilet flange, also known as a closet flange, is a pipe fitting that connects the toilet to the drain pipe in the floor. It is usually made of PVC or metal and has slots for mounting bolts to secure the toilet. Over time, a toilet flange can become loose, deteriorate, or even break, causing leaks and allowing sewer gases into the home. Replacing or repairing a broken toilet flange under the floor can be a tricky DIY project but is doable with the right tools and knowledge. Here we will walk through the steps for how to access and fix a toilet flange under the floor.
Page Contents
- 1 What is a Toilet Flange?
- 2 Why Would a Toilet Flange Need Repair?
- 3 Preparation
- 4 How To Replace a Toilet Flange
- 5 How To Repair a Loose Toilet Flange
- 6 Can You Move a Toilet Flange?
- 7 Adding a Flange Extender Ring
- 8 How To Fix Flange Height with Self-Leveling Concrete
- 9 Replacing Toilet Flange on Concrete Floor
- 10 Fixing Toilet Flange with Broken Floor
- 11 Cost to Replace Toilet Flange
- 12 Preventing Toilet Flange Damage
- 13 When to Call a Professional for Toilet Flange Repair
- 14 Conclusion
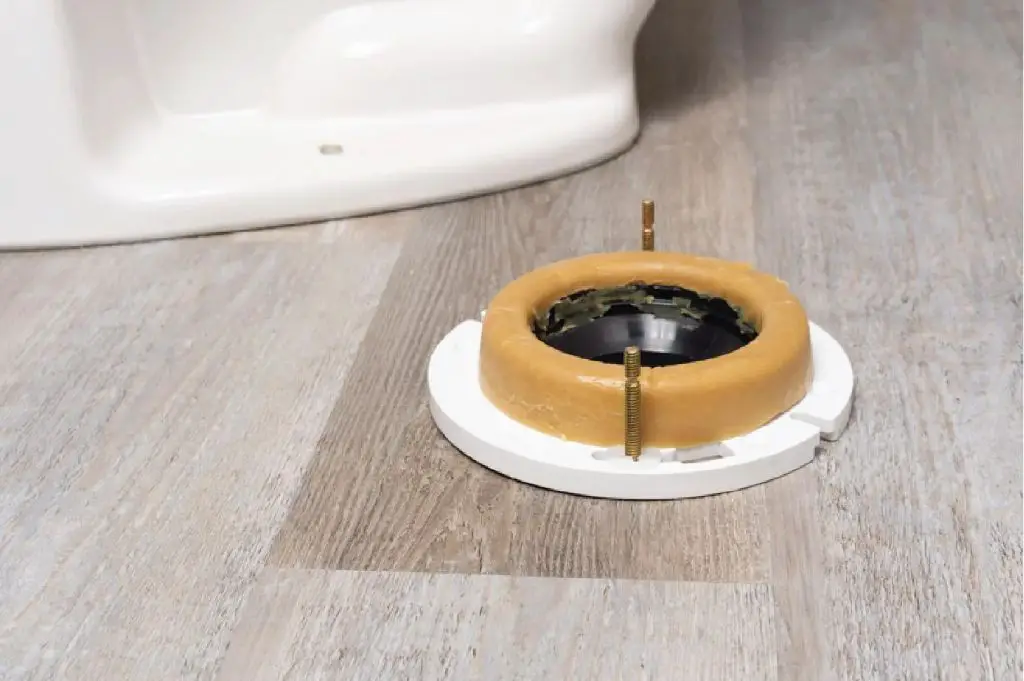
What is a Toilet Flange?
A toilet flange, also known as a closet flange, is a pipe fitting that connects the bottom of a toilet to the drain pipe in the floor. It is always positioned at floor level and attached to the drain pipe. Here are some key things to know about toilet flanges:
– Material – Most are made of PVC plastic but some older ones may be cast iron. Newer styles feature a stainless steel ring for added strength.
– Mounting Bolts – Features slots that allow mounting bolts to pass through to secure the toilet. There are typically two or four slots.
– Sealing – A wax ring forms a seal between the bottom of the toilet and flange to prevent leaks and sewer gas escape.
– Position – Sits on top of the drain pipe, level with the finished floor. Extends up vertically about 1-2 inches.
– Size – Designed to fit 3” or 4” drain pipes. Matching the flange size to drain size is crucial.
– Connection – Attaches to the drain pipe below, allowing waste to flow from toilet into drain line. A rubber gasket can provide the seal here.
Why Would a Toilet Flange Need Repair?
There are a few common reasons why a toilet flange may need to be repaired or replaced entirely:
– Broken or cracked flange – Normal wear and tear can cause the flange to crack or break over time. This will leave the toilet unstable and leak sewer gases.
– Loose mounting bolts – If mounting bolts become loose, the toilet will rock and leak from the base. This indicates a problem with the flange mounting.
– Damage during flooring installation – New flooring like tile or vinyl can sometimes damage an existing flange during installation. The wax seal will also no longer match up.
– Rotting or deterioration – An old flange made of iron can rust and deteriorate over time. Plastic flanges can also decay or crack.
– Wrong size – If a new toilet is installed and flange size does not match drain line size, it will need to be replaced.
– Uneven floor – A flange sitting crooked on an uneven floor can allow leaks and movement. Adding a flange extender or shims can help.
Preparation
Before tackling a toilet flange repair, gather the following tools and supplies:
– Safety glasses, work gloves, knee pads
– Flat pry bar
– Caulk and caulk gun
– Putty knife
– Reciprocating saw with metal blade (for cast iron flange)
– PVC cutter (for plastic flange)
– Sandpaper
– Rag
– Plastic or metal replacement flange
– Wax ring
– Flange bolts
– Screwdriver
– Shop vacuum
– Wood shims
– PVC primer & cement (for PVC flange)
Turn off the water supply valve behind the toilet. Flush any remaining water out of the toilet bowl. Disconnect and remove the toilet completely to allow full access to the flange. Cover nearby drains to prevent dropped items from falling in. Have a bucket ready to catch any water in the pipes.
How To Replace a Toilet Flange
Follow these steps to remove an old toilet flange and install a new replacement:
1. Scrape off the old wax ring under the toilet using a putty knife. Remove all residue.
2. Unscrew the flange bolts fully and set aside. You may need to cut through stubborn rusted bolts.
3. Loosen the old flange from the floor using a flat pry bar. Apply it under the flange edge and gently pry upwards.
4. For PVC flanges, use a PVC cutter to cut through the old flange around its circumference. Cut it off the top of the drain pipe below.
5. For metal cast iron flanges, use a reciprocating saw with a metal blade to cut around the flange in a circle. Wear eye protection.
6. Clean the top of the drain pipe thoroughly using sandpaper or a file. Remove any leftover gasket material or residue.
7. Dry fit the new replacement flange onto the drain pipe to test the fit. The bottom lip should sit flush on the floor.
8. For PVC flanges, apply PVC primer and cement to the pipe and flange bottom to permanently attach it. Let cement cure fully.
9. For metal flanges, no gluing is needed. Just position it correctly on the drain pipe with the bolt slots facing up.
10. Press a new wax sealing ring evenly onto the new flange. This seals the toilet base to the flange.
11. Reinstall the toilet atop the new flange and wax ring. Tighten flange bolts evenly until snug. Do not overtighten.
12. Reconnect the water supply line and turn on the shutoff valve. Check for any leaks at the new connection.
How To Repair a Loose Toilet Flange
If the toilet flange is damaged or broken but still intact enough to possibly repair, follow these steps:
1. Remove the toilet as outlined above. Scrape off old wax.
2. Inspect the flange for cracks or decay. Make sure base remains sturdy and level.
3. Try tightening the existing flange bolts first. Insert shim washers if bolts remain loose.
4. If flange is cracked, apply PVC glue or epoxy to bond it back together. Allow to fully cure.
5. For stripped bolt holes, use longer bolts or screws that can grip the subfloor better.
6. If flange is loose from floor, secure with construction adhesive or sealant like silicone.
7. Add an extender ring for additional height if needed to reach toilet base.
8. Reinstall wax ring, toilet, and supply line. Check for leaks or rocking.
9. If leaks persist from a very damaged flange, full replacement is likely needed as outlined above.
Can You Move a Toilet Flange?
It is possible to move a toilet flange over slightly if needed during the repair process:
– The key is ensuring the new location still lines up with the toilet drain horn above.
– When positioned correctly, cut the flange from the pipe with a PVC cutter or metal saw.
– Glue or adhere the flange to the floor at the new, aligned location.
– Use shims under the sides if the floor is uneven.
– A short extension piece may help bridge any gaps to the drain pipe.
– Retest the fit by dry setting the toilet. The horn must insert fully into the moved flange.
– Trying to move a flange too far from the waste line may require relocating the drain completely. Hire a plumber for this complex job.
Adding a Flange Extender Ring
If the existing toilet flange is intact and at the right spot but just sits too low, adding an extender ring can raise it up:
– Remove toilet and wipe flange clean to install extender.
– Select a flange extender kit with the right diameter for your drain size.
– Stack multiple extenders if you need to raise the flange over 1 inch high.
– Use the included screws to secure the extender to the old flange.
– Many extenders are designed with a new wax ring surface on top.
– Reinstall the toilet atop the raised extender kit.
How To Fix Flange Height with Self-Leveling Concrete
For flanges that sit too high or are uneven with the floor:
– Remove toilet and grind down high spots on flange with a rotary tool.
– Fill any gaps below flange with hydraulic cement to raise floor level. Let fully harden.
– Mix up a self-leveling concrete product to desired pouring thickness.
– Pour carefully around and under the flange. Spread evenly.
– Allow concrete to fully cure for 1-2 days.
– Use a concrete grinder to flatten if needed before resetting toilet.
Replacing Toilet Flange on Concrete Floor
Concrete floors make flange replacement more difficult since you cannot cut the flange out from below. Here is one method:
1. Use a hammer drill and concrete bit to drill out the anchors securing the old flange.
2. Break flange into pieces with a hammer and chisel. Remove pieces from the floor.
3. Scrape and clean the top of the drain pipe protruding from the concrete.
4. Apply a concrete epoxy adhesive to the underside of the new flange. Set it in place on concrete.
5. Push replacement flange down to adhere to the pipe below. Add weight if needed.
6. Let epoxy fully cure before reinstalling toilet. This anchors the flange in place.
7. A metal flange may also be anchored with masonry anchor screws drilled into the concrete.
Fixing Toilet Flange with Broken Floor
If the area around the toilet flange has broken, weak subflooring, follow these repair steps:
1. Remove toilet and cut away any loose, rotting subfloor around the flange area.
2. Cut a square piece of 3⁄4” plywood at least 8” x 8” to fit the hole.
3. Apply construction adhesive to the back of the plywood patch.
4. Place plywood over the flange cutout and press firmly in place.
5. Drill pilot holes and use long screws to further secure the plywood patch.
6. Use hydraulic cement to help level and smooth the repaired area around flange.
7. Allow all materials to fully harden before resetting toilet.
Cost to Replace Toilet Flange
Replacing a toilet flange yourself can cost between $10-$40 for the parts like flange, wax ring, bolts and tools needed. Hiring a plumber usually costs $125-$250 depending on labor time and local rates. Here is a typical breakdown:
| Toilet Flange Replacement Cost | DIY | Plumber |
|---|---|---|
| PVC flange | $5 – $15 | n/a |
| Stainless flange | $15 – $40 | n/a |
| Wax seal ring | $5 | included |
| Hardware | $5 | included |
| Tools | $0 – $30 | n/a |
| Labor | $0 | $100 – $150 |
| Total Cost Range | $10 – $40 | $125 – $250 |
As you can see, DIY flange replacement can save over hiring a professional. But for tricky installations or concrete floors, a plumber may be worth the cost.
Preventing Toilet Flange Damage
To help prevent toilet flange damage down the road:
– Use quality flange materials like stainless steel or cast iron. Avoid cheap plastic.
– Make sure flange size matches drain line size for secure connection.
– Replace wax ring every 5-10 years or immediately if loose.
– Tighten flange bolts gradually and evenly to the proper torque.
– Use extra thick wax rings for uneven floor height.
– Caulk around base of toilet to prevent leaks.
– Avoid hitting toilet or flange with force during cleaning.
– Keep all bathroom caulk and sealants in good condition.
– Replace flange along with toilet for full upgrade.
When to Call a Professional for Toilet Flange Repair
While do-it-yourselfers can handle many flange replacements and repairs, it’s best to call in a professional plumber in these situations:
– Cast iron or lead flange needs replacement. These require special tools.
– Concrete floor installation. Breaking concrete requires specific skills.
– Drain line needs to be moved or replaced.
– Severe water damage or rotted floor around flange. Major repairs needed.
– Old galvanized pipe must be cut out and replaced with PVC.
– Toilet drain is completely clogged below the flange.
– Flange repair is needed in a tight, awkward crawlspace area.
Hiring a pro for difficult flange projects can provide peace of mind and prevent costlier future repairs from DIY mistakes. Many plumbers also offer warranties.
Conclusion
Fixing a toilet flange under the floor is a common DIY bathroom repair. With the right tools and replacement flange you can replace the flange fairly easily in most cases. For cracked or loose flanges, a variety of fixing methods like epoxy, extender rings, self-leveling concrete, and plywood patches can often save the flange. But very damaged, rusty or uneven flanges may need full replacement. If the drain line location or concrete flooring creates challenges, calling a professional plumber is advisable for this project. With proper flange repair, you can restore a rock solid mount for the toilet and prevent leaks or damage.