A toilet flapper that won’t close completely is a common problem that can cause your toilet to continuously run or leak water into the bowl. Fixing a flapper that won’t seal properly is usually an easy DIY job that doesn’t require any special tools.
Page Contents
What is a toilet flapper and what does it do?
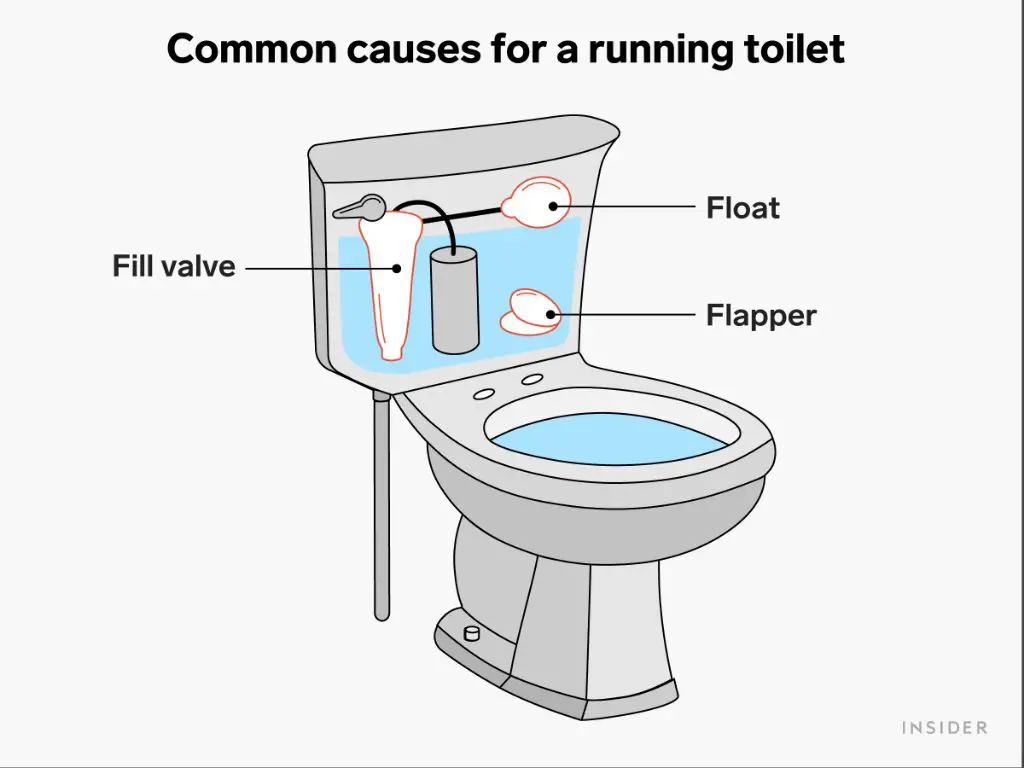
The flapper is the rubber seal at the bottom of the tank that lifts up when you flush the toilet. When you press the flush handle, the flapper lifts up and allows the water in the tank to rush into the toilet bowl. Once the tank has emptied, the flapper is supposed to close sealing the tank so it can refill with water for the next flush. If the flapper doesn’t close all the way, water will continuously trickle from the tank into the bowl, resulting in higher water usage.
Why won’t my toilet flapper seal?
There are a few common reasons why a toilet flapper may not be sealing properly:
- The flapper is old and deteriorated. Flappers can weaken and crack over time.
- Buildup of minerals from hard water on the flapper seal. This prevents the flapper from making a tight seal.
- The flapper chain is too tight, which doesn’t allow the flapper to close fully.
- The flapper is the wrong size for your toilet tank.
How to diagnose the problem
Start by taking a look inside your toilet tank. Lift off the tank lid and inspect the flapper. Here’s what to look for:
- Check for signs of wear or cracking on the flapper. Rubber that is cracked, misshapen, or looks swollen indicates it’s time for a new flapper.
- See if mineral deposits have built up on the flapper seal. You’ll see chalky white or rust colored buildup.
- When you flush, check that the flapper is rising enough to allow a full flush. Make sure it’s not getting hung up on something.
- After flushing, check that the flapper is dropping back down fully onto the flush valve seal. If you see water continuously running into the bowl, it’s not sealing properly.
Testing with food coloring is another method to diagnose a flapper leak. Simply add a few drops of food coloring into the tank after it has filled. Do not flush. Wait about 10-15 minutes and then check the toilet bowl for color. If you see coloring in the bowl, it indicates that water is slowly leaking from the tank and the flapper is not fully sealed.
How to fix a flapper that won’t close fully
Here are the steps to fix a leaky toilet flapper so it seals properly:
Clean mineral deposits from flapper
Hard water mineral buildup on the flapper can prevent a tight seal. To clean:
- Turn off the water valve behind or under the toilet.
- Take the flapper off by removing the chain and prying up the tabs around the flapper.
- Scrub off mineral deposits using a plastic bristle brush or pumice stone.
- Clean the matching seal surface on the bottom of the tank.
- Reattach flapper and chain. Make sure it moves freely.
- Turn water back on and test.
Adjust flapper chain
If the flapper chain is too tight, it won’t allow the flapper to drop down fully. To loosen:
- Disconnect chain from flapper if attached.
- Loosen chain by removing a chain link or two.
- Reconnect chain with just enough slack so the flapper can drop and seal.
Replace flapper
If cleaning or adjusting the chain doesn’t fix it, the flapper likely needs to be replaced. Here’s how:
- Turn off toilet water valve.
- Disconnect and remove old flapper. Inspect seal area for debris.
- Clean seal surface area if needed.
- Install new flapper. Make sure it’s the same style and size as old one.
- Attach flapper chain with just a little slack.
- Turn on water and test flush several times.
Make sure to purchase the correct replacement flapper. Bring the old flapper to the hardware store to match it up. Flappers are inexpensive, usually less than $10.
When to call a plumber
While a simple flapper replacement is an easy DIY job, there are some instances where it’s best to call a professional plumber:
- If the new flapper you installed still won’t seal, there could be an issue with the flush valve seat and a plumber may need to replace seals or valves.
- If you have a two-piece flapper assembly, replacement is trickier and best left to a plumber.
- If you have a modern pressure-assisted or low-flow toilet, these operate differently than old style toilets and may require a pro.
- If you have a tankless style toilet, these do not operate with a flapper and require service from a qualified plumber.
Preventing future flapper leaks
Here are some tips to extend the life of your flapper and prevent leaks down the road:
- Avoid slamming the toilet seat down hard after flushing which can lead to hairline cracks in the flapper over time.
- Consider using a water softener if you have hard water, to minimize mineral buildup on flapper seal surfaces.
- Change the flapper as a regular part of toilet maintenance every 3-5 years.
- Use a chlorine-free toilet cleaner to help prevent deterioration of flapper rubber.
When to replace the entire flush valve
While fixing or replacing the flapper is the go-to solution for a leaky toilet, sometimes deteriorated valves or tank components can prevent the flapper from sealing correctly no matter how many times it’s replaced. Here are signs that the entire flush valve assembly needs to be rebuilt or replaced:
- The valve seat where the flapper seals is badly corroded or damaged.
- The overflow tube is clogged or has a gap that affects flapper seal.
- You’ve tried several flappers and none of them seal properly.
- Water level in tank is difficult to adjust and causes weak or intermittent flushes.
A full flush valve repair kit allows you to replace all the working parts inside the tank, including the valve seals, flapper, gaskets, bolts, and overflow tube. Kits run $25-40 and provide a more complete fix to a chronically leaky valve, rather than just swapping flappers endlessly. Call a plumber if you don’t feel comfortable completing this type of repair.
Conclusion
A leaky toilet flapper is usually an easy fix. Start by cleaning or replacing the flapper and making sure the chain has the right amount of slack. Make sure to use chlorine-free cleaners and change the flapper regularly to extend its lifespan. If the leak persists after flapper replacement, you may need to replace the entire flush valve assembly. With a little effort, you can stop that annoying toilet tank leak and save on your water bill.