Maintaining a sturdy and secure wooden fence is an important part of any property upkeep. Over time, wooden fence posts can rot, crack, or become loose and require repair. Fixing a damaged wooden fence post helps ensure the fence stays upright and prevents further deterioration. This comprehensive guide will walk through the steps for repairing common wooden fence post problems.
Page Contents
Assessing the Damage
Before starting any repairs, carefully inspect the post to determine what is wrong. Here are some of the most common issues that can afflict wooden posts:
- Rotting wood – This is caused by exposure to moisture and manifests as soft, punky wood. Use a screwdriver to test wood hardness.
- Insect damage – Look for small bore holes or tunnels in the post. Carpenter ants and termites will burrow into the wood.
- Warping or cracking – Significant cracks or warp can compromise strength. This is common with improper installation.
- Loose in ground – Posts can become loose due to soil erosion, frost upheaval, or deteriorating concrete.
- Collision damage – Accidental impacts can split or crack wood fibers.
Pay attention to where the damage is located. For example, rotting or insect damage is often concentrated at ground level where moisture is highest. Once the extent of the damage is determined, you can decide whether the post needs to be repaired or fully replaced.
Tools and Materials
Gather the necessary tools and materials before starting the fence post repair project:
- Shovel
- Post hole digger
- Hand saw or chainsaw
- Hammer
- Pry bar
- Level
- Drill and drill bits
- Wrench
- Carpenter’s plane
- Wood filler
- Replacement wood post
- Concrete
- Gravel
- Galvanized screws and nails
- Exterior wood glue
- Wood preservative
Having these tools close at hand will make the repair job much easier. You may need a helper for some tasks like removing and replacing heavy posts.
Prepping the Damaged Post
Before installing any new materials, prep work needs to be done on the original damaged post. Here are the steps:
- Remove any detached boards or debris surrounding the post.
- Excavate soil around the post to expose 2 feet of the post bottom.
- Check if a concrete anchor was used. Chip away any deteriorating concrete with a chisel and hammer.
- Cut away any rotting or insect damaged areas using a saw. Cut into good, solid wood.
- Smooth cut areas with a plane and sandpaper.
- Apply wood preservative or fungicidal sealant to cut areas.
- Drill pilot holes for new fasteners if needed.
Now the post is ready for the repair installation. For severely decayed posts that are unrestorable, complete removal will be required before installing the new replacement post.
Setting a New Post Next to the Old One
One simple repair method is to install a new post adjacent to the damaged one. Here is how to complete this process:
- Dig a new post hole about 2 feet away and to the same depth as the original.
- Insert the new treated wood post into the hole.
- Fill the bottom of hole with 6 inches of gravel for drainage.
- Use post level to ensure new post is plumb.
- Hold the post in place and fill around it with concrete mix. Wait for concrete to cure.
- Attach a 2×4 brace beam between the old and new posts using lag screws.
- Attach new fencing boards to the new post surface.
- Use exterior wood screws to reinforce aged fencing boards as needed.
- Paint or stain the new wood to match old post coloring.
Adding a sistered new post is quick and provides immediate structural support. The damaged old post can be left in place or removed once the concrete cures.
Replacing the Entire Post
For severely damaged posts that are split or rotting at the top, complete replacement will be required. Follow these steps:
- Detach any fencing boards still attached to the post. Pry them off carefully with a hammer and pry bar.
- Use a post hole digger to excavate the soil around the deepest portion of the post, about 2 feet down.
- Use a sledgehammer or pry bar to rock the post back and forth, loosening it from the ground.
- Attach a chain to the top of the post and connect it to a vehicle or post puller tool. Pull the post directly upwards to extract.
- A backhoe loader can also be used to pull up stubborn posts.
- Dig a new hole that is slightly deeper and wider than the original.
- Insert the new pressure treated post and fill with drainage gravel.
- Use a level to ensure the post is plumb as concrete backfill is poured.
- Allow concrete to fully cure before attaching new boards.
- Pre-drill holes and attach boards to new post with galvanized screws.
- Cut boards as needed to proper length.
Completely replacing a damaged post provides a permanent solution. Take safety precautions when extracting and moving heavy posts.
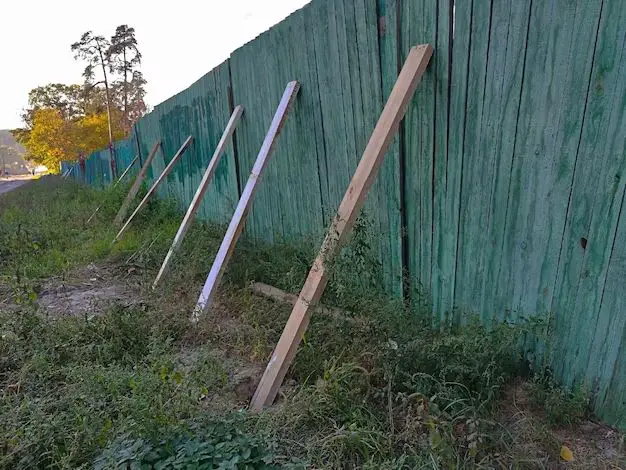
Temporary Bracing
If you need to repair a post but don’t have time for full replacement, temporary bracing can stabilize it:
- Use angled boards screwed into the sides of the post to brace it.
- Attach heavy duty metal post anchors to the post bottom and drive into ground.
- Use rope or chain wrapped around the post to stake it in place.
- Metal post jacks can be positioned beneath the post and raised to lift and stabilize.
Temporary fixes won’t last long, but can provide a quick band-aid until more thorough repairs are made.
Preventing Future Damage
Use these tips to help your repaired fence posts last longer:
- Check for signs of rot each year before it worsens.
- Re-stain and seal wood regularly to prevent moisture damage.
- Keep soil sloped to promote drainage away from posts.
- Don’t allow plants or grass to grow against posts.
- Use metal post anchors or concrete collars to fortify soil.
- Inspect for termites and carpenter ants which damage wood from the inside.
An ounce of prevention saves fence posts! With diligent maintenance checks, minor issues can be caught before necessitating major repairs.
Key Tips for Repairing Wooden Fence Posts
Here is a quick summary of the key tips for repairing wooden fence posts:
| Phase | Tip |
|---|---|
| Inspection | Check for rot, insects, cracks, and loose soil. |
| Prep Work | Excavate soil, cut away damaged areas, apply preservative. |
| New Post | Dig new hole, use gravel and concrete for setting post. |
| Replacement | Detach boards, pull out old post, set new post with concrete. |
| Bracing | Use boards, anchors, rope, or jacks to temporarily stabilize. |
| Prevention | Seal and stain wood, improve drainage, inspect for termites. |
Keep this summary handy as a quick reference for approaching any fence post repair project.
Conclusion
Maintaining sturdy fence posts is an ongoing task for any property owner. Thankfully, with the right tools and proper technique, repairing common post problems like rot, cracking, and loosening is usually a straightforward process. Remember to always start by thoroughly inspecting the posts and determining how much repair is needed. Keep the surrounding soil dry and sloped for prevention. With periodic maintenance and timely repairs, you can keep your wooden fence posts in good working order for many years to come. Let this guide give you the knowledge and confidence to fix those wobbly posts and keep your fence looking its best.