Page Contents
- 1 What causes black mold in showers?
- 2 Health risks of black mold
- 3 How to remove black mold from shower ceilings
- 4 DIY methods to kill and remove black mold
- 5 Professional mold remediation
- 6 How much does black mold remediation cost?
- 7 Can you paint over black mold?
- 8 How to test for mold behind shower walls
- 9 How to prevent mold in shower
- 10 Conclusion
What causes black mold in showers?
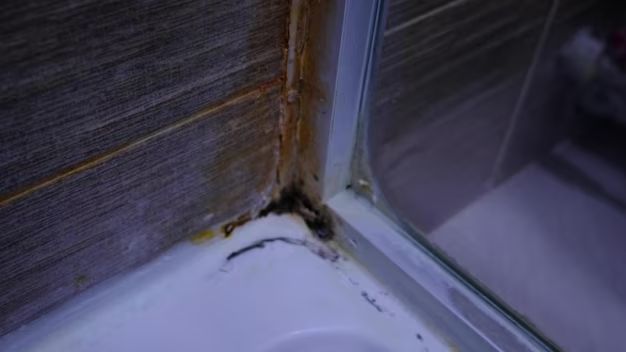
Black mold, also known as Stachybotrys chartarum, is a type of mold that grows in damp, humid areas with poor air circulation. Showers are a common place for black mold to grow because of the warm, moist environment. When water splashes on the walls and ceiling during a shower, mold spores can begin to grow if not properly cleaned.
Several factors can contribute to the growth of black mold in showers:
- Insufficient ventilation – Bathrooms need proper ventilation to allow moisture to escape. Lack of exhaust fans or windows can let moist air linger.
- Leaky plumbing – Dripping faucets, showerheads, or pipes can lead to excess moisture.
- High humidity – Mold thrives in humid environments above 55% relative humidity.
- Standing water – Water pooling in corners, crevices or on surfaces allows mold to grow.
- Porosity – Porous materials like grout, sheetrock, wood, and ceiling tiles provide surfaces for mold to inhabit.
- Temperature – Warm, consistently moist environments promote mold growth.
If these excess moisture issues are not addressed, black mold can establish itself in a shower. Regular cleaning alone is not always sufficient once mold has taken hold. Other moisture control and removal steps need to be taken.
Health risks of black mold
Exposure to black mold can potentially cause a variety of health issues:
- Allergic reactions – Symptoms like wheezing, runny nose, red or itchy eyes, and skin rash.
- Respiratory problems – Irritation and inflammation of airways, coughing, difficulty breathing.
- Sinus congestion – Mold spores can aggravate chronic sinusitis.
- Asthma attacks – Mold exposure can trigger asthma episodes in sensitive individuals.
- Headaches – Both allergy-related and potentially toxic mold headaches.
- Fatigue – Possible links between mold exposure and chronic fatigue.
- Mood effects – Associations found between mold and symptoms of depression and anxiety.
The very young, elderly, pregnant women, and those with compromised immune systems or chronic respiratory conditions are most vulnerable to black mold’s effects. Both dead and living mold can provoke allergic and respiratory reactions, so moldy areas should be remediated as soon as possible.
How to remove black mold from shower ceilings
Fixing a black mold problem on a shower ceiling requires a multi-step process:
- Assess and address the moisture source.
- KIll and prepare the mold.
- Scrub away mold and stain.
- Dry out affected areas completely.
- Seal and inhibit mold recurrence.
Any plumbing leaks, humidity issues, or standing water must be corrected to stop mold growth. An exhaust fan may need to be added or improved. Identifying and fixing the root cause of moisture is crucial.
First, spray the moldy areas with a commercial mold killing biocide such as concrobium or bleach solution. This will kill surface mold and prepare the area for cleaning. Wear protective gear like goggles, gloves and an N95 respirator mask.
Use a stiff nylon scrub brush and warm, soapy water to manually scrub stained areas. Take care not to scatter mold spores. A steam cleaner can aid cleaning textured or porous surfaces. Rinse thoroughly.
Use a dehumidifier, fans, and open windows to actively dry out the shower. Porous materials may need replacement if they cannot be fully dried out. Any residual moisture will allow mold regrowth.
Apply a mildew resistant grout sealer to re-grouted areas. Repaint cleaned ceiling patches with bathroom moisture-resistant primer and paint. Perform periodic re-caulking around joints. Good ventilation going forward will help control humidity.
Moldy drywall may need partial or complete removal for cleaning behind walls. Seek professional assessment for signs of extensive mold damage beyond surface cleaning.
DIY methods to kill and remove black mold
For small black mold jobs, homeowners can attempt DIY removal using proper preparatory and cleaning methods:
Prep work
- Buy an N95 respirator mask, goggles, gloves, disposable coveralls.
- Isolate the affected area – seal vents, close doors.
- Mix up mold killing solutions in a pump sprayer.
Killing solutions
- Bleach – Mix 1 cup bleach per gallon of water. Spray on moldy areas until completely wet. Let sit 15 minutes before scrubbing. Rinse cleaned areas with water.
- Borax – A more natural option, mix 1 cup borax with 1 gallon hot water. Spray and let sit, then scrub and rinse.
- Vinegar – White vinegar kills up to 82% of mold species. Use undiluted on shower mold. Follow with hydrogen peroxide if needed.
- Hydrogen Peroxide – Another alternative, spray 3% hydrogen peroxide solution on mold. Scrub after fizzing stops.
- Concrobium – Buy premixed concrobium mold killer spray if you want an commercial biocide product.
Scrubbing and cleaning
Once the killing solution has sat for 10-15 minutes on shower surfaces, scrub away remaining mold and stains using:
- Stiff nylon brush
- Non-scratch scouring pad
- Soft-bristle toothbrush for grout
- Steam cleaner attachment for porous surfaces like grout or acoustic ceiling tile
Rinse cleaned areas thoroughly with water to remove all mold residue and cleaning solutions.
Drying and inhibition
After vigorous scrub cleaning, use the following to completely dry out affected porous materials:
- Industrial dehumidifier
- Fans to improve air circulation
- Open windows if weather permits
- Room air conditioner or HVAC system set to lower interior humidity
Once dry, apply a preventive sealant:
- Grout sealer like Miracle 511 Impregnator for re-grouted joints
- Bathroom moisture-resistant primer and paint for ceilings
- New coat of bathroom-grade silicone caulk for gaps and joints
With diligent scrubbing and drying, smaller areas of black mold can be successfully removed through careful DIY methods. However, recurring mold or signs of mold within walls requires professional mold remediation. Use protective gear when cleaning mold.
Professional mold remediation
For large scale black mold problems or mold within shower walls and ceilings, professional mold remediation will be required. Here is a general overview of the professional mold removal process:
Inspection and containment
A mold remediation pro will:
- Do a thorough inspection to identify all affected areas.
- Determine if the mold has spread within shower walls or ceiling cavities.
- Conduct moisture readings and humidity measurements.
- Isolate and contain the work area using plastic sheeting.
- Set up air scrubbers with HEPA filtration.
Mold removal
Depending on the inspection findings, the remediation crew will:
- Treat non-porous surfaces with biocide and scrub clean.
- Use steam, sanding, or replace porous materials like grout and acoustic ceiling tile.
- Cut out and replace moldy drywall if moisture level is low.
- Perform wall cavity cleaning if hidden mold is detected.
Proper containment and air filtration prevents spore spread during remediation. Removed materials are double-bagged and disposed of.
Post remediation and prevention
As a final step, the pro remediators will:
- Run air clearance tests to confirm mold levels are safe.
- Apply anti-microbial coating to treated surfaces.
- Perform moisture mapping to check that drying was complete.
- Help correct humidity, ventilation, leak issues.
- Provide tips to prevent future mold recurrence.
Though more expensive than DIY, professional mold removal provides full eradication of mold problems within walls, ceilings, ventilation systems and confined spaces that DIY cannot reach. For homeowners struggling with recurring black mold, hiring a certified professional mold removal company is worth the cost.
How much does black mold remediation cost?
The cost to professionally remove black mold varies based on the extent of the problem and remediation methods needed:
- Limited surface mold – $500 to $1000.
- Medium wall and ceiling mold -$2000 to $4000.
- Major mold contamination – $4000 to $8000.
- HVAC system mold removal – $1000 to $3000.
This covers containing, cleaning, and sealing a small area of surface mold growth.
For mid-size areas of mold growth inside wall cavities or above ceiling tiles, with drywall removal.
For widespread mold contamination throughout bathroom requiring extensive wall reconstruction, cavity treatment, plus mold resistant primer paints and sealers.
If mold spreads to heating and air ducts, professional cleaning and sanitizing of the HVAC system is required.
Other factors that can increase black mold abatement costs:
- Severity of moisture damage requiring repairs.
- Need for containment units and air scrubbers.
- Special structural repairs of wall, floor and ceiling surfaces.
- Amount of materials requiring replacement due to porous mold growth.
- Difficult access areas like attics, crawlspaces and ventilation ducts.
Homeowners should get at least 3 estimates from certified mold remediation companies before selecting one to perform the black mold removal. While expensive, professional mold removal prevents health hazards and more costly structural damages long-term.
Can you paint over black mold?
Painting over black mold is not recommended. Mold often grows in the porous material underneath paint such as drywall, plaster, wood or concrete. Simply painting over will seal the mold inside walls or ceilings where it can continue spreading and release spores.
To properly fix a black mold problem:
- Kill mold – Apply a biocide solution first to eliminate active mold.
- Clean surfaces – Thoroughly clean off all staining after application.
- Dry substrate – Ensure underlying material is completely dry before painting.
- Seal with primer – Use a stain-blocking, mold resistant primer to seal surfaces.
- Paint with bathroom paint – Apply a moisture-resistant bathroom ceiling paint as a finish coat.
If the affected surface cannot be properly cleaned and dried out first, the substrate may need replacement before painting. Simply applying new paint over hidden mold will enable future mold outbreaks. Proper process of killing, cleaning, drying and priming ensures paint will adhere well and inhibit mold recurrence.
How to test for mold behind shower walls
If black mold is visible on shower surfaces, it may have spread behind tiles, walls or ceiling. Here are some DIY methods to detect hidden mold growth:
Physical examination
- Look for cracks, gaps or bulging in shower surfaces where water may intrude.
- Smell for a musty odor which could indicate mold spread.
- Check for soft, damp or stained areas in surrounding walls.
- Examine backside of wall for stains where plumbing penetrates.
- Knock on tiles or drywall to check for hollow or damaged areas.
Moisture meter
Use a moisture meter pinned into walls or ceiling areas to check for elevated moisture content which promotes mold growth. Hollow, moist areas warrant further professional inspection.
Borescope
A small borescope camera can be inserted into drilled holes to view behind walls for any black mold signs or moisture damage.
Air sampling
Collecting and laboratory testing of air samples can detect elevated spore levels coming from behind walls indicating mold infestation.
Professional inspection
A trained mold inspector has the expertise, high-tech tools and the ability to cut inspection openings to thoroughly assess the presence of hidden mold growth throughout a bathroom. This is the most certain method.
Discovering mold behind shower walls early is important to prevent spreading damage. Notify professionals if inspections reveal moisture issues and hidden mold growth. Addressing it quickly reduces repair costs.
How to prevent mold in shower
Preventing the conditions that allow black mold to flourish is better than dealing with removal. Here are some tips to stop mold in showers:
Control moisture
- Fix plumbing leaks promptly.
- Caulk cracks and crevices thoroughly.
- Apply grout sealer to porous joints.
- Slope shower floor towards drain.
- Use exhaust fans during and after showering.
- Leave bathroom door open to ventilate.
- Dehumidify to keep indoor humidity under 50%.
Clean regularly
- Keep surfaces free of soap scum and mildew stains.
- Disinfect walls, floors and grout lines weekly.
- Wipe down shower curtains and tracks.
- Scrub caulk joints and tile crevices.
- Clean bathroom ceiling above shower.
Design and upgrades
- Choose mold resistant bathroom paint.
- Replace porous ceiling material with mold-proof board.
- Install an HVAC system with better ventilation.
- Upgrade to a moisture-proof shower enclosure.
Routine bathroom and shower cleaning along with moisture control are the best defenses against recurring black mold problems. Pay attention to any failure points that allow water intrusion. With diligent prevention, expensive mold removal work can be avoided.
Conclusion
Black mold growth on bathroom ceilings and shower stalls can happen when excess moisture and poor ventilation provide optimal conditions for mold. While some small scale black mold can be removed through thorough DIY scrubbing and drying, recurring mold or major outbreaks behind walls requires professional mold remediation to fully rectify.
Preventing excess humidity conditions and maintaining clean, dry shower surfaces provides the best protection against toxic black mold infestations in the first place. Attention to quickly fixing any water leaks or drips can also keep shower mold problems from ever taking root. Implementing good bathroom ventilation and dehumidification practices can help achieve moisture control.
With diligence to eliminating conducive conditions as well as proper remediation of existing infestations, black mold in showers can be effectively eliminated and kept under control. Having a clean, healthy bathroom environment then becomes possible.