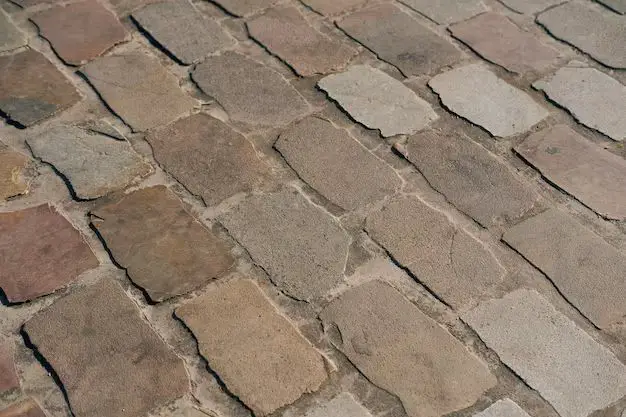
Uneven brick pavers can be a real eyesore in your driveway, patio, or walkway. Over time, bricks can shift and settle due to soil movement, erosion, tree roots, or improper installation. fixing uneven pavers may seem daunting, but with the right tools and techniques, it can be a doable DIY project.
Page Contents
What causes brick pavers to become uneven?
There are several common causes of uneven brick pavers:
- Improper base preparation – The base underneath the pavers is crucial for stability. An insufficient base or improper compaction can lead to settling and shifting of pavers over time.
- Tree root growth – Tree roots slowly growing under pavers can push them up unevenly. This is a common problem for pavers near trees.
- Settling and erosion – Normal settling of soil and erosion from weather and water runoff can cause dips, bumps, and uneven spots in paver surfaces.
- Vehicular traffic – In driveways and high-traffic areas, the weight of cars and trucks can settle pavers unevenly over time.
- Poor installation – Incorrect installment of the paver base or surface during construction can lead to an uneven surface down the road.
Tools and materials needed
Fixing uneven pavers requires a few specialized tools and materials. Here’s what you’ll need:
- Pry bar – A long steel pry bar helps lift and remove pavers.
- Mason’s chisel – A bullpoint chisel helps cut and shape replacement pavers.
- Rubber mallet – A 2-4 lb. rubber mallet is essential for adjusting pavers.
- Mason’s trowel – Used to spread new joint sand between pavers.
- Level – A long spirit level helps identify uneven spots.
- Broom – For sweeping fresh sand into paver joints.
- Polymeric sand – Special sand that hardens to “lock in” pavers.
- Landscape fabric – Prevents weeds growing between pavers.
- Crushed gravel – For rebuilding the gravel base as needed.
- Replacement pavers – For damaged pavers that need to be replaced.
Inspecting and diagnosing the problem
Carefully inspect the uneven paver area to diagnose what is causing the problem. Here are some steps:
- Use a long level on the surface to identify any humps or depressions. Mark high and low spots with spray paint.
- Check for cracked, damaged, or deteriorating pavers that may need to be replaced.
- Note the overall drainage pattern and look for pooling of water that could be eroding the base.
- Inspect the edge restraints around the perimeter – inadequate restraints can allow pavers to spread and shift.
- Dig into the joint material to check for proper base depth – 2 to 3 inches is recommended for stability.
- Probe for tree roots near affected areas, which may be exerting pressure from below.
Pinpointing the probable causes will inform the best fix. Isolated sunken pavers may just need adjusted, while a generally uneven surface may require rebuilding the base.
Removing the existing pavers
Once the issue is diagnosed, the repair can begin. The first step is prying up and removing affected pavers with care:
- Outline the area being repaired with string lines for straight visual guides.
- Use a pry bar and gently lift up each paver, starting at the outside edge.
- Stack removed pavers neatly on pallets for potential re-use or cleaning.
- Sweep away all joint sand from the bare base area so it’s exposed.
- For tree root problems, dig down and cut away invading roots with a saw or axe.
- Dispose of any cracked, damaged, or deteriorated pavers that can’t be salvaged.
Be sure to wear gloves and safety goggles when prying up pavers. Stack them carefully to avoid scratches or chips.
Adding or replacing the base
After clearing away the paver surface, the condition of the crushed stone base underneath can be inspected. Here are some tips for this important step:
- The base should be excavated at least 6 inches deep, or down to undisturbed soil.
- Replace the base gravel if it’s either insufficient or heavily compacted and uneven.
- Add and level fresh layers of gravel to achieve a smooth, well-compacted base.
- Compact gravel in several lifts, spraying with water to help settle dust.
- Make sure the final compacted base is 2-3 inches below the paver surface.
- Avoid walking on the finished base to keep it smooth and properly compacted.
A quality crushed gravel or stone base provides the stability pavers need. This key step should never be rushed – a smooth, dense base prevents future settling issues.
Re-laying the pavers
Once an even base is prepared, the pavers can be reinstalled. Follow these tips for properly laying the surface:
- Set string lines on gravel base to guide paver spacing and alignment.
- Reuse old pavers if still in good shape, otherwise use new replacement pavers as needed.
- Position pavers tightly, maintaining straight pattern lines. Cut border pavers to fit with chisel.
- Use rubber mallet to tap pavers into desired alignment and height. Make adjustments gradually.
- Check level and surface plane regularly to ensure even paver positioning.
- Fill gaps between pavers with polymeric sand; sweep it into joints. Mist lightly with water to set sand.
- Compact finished surface with a plate compactor. Protect edges with a strip of wood.
Patience and care is required when re-laying pavers. Don’t rush through this critical step. Allow time to frequently inspect alignment and level as you progress.
Preventing future settling
To prevent uneven pavers from reoccurring, some preventative maintenance steps will help:
- Check that edge restraints are secure. Consider adding restraints if none exist currently.
- Fill cracks immediately with polymeric sand to limit erosion and base leaching.
- Clean debris from joints routinely to allow drainage and prevent sand buildup.
- Seal joints every 1-2 years with fresh polymeric sand to strengthen paver bond.
- Limit vehicular traffic on pavers as much as possible.
- Prune nearby trees to avoid invasive surface roots.
Following up your repairs with regular paver maintenance will help ensure your beautiful, level surface lasts for years to come.
Conclusion
Fixing uneven pavers takes time and care, but Yields long-lasting results. By methodically diagnosing the problem, rebuilding the base, carefully relaying the surface, and sealing the joints, you can restore a smooth paver surface that looks and performs beautifully for decades. With the right tools and patience, creating a flawlessly even paver surface is an achievable DIY project for any homeowner. Just follow each step carefully, do not take shortcuts, and your repaired pavers will be a level surface you can enjoy for years to come.