Vinyl plank flooring has become a popular flooring option in many homes thanks to its durability, water resistance, and affordable price point. However, over time, vinyl planks can become disconnected or start to lift up at the seams. When this happens, it’s important to fix them properly to prevent further damage. Here’s a step-by-step guide on how to reattach vinyl planks that are coming apart.
Page Contents
- 1 Assess the Damage
- 2 Remove Affected Planks if Necessary
- 3 Thoroughly Clean the Area
- 4 Apply New Adhesive
- 5 Reinstall the Vinyl Planks
- 6 Consider Using Vinyl Plank Repair Putty for Small Gaps
- 7 Take Steps to Prevent Future Separations
- 8 Tips for Easing Vinyl Plank Repairs
- 9 When to Call in a Professional
- 10 FAQs About Fixing Separating Vinyl Planks
- 11 Conclusion
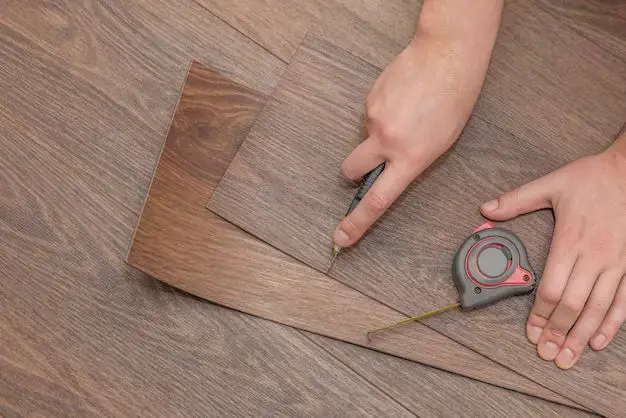
Assess the Damage
Start by taking a close look at all of the vinyl planks in the room and identify any areas where planks have come loose or separated. Make note of how many planks are affected and how severe the damage is. In some cases, you may just have a few planks that need to be resecured. In other cases, large sections of the floor may be compromised and need repairs.
Check to see if the loose planks can be simply pressed back into place. If so, they likely just need to be re-adhered. If the planks have lifted significantly or will not stay in place, the adhesive beneath them has likely failed and will need to be replaced.
Remove Affected Planks if Necessary
For planks that have completely detached, you will need to remove them in order to make repairs. Carefully pull up the loose planks as well as any connected planks that have also lost adhesion. Try to remove them in whole pieces to preserve the tongue-and-groove connections along the sides.
As you remove planks, inspect the condition of the underlayment or subfloor underneath. Make sure there are no areas of moisture damage, rot, or mold growth. Address any underlying subfloor issues before proceeding with vinyl repairs.
Thoroughly Clean the Area
Once you have removed the affected planks, it’s important to thoroughly clean the flooring area in preparation for new adhesive. Use a vacuum or broom to remove any dirt, debris, or old adhesive remnants from the subfloor. Go over the entire area with a damp mop to eliminate any dust, grease, or grime.
Make sure the floor is completely dry before attempting to re-adhere vinyl planks. Any moisture on the floor can prevent the adhesive from bonding properly. Use rags or a wet/dry vacuum to soak up standing water and help speed up drying time.
Apply New Adhesive
Choose a high-quality vinyl plank flooring adhesive made specifically for the type of vinyl you are working with. Waterproof vinyl planks require a different adhesive than standard vinyl. Follow the adhesive manufacturer’s instructions carefully.
Spread a thin, even layer of the new adhesive over the area where planks will be replaced using a trowel with the recommended notch size. Only apply adhesive to one small section at a time to prevent it from drying out before planks are installed. The adhesive should still be wet when the planks make contact.
Reinstall the Vinyl Planks
Once the adhesive is ready, carefully reposition the vinyl planks in place, matching up the tongue-and-groove connections along the sides. Make sure to maintain proper spacing between planks. You may need to use painter’s tape on the edges to keep the seams tight until the adhesive sets.
As you work, roll over the replaced planks slowly with a J-roller or weighted flooring roller to ensure maximum adhesive transfer and a strong, even bond. Remove any tape right away before the adhesive dries.
Wipe away any excess adhesive that seeps up from the seams using a damp cloth. Be careful not to allow water or moisture under the newly-adhered planks. Allow the adhesive to fully cure for at least 24 hours before walking on the repaired flooring.
Consider Using Vinyl Plank Repair Putty for Small Gaps
For minor gaps or slight elevation differences between vinyl planks, you can use a vinyl plank filler putty to smooth out the seams. Look for a flexible vinyl putty designed for click-together flooring. This can help improve the appearance of the flooring and prevent debris from getting caught in seams.
Follow the putty package directions to fill small gaps. Use a plastic putty knife to carefully force the putty into gaps and wipe away excess. Avoid over-filling since the putty will shrink slightly as it dries. Let it dry completely before walking on the floor.
Take Steps to Prevent Future Separations
To help prevent vinyl planks from lifting up again in the future, there are a few important precautions to take:
- Always follow the vinyl flooring manufacturer’s installation instructions carefully, including proper subfloor prep. Any imperfections in the subfloor can allow planks to detach.
- Use the adhesive recommended for the specific vinyl flooring you are installing. Adhesive type and application method can impact bond strength.
- Maintain indoor relative humidity between 35-55%. Excessive moisture can cause planks to buckle or release from adhesive.
- Avoid getting excess water under vinyl floors from spills, leaks, cleaning, or other moisture. Thoroughly dry any liquid right away.
- Use furniture pads and chair leg protectors to prevent heavy furniture from scratching planks and damaging seam connections.
- Replace worn-out rolling caster wheels that may catch and lift plank edges.
Properly installed and maintained vinyl plank flooring should remain securely adhered. But minor separations are not uncommon as the flooring ages. By using the proper techniques and adhesives, these issues can usually be repaired invisibly.
Tips for Easing Vinyl Plank Repairs
Repairing coming apart vinyl planks takes patience and care. Here are some additional tips to make the process easier:
- Work in sections – only remove and replace a few planks at a time to keep the project manageable.
- Number each plank and make a diagram of the floor pattern before removal so you can replicate it correctly.
- Use a heat gun to warm and soften vinyl to make it more pliable for removal and reinstallation.
- Cut planks into segments if needed using a utility knife with a sharp blade for clean, straight cuts.
- Remove old adhesive with a chisel, putty knife or adhesive remover – avoid harsh scrapers that may damage the subfloor.
- Warm rooms to at least 65° F to help adhesive cure properly.
When to Call in a Professional
While minor vinyl plank separations can often be managed as a DIY project, it’s best to call in a professional installer for more extensive damage or repairs needed underneath the flooring. Signs you may need a pro include:
- Multiple rooms or large sections of flooring affected
- Damage, moisture issues, or unevenness with the subfloor
- Loose planks cannot be simply re-adhered due to warped or damaged edges
- Unsure about the proper adhesive type needed
- Lack of experience working with vinyl plank flooring
Hiring an experienced vinyl flooring contractor can ensure repairs are done properly to avoid ongoing issues. They have the skills, tools, and materials to address any subfloor problems, reattach planks securely, and blend repaired sections seamlessly.
FAQs About Fixing Separating Vinyl Planks
Can you just glue back vinyl planks that have lifted?
In some cases, yes. If the planks are still in good condition and only a few edges have detached, you may be able to simply re-glue them back down. Use a small bead of vinyl plank adhesive just along the lifted edges. Weight the planks down until the adhesive cures to re-bond the edges.
What is the best vinyl flooring adhesive?
Popular quality adhesive brands for vinyl planks include Roberts, Bostik’s Best, and Henry’s PerfectPlank. Look for a flexible, water-resistant adhesive made for vinyl floors. Make sure to choose the right one for your specific vinyl flooring – some are designed for solid vinyl versus vinyl composite.
Can Liquid Nails be used to re-glue vinyl planks?
Liquid Nails is not the optimal choice for re-adhering vinyl flooring. It does not provide the same flexibility and water resistance of vinyl-specific adhesives. A urethane-based adhesive made for vinyl is recommended for the strongest, longest-lasting bond.
Should old adhesive be removed before installing new vinyl planks?
Yes, it’s usually best to remove all traces of old adhesive residue before attempting to re-glue vinyl planks. This allows the new adhesive to make full contact. Use a scraper, putty knife, or adhesive remover product to eliminate old glue.
Can you just replace a few damaged vinyl planks?
It is possible to replace just a few damaged vinyl planks in an existing floor. However, the new pieces must be exactly the same style and color to match the floor seamlessly. Also take care to properly re-adhere the new planks at the edges for a smooth transition.
Conclusion
Vinyl plank flooring provides a versatile and water-friendly flooring option. But like any floor covering, it can start to detach over time. By following the proper vinyl plank repair procedures, you can often fix these issues invisibly. Carefully removing affected planks, cleaning and prepping the subfloor, applying the right adhesive, and properly reinstalling the planks can get your vinyl flooring firmly re-adhered and looking great again.