Fluorescent bulbs provide bright, energy efficient lighting in homes, offices, and commercial spaces. Over time, the bulbs burn out and need replacement. Getting the old bulb out of the socket can sometimes be tricky, especially if it has been in place for a long time. Here is a step-by-step guide on how to safely remove a spent fluorescent bulb from its socket.
Page Contents
- 1 Step 1: Turn Off Power to the Fixture
- 2 Step 2: Remove the Bulb Cover
- 3 Step 3: Release the Bulb from the Sockets
- 4 Step 4: Remove the Old Bulb
- 5 Step 5: Inspect the Fixture
- 6 Step 6: Install the New Fluorescent Bulb
- 7 Step 7: Replace the Cover
- 8 Step 8: Restore Power and Test
- 9 Tips for Changing Fluorescent Bulbs
- 10 Fluorescent vs LED Bulbs
- 11 Troubleshooting Fluorescent Fixture Issues
- 12 Conclusion
Step 1: Turn Off Power to the Fixture
The first and most important step is to turn off power to the light fixture at the breaker box or switch. Fluorescent fixtures have live electrical contacts inside that you do not want to touch when changing the bulb. Shutting off the power avoids the risk of electrical shock.
Locate the correct breaker or switch that controls the power to the fluorescent fixture. Flip the breaker to the off position or toggle the switch off. Verify the power is disconnected by flipping the light switch on and off – the bulb should not come on.
Step 2: Remove the Bulb Cover
Most fluorescent fixtures have a plastic cover that protects and diffuses the light from the tubes. This cover needs to be removed to access the bulbs. There are usually clamps, screws or hinges that allow the cover to come off.
Carefully examine the light fixture to find how the cover is secured. Release any clamps or screws. For hinged covers, look for a release tab or lever to detach one side. Be cautious when removing the cover – the plastic is often brittle from age. Set the cover aside in a safe location.
Step 3: Release the Bulb from the Sockets
With the cover removed, you’ll have access to the fluorescent tubes and their sockets. There will be a socket at each end of the tube that holds it in place through electrical contacts. These socket connectors must be released before you can remove the bulb.
First, locate any locking tabs on the outside of the sockets. Push these tabs down or slide them outward to unlock the socket. Next, rotate the bulb a quarter turn in either direction. This breaks the electrical connection and releases the pins from the socket.
For shrouded sockets, insert a flathead screwdriver into the opening between the bulb and socket. Gently pry upwards to release the bulb from the locking pins.
Step 4: Remove the Old Bulb
With both sockets at either end of the tube disengaged, you can now remove the fluorescent bulb. Grasp the bulb gently at the ends and slide it straight out. Take care not to bend or twist the bulb – this could cause it to shatter.
If the bulb is stuck, rock it gently back and forth lengthwise to loosen it. Push any locking tabs fully down or out as you slide out the bulb. Removing a stuck bulb may take some patience and care.
Place the spent fluorescent tube in a plastic bag or wrap it in newspaper. Dispose of the bulb properly according to your local regulations. Fluorescent bulbs contain mercury and must be recycled or trashed safely.
Step 5: Inspect the Fixture
Before installing a new bulb, take a moment to inspect the now-empty fluorescent light fixture. Look for any cracks, damage, or corrosion on the housing and sockets. Make sure contacts are straight and clean. Any issues should be repaired before using the fixture again.
Check that any reflectors or lenses are in good shape. Dust or vacuum out any debris or dead insects. Replace any discolored or damaged socket covers. Get the fixture into proper working order for the best lighting performance.
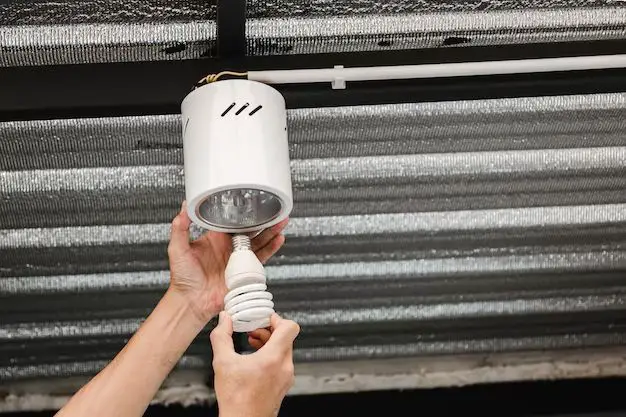
Step 6: Install the New Fluorescent Bulb
Once the fixture is prepped, it’s time insert the new fluorescent tube. First, remove the bulb from its packaging. Avoid touching the glass tube itself. Check that all pins are straight and aligned.
Orient the bulb so the pins match up with the sockets. Insert the pins fully into the sockets at both ends. Rock the bulb gently to seat it completely. Rotate the bulb a quarter turn clockwise until it is locked in.
For shrouded sockets, lift the locking tab just enough to let the pins slide under. Close the shroud flaps down over the bulb ends to secure it.
Ensure the bulb is centered and straight within the fixture housing. Bent or crooked tubes may not light properly. Engage any external socket locking tabs to hold the bulb firmly in place.
Step 7: Replace the Cover
With the new fluorescent tube installed and powered, put the plastic light cover back on the fixture. Line up any screw holes or hinges. Close clamps gently but securely. Be careful not to overtighten any fasteners into brittle plastic.
The cover helps protect the bulb and direct its light output. Leaving the fixture uncovered risks bulb damage or unintended glare. The cover may also be required for proper electrical function.
Step 8: Restore Power and Test
With the bulb swapped and cover replaced, it’s time to power things back up. Return to the breaker box or switch and flip the circuit on for the fluorescent fixture. Go back to the light and flip the switch to test.
The new fluorescent tube should come on brightly. Make sure both ends are lit. Turn the switch on and off to ensure proper operation. If the bulb does not light, recheck that it is fully seated in the sockets.
Be sure to check for any flickering or unusual buzzing sounds which may indicate a defective bulb or other issue. Your newly retrofitted fluorescent fixture should now provide many hours of bright, efficient illumination.
Tips for Changing Fluorescent Bulbs
- Purchase replacement tubes with the same length, diameter, and wattage as the original bulb.
- Wear gloves when handling fluorescent bulbs to avoid skin contact with mercury.
- Support tubes at both ends to avoid breakage when removing or installing.
- Rotate tubes gently to avoid twisting and cracking the fragile glass.
- Clean dirty sockets with rubbing alcohol to improve electrical contact.
Fluorescent vs LED Bulbs
In the past decade, LED lighting has emerged as an alternative to traditional fluorescents. Here’s how the two technologies compare:
| Feature | Fluorescent | LED |
|---|---|---|
| Efficiency | 60-80 lumens per watt | 80-100 lumens per watt |
| Lifespan | 10,000-20,000 hours | 25,000-50,000 hours |
| Light Quality | Cool white light | Variable color temperature |
| Cost | Cheap purchase price | Higher upfront cost |
| Mercury Content? | Yes | No |
While fluorescent lighting has been the norm for decades, the advantages of LED technology are making it the new standard in energy efficient lighting. Many homes and businesses are converting over to LED.
Troubleshooting Fluorescent Fixture Issues
If your fluorescent bulb fails prematurely or the fixture is exhibiting problems, here are some troubleshooting tips:
Bulb Flickering
- Socket is loose or making poor contact
- Wiring is faulty or power supply is irregular
- Bulb is old, worn out, or incompatible
- Ballast is defective and needs replacement
Buzzing Sound
- Electrical issue with ballast, wiring, contacts
- Bulb is old or wrong type for ballast
- Fixture parts are loose and vibrating
Dim Light Output
- Bulb is expired
- Ballast failure
- Socket is dirty or corroded
- Reflector discolored or damaged
Won’t Turn On
- Power is out or tripped breaker
- Defective ballast
- Bulb has burned out
- Bad starter
If issues persist after bulb replacement and socket cleaning, you may need professional electrical service to repair or replace internal fixture components like the ballast, wiring, or starters.
Conclusion
Removing and replacing fluorescent bulbs is a straightforward DIY project. Just be sure power is disconnected first and use care when handling the tubes. Proper bulb disposal is also important. With routine maintenance, fluorescent fixtures can provide many years of bright, eco-friendly illumination.