Luxury vinyl plank flooring, also known as LVP or LVF, is a popular flooring option for homes and businesses. It is designed to mimic wood or tile flooring but is made of vinyl. One of the benefits of LVP flooring is that it is durable and scratch-resistant. However, LVP can still get scratched over time from pets, furniture, shoes, toys, and other objects being dragged across the floor. Thankfully, there are ways to reduce and remove scratches from vinyl plank flooring to keep it looking new. Here we will explore the most effective methods for dealing with scratches on luxury vinyl tile and planks.
Page Contents
Causes of Scratches
There are a few common causes of scratches in LVP flooring:
- Pet nails – Dogs and cats running across the floor can scratch it with their nails.
- Furniture legs – Dragging furniture like chairs or appliances without protection can scratch the floor.
- Toys with wheels – Hard plastic wheels on toys like cars or dollies can scratch LVP.
- High heels – Spike heels will dig into the floor.
- Grit and debris – Small rocks, sand, and dirt particles act like sandpaper under furniture legs, shoes, etc.
- Heavy/sharp objects – Dropping heavy or sharp items can gouge the floor.
Scratches in vinyl flooring will look like light colored marks across the surface. Deeper gouges can disrupt the top protective layer. The good news is LVP flooring is designed to hide minor scratches. But deeper ones will need to be dealt with to prevent further damage.
Cleaning and Daily Maintenance
Keeping your LVP flooring free of scratches starts with proper daily and weekly cleaning. Here are some tips:
- Sweep, dust mop, or vacuum the floor regularly to remove dirt, grit, pet hair and other debris that can abrade the surface.
- Clean up spills immediately so they don’t soak in and stain.
- Use felt pads under furniture legs and chair feet to prevent scratching from sliding.
- Keep pet nails trimmed to minimize scratches.
- Lift heavy furniture or appliances rather than sliding them across the floor.
- Use a vinyl floor cleaner and microfiber mop to clean the floors at least once a week.
- Avoid harsh cleaners, bleach, ammonia, or abrasive scrubbing pads.
Proper cleaning and maintenance will help prevent new scratches in your LVP flooring. But accidents still happen! Read on to find out how to remove existing scratches from your luxury vinyl planks.
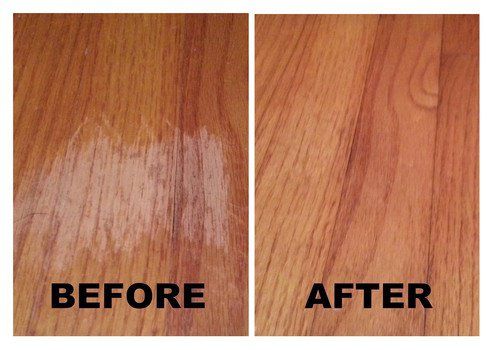
Buffing Out Light Scratches
For minor surface scratches, buffing is often the quickest and easiest solution. You simply use an abrasive pad to smooth the scratches so they blend into the floor. Here’s how to buff out light vinyl plank scratches:
- Sweep or vacuum the floor thoroughly to remove any grit or debris.
- Apply a vinyl floor cleaner to the scuffed area and let it soak for 5-10 minutes.
- Use a buffing pad under a floor buffer or polisher to gently sand the area. Choose a white or red colored buffing pad.
- Apply firm pressure and buff in the direction of the floor planks to blend the scratches.
- Wipe away residue with a clean damp mop.
- Apply new vinyl floor finish to the buffed area and allow to dry.
Buffing should help blend shallow surface scratches into the surrounding vinyl plank flooring. Deeper gouges or damage will require additional steps.
Filling Deep Scratches
If you have deep scratches that have cut through the protective wear layer of the vinyl planks, buffing alone won’t be effective. These will need to be filled in using vinyl plank filler. Here is a step-by-step guide:
- Clean the scratched area thoroughly and allow to dry completely.
- Choose a filler that closely matches the color of your LVP flooring. A good option is white latex filler, which you can dye to match with vinyl dye.
- Knead the filler product and apply it carefully over the scratch using a plastic putty knife.
- Press firmly to fill the damaged area fully and remove air pockets.
- Allow the filler to dry completely based on package directions, usually 24 hours.
- Once dry, gently sand the filled area using 150-200 grit sandpaper until flush with the floor.
- Wipe away all sanding dust with a slightly damp microfiber cloth.
- Apply new vinyl floor finish over the repaired area and surrounding floor.
- Allow the finish to dry fully before walking on the floor, around 2 hours.
Filling deeper vinyl plank scratches takes more effort but leaves your floor looking flawless. The filler creates a smooth, permanent patch.
Using Scratch Covering Markers
Another quick fix for minor scratches is using a vinyl scratch concealer marker. These markers contain colored wax that can fill and disguise surface scuffs when melted into the grooves. Follow these steps:
- Clean and dry the scratched area thoroughly.
- Choose a marker that matches your floor color. Test on a small spot first.
- Shake the marker well and remove the cap.
- Lightly fill the scratch with the marker by rubbing the tip back and forth over the length of the scuff.
- Use a plastic card or putty knife to remove excess wax immediately and smooth it flat.
- Buff the area with a clean cloth once the wax has dried for an even, blended appearance.
While not a permanent solution, scratch markers offer a quick way to disguise surface damage on vinyl plank flooring between deeper treatments.
Replacing Damaged Planks
For deep gouges, punctures, or excessive scratching that has harmed the structural integrity of the vinyl planks, replacement may be needed. Here is an overview of how to replace damaged LVP flooring planks:
- Use a utility knife to cut out the full damaged plank from end to end.
- Carefully lift and remove the cut plank as well as any debris underneath.
- Thoroughly clean the subfloor below the removed plank.
- Dry fit the replacement plank to ensure it fits properly.
- Apply vinyl plank adhesive to the back of the new plank per adhesive directions.
- Insert the replacement plank, aligning the edges seamlessly.
- Use a hand roller to firmly adhere the plank to the adhesive.
- Allow the adhesive to dry fully – at least 24 hours.
Be sure to use replacement planks that closely match the original flooring in color, design, and thickness. This ensures the repair blends in seamlessly.
Preventing Future Scratches
To avoid having to remove scratches from your luxury vinyl planks in the future, implement these prevention steps:
- Attach felt pads to the bottom of furniture legs.
- Lift furniture or appliances instead of sliding them when moving.
- Keep pet nails trimmed short.
- Place pet food bowls on mats so kibble doesn’t scatter.
- Use broad carpet protectors under office chairs.
- Sweep and mop regularly.
- Immediately clean up spills.
- Avoid walking on the floor with cleats, stilettos or sharp objects.
Following a good maintenance routine and taking precautions will help your LVP flooring stay scratch-free for years. But if accidents happen, you now have several methods to remove scratches from luxury vinyl planks and restore your floor’s flawless look.
Conclusion
Scratches in luxury vinyl plank flooring can occur over time but don’t have to be permanent damage. With regular care and cleaning, most light scuffs can be buffed away easily. For deeper scratches, filling and sanding or using concealer markers provides effective and inexpensive solutions. Heavily damaged planks may need replacement for the best results. Following scratch prevention best practices is also key to maintaining the pristine appearance of LVP flooring. With this multi-step approach, you can keep your vinyl plank floors looking like new for many years before considering any expensive refinishing or replacements.
| Scratch Severity | Removal Method |
|---|---|
| Light surface scuffs | Buffing with abrasive pad |
| Damage to wear layer | Filling with vinyl filler |
| Long surface scratches | Concealer markers |
| Deep gouges, punctures | Plank replacement |