Hanging drywall on a ceiling by yourself can seem like a daunting task, but with the right tools and techniques, it is possible for one person to install drywall overhead successfully. The key is having the right equipment, preparing your work area, using proper lifting techniques, and taking your time. Follow these steps to learn how to hang drywall on a ceiling by yourself.
Page Contents
Can You Hang Drywall on a Ceiling By Yourself?
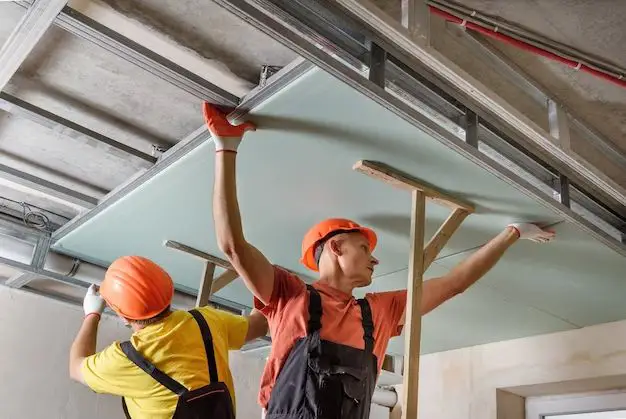
Yes, it is possible for one person to hang drywall on a ceiling alone. However, it can be challenging and physically demanding work. Hanging overhead requires lifting full sheets of drywall up over your head and fastening them to the ceiling joists while balancing on a ladder or lift. Having someone to help makes the job much easier and safer. But with determination, patience, and the right set of tools, a single DIYer can install ceiling drywall independently.
Tools and Equipment Needed
Installing drywall on a ceiling requires having the proper equipment to lift, position, and fasten the sheets overhead. Here are the essential tools you’ll need:
- Drywall sheets – Use 1/2 inch thick, 4 x 8 or 4 x 12 foot sheets for ceiling installation. The larger 12 foot boards will help minimize seams.
- Drywall lift – An adjustable lift allows you to raise boards to ceiling height.
- Screws – 1 5/8 inch drywall screws for securing boards to ceiling joists.
- Electric drill and/or screwgun – Makes driving screws quicker and easier.
- Utility knife – For scoring and cutting drywall.
- Keyhole saw – For cutting openings and holes for lights, vents, etc.
- T-square – Ensures boards are positioned square to joists.
- Stepladder – Provides access for installing boards and screws.
- Measuring tape – For measuring and marking board sizes.
- Pencil – Mark cutting lines and joist locations.
- Drywall saw – Finish cutting outs with a drywall saw.
- Eye protection – Safety glasses help prevent eye injuries.
- Ear protection – Reduces noise from power tools.
- Dust mask – Drywall dust can irritate lungs.
Having these essential tools and safety gear will make DIY ceiling drywall installation much simpler. Investing in or renting a drywall lift is strongly recommended when working alone.
Preparing the Work Area
Before starting any drywall installation, it’s important to properly prepare the ceiling space:
- Inspect ceiling joists – Confirm spacing and condition of joists. Look for any issues like moisture damage or rot.
- Install backing – Fasten any necessary drywall backers around ceiling fixtures or soffits.
- Plan layout – Map out placement of light cutouts, vents, and drywall seams.
- Mark joists – Use chalk line to mark position of each ceiling joist.
- Clean space – Remove construction clutter and sweep floor.
- Lighting – Provide adequate lighting so the ceiling space is well illuminated.
Proper planning and marking of the ceiling will make fastening the drywall much simpler. Taking time to clean the area and set up lighting shows attention to safety.
Lifting and Handling Drywall
Drywall sheets are bulky, heavy, and awkward to lift and maneuver overhead. Follow these safe practices when moving boards:
- Get help – Whenever possible, have someone assist with lifting sheets up to the ceiling.
- Use dollies or carts – Use a hand truck or drywall cart to transport boards.
- Lift safely – Bend knees, keep back straight, and lift with legs when picking up sheets.
- Carry vertically – Hold sheets upright, rather than flat, when carrying.
- Use lift assist devices – Installer poles can help position boards overhead.
- Work in stages – Only lift amount that can be safely managed and installed.
- Take breaks – Fatigue leads to accidents. Take rest breaks as needed.
Rushing or overexerting when lifting drywall overhead substantially increases the chance of injury. Take things slowly and listen to your body’s limits.
Drywall Lift Setup
A drywall lift is an invaluable tool when installing ceiling boards solo. Follow manufacturer’s instructions to properly set up and operate the lift:
- Assemble – Carefully assemble lift sections according to provided directions.
- Attach wheels – Wheels enable moving the load around the room.
- Position – Place lift under installation area.
- Secure feet – Lock casters and adjust legs for stability.
- Test operation – Raise and lower empty lift to ensure proper operation.
- Set extension – Adjust height to match ceiling height.
- Inspect cables – Check for any worn or damaged cable strands.
Taking the time to correctly assemble and position the lift will make raising drywall sheets much easier and safer. Never operate a lift that has damaged or worn cables.
Loading Drywall Onto the Lift
With the lift in place below the installation area, you can start loading drywall sheets:
- Slide board on – Place sheet along lift rails and slide into position.
- Secure board – Ensure board is centered and secure on lift.
- Check balance – Board should sit flat and balanced as it is raised.
- Add support – Have someone assist with upright sheets if needed.
- Watch pinch points – Keep hands/fingers clear when loading boards.
- Prepare next sheet – Stage next board nearby for efficient loading.
Take care when sliding heavy drywall sheets into place on the rails. Keep hands clear of any pinch points. Have someone assist if boards want to lean or slip.
Installing Ceiling Drywall
Once sheets are staged on the lift, the installation process begins:
- Raise board – Use lift to bring board up against ceiling.
- Position sheet – Align board square and tight to joists.
- Pre-fasten – Drive a few screws to hold board in place.
- Install screws – Fully fasten sheet every 8 – 12 inches along joists.
- Inspect – Ensure board is level and tightly fastened.
- Lower lift – Carefully lower lift once sheet is secured.
- Load next – Safely load and raise the next sheet into place.
- Finish seams – Tape and finish seams after boards are all hung.
Take your time positioning and fastening each sheet. Secure boards every 8 to 12 inches along joists using 1 5/8 inch drywall screws. Work methodically and safely until the entire ceiling is covered.
Cutting Holes and Openings
Measure and pre-cut openings for lights, vents, and fixtures prior to hanging boards:
- Mark openings – Trace outline with pencil once board is installed.
- Drill holes – Drill holes in corners of outline for keyhole saw.
- Cut hole – Use keyhole or drywall saw to cut opening.
- Check fit – Test fit light or fixture in cutout.
- Trim if needed – Trim opening for accurate fit if required.
Going slowly when cutting ceiling openings will result in clean and accurate holes for lights and fixtures. Trimming openings with a drywall saw produces smooth cuts.
Tips and Tricks for One-Man Install
Hanging drywall overhead alone requires patience and preparation. Here are some additional tips for smooth ceiling installation:
- Work in sections – Divide ceiling into more manageable sections.
- Use backing – Add nailing blocks to support seams between sheets.
- Keep sheets large – Use sheets as large as possible to minimize seams.
- Stack efficiently – Stage sheets in lift area to streamline loading.
- Watch the clock – Monitor physical strain and take breaks as needed.
- Drink water – Stay hydrated, especially on hot days.
- Wear soft shoes – Cushioned shoes reduce leg and back fatigue.
- Team lift – Get help carrying very large or heavy sheets.
Staying organized, listening to your body, and utilizing helpers for heavy lifting makes solo installation much easier.
Conclusion
Hanging drywall on a ceiling alone is challenging but certainly possible. Being prepared with the proper tools and techniques allows a motivated DIYer to tackle the job independently. Focus on safety and take your time to achieve the best results. With patience and persistence, you can achieve professional-looking ceiling installation as a one-man team. Just remember to work safely, take breaks, and don’t hesitate to recruit a helper for the heavy lifting steps when needed.