Hanging a new door can seem like an intimidating task, but it’s actually quite straightforward once you know the steps. The key is having the right tools, materials, and basic carpentry skills. In this guide, we’ll walk through everything you need to know to successfully hang a new door, from removing the old door, prepping the doorway, installing hinges, adjusting the door, and adding finishing touches like trim and knobs.
Page Contents
- 1 What You’ll Need
- 2 Preparing the Doorway
- 3 Hanging the New Door
- 4 Final Adjustments and Finishing
- 5 Conclusion
- 6 Step-By-Step Instructions
- 6.1 1. Remove existing door, trim, and door jamb
- 6.2 2. Inspect frame and make repairs
- 6.3 3. Clean opening and check for level
- 6.4 4. Install hinges on new door
- 6.5 5. Set door into opening
- 6.6 6. Mark and drill holes for frame hinge screws
- 6.7 7. Reinstall door and test operation
- 6.8 8. Install latch and strike plate
- 6.9 9. Caulk perimeter of door
- 6.10 10. Add trim pieces
- 6.11 11. Finish door and trim with paint/stain
- 6.12 12. Install door hardware
- 7 Tips for Hanging a Door Perfectly
- 8 Common Problems and Solutions
- 9 FAQs
- 9.1 What size door do I need?
- 9.2 Does a new door come pre-hung?
- 9.3 Should I get a solid or hollow core door?
- 9.4 How much gap should be around a door?
- 9.5 What kind of hinges do I need?
- 9.6 How do I cut a door?
- 9.7 What type of drill bit is needed?
- 9.8 Can I install the handle and lock first?
- 9.9 How long does it take to fully install a door?
- 10 Conclusion
What You’ll Need
Before starting this project, make sure you have the following materials and tools on hand:
Materials
– New pre-hung interior or exterior door
– Wood shims
– Construction adhesive
– Finish nails
– Wood putty
– Sandpaper
– Primer and paint
– Door trim
– Door knobs/lever handles
– Deadbolt (if adding)
Tools
– Pry bar
– Hammer
– Phillips and flat head screwdrivers
– Tape measure
– Level
– Drill with various drill bits
– Utility knife
– Chisel
– Handsaw or circular saw (for trimming door if needed)
– Sanding block
– Stud finder
– Safety equipment (glasses, gloves, ear protection, etc.)
Preparing the Doorway
Once you have everything ready, the first step is preparing the doorway for your new door. Here’s how:
Remove Existing Door and Trim
If there is already a door in the doorway you’ll be replacing, you’ll need to remove it first along with any trim around the frame. Carefully pry off any trim using a pry bar. Use a utility knife to cut through any caulking or paint sealing the trim in place. Once the trim is removed, you can uninstall the existing door by removing the hinge pins then lifting the door out of the frame.
Inspect and Repair Door Frame
With the old door gone, take a close look at the door frame and make any necessary repairs. Look for areas where the frame is damaged, rotted or not level/plumb. Use wood filler, epoxy, or a wood patch to repair small holes and rotted spots. For more substantial damage, you may need to cut out the bad section and splice in new wood. Sand down any rough or uneven areas.
Prepare Door Opening
Make sure the opening is clean and ready for your new door. Chisel or scrape away any old caulk, sealant or paint. Vacuum out any bits of old insulation or debris. Check for level and plumb along each side of the door frame as well as above the opening. Add shims if needed to make the frame perfectly square.
Hanging the New Door
Once your doorway is prepped and level, it’s time to move on to installing the hinges and hanging the actual door. Follow these steps:
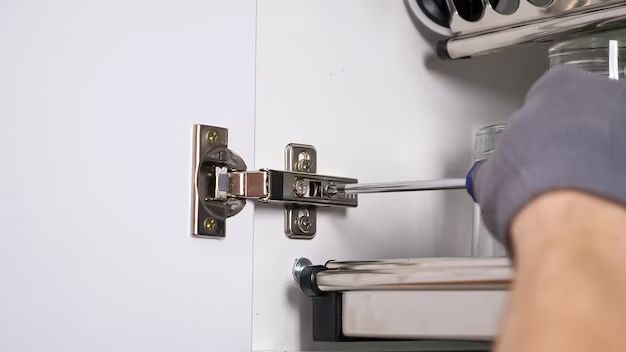
Install Hinges
Place your new door into the opening to test the fit. Mark where the hinges will go – typically about 4-6” from the top and bottom of the door sides. Use the holes in the door’s hinge stile as a guide. Drill pilot holes then use the provided screws to install hinges to the door first.
Set Door in Opening
With hinges attached to the door, set the door into the opening in the closed position. Center it from side to side in the frame. Use shims to make plumb and fill any gaps around the edges.
Mark Hinge Positions
With the door centered where you want it, mark the hinge locations on the door frame. Remove door and drill pilot holes.
Install Door
Screw the hinges into the door frame pilot holes using the provided screws. Place door back into opening and test operation. Make sure gaps are even. Insert shims above or behind hinges if needed to adjust.
Final Adjustments and Finishing
With the door hung, there are just a few more steps to complete the job:
Install Door Latch and Strike Plate
If your door came pre-drilled for the latch/strike, follow the holes provided. Otherwise, you’ll need to measure and drill them yourself. Close the door and mark where the center of the latch should go. Drill a hole for the latch bolt. On the door frame, align the strike plate and drill holes for the screws. Attach both with screws.
Caulk and Seal
Go around the entire door frame with exterior sealant or caulk. Make sure any gaps or holes are filled to help weatherproof the door. Wipe away any excess.
Add Door Trim
Cut door trim pieces to size and attach around the frame using finish nails and construction adhesive. Pre-drill holes to prevent splitting. Use wood putty to fill nail holes.
Finish Door and Trim
Finish the wood surfaces by sanding, priming and painting or staining. Apply at least two coats allowing proper drying time between them. Add protective sealer for exterior doors.
Install Hardware
Install the knobs, handles, deadbolt (if included) and any other hardware that came with your door. Follow the manufacturer’s instructions.
Conclusion
While hanging a door may look difficult, it’s actually a very approachable DIY project. As long as you have the right materials, tools and follow the steps, you can achieve professional results. Pay close attention to making sure your door frame is level and properly shimmed – that’s the key to getting a good fit and operation. Don’t be intimidated to take this project on yourself!
| Tool | Purpose |
|---|---|
| Pry bar | Removing old trim |
| Hammer | Driving/removing nails |
| Screwdrivers | Removing screws/hinge pins |
| Tape measure | Measuring for accurate cuts and spacing |
| Level | Checking for plumb/level frame |
| Drill | Drilling pilot holes |
| Utility knife | Cutting caulk/trim |
| Chisel | Removing old caulk or paint |
| Handsaw/circular saw | Cutting door or trim to size |
| Sanding block | Smoothing surfaces for finishing |
| Stud finder | Locating studs for secure install |
| Safety equipment | Protecting your eyes, ears, etc. |
Step-By-Step Instructions
Follow these step-by-step instructions for smoothly hanging a new door:
1. Remove existing door, trim, and door jamb
Use a pry bar and hammer to remove any existing trim. Pull out any nails still in the wall. Unscrew hinges and lift old door out of frame. Remove nails and screws to fully detach jamb.
2. Inspect frame and make repairs
Look for any rotted or damaged areas of the frame. Cut out bad sections and make repairs with wood filler, epoxy or fresh wood. Sand smooth.
3. Clean opening and check for level
Remove old caulk, paint or sealant until you have a clean opening. Make sure frame is level and plumb by using a level tool. Shim if needed.
4. Install hinges on new door
Place door in frame opening to mark hinge positions. Drill pilot holes and use screws to attach hinges to the door.
5. Set door into opening
With hinges on, set the door into the frame opening. Center side-to-side. Use shims until plumb.
6. Mark and drill holes for frame hinge screws
With door positioned, mark hinge locations on jamb. Take door back out and drill pilot holes.
7. Reinstall door and test operation
Screw hinges into jamb pilot holes. Rehang door and open/close to test fit. Adjust shims until gaps are even.
8. Install latch and strike plate
Mark and drill holes for latch and strike plate. Attach both to jamb and door edge.
9. Caulk perimeter of door
Go around entire frame with exterior caulk or sealant. Fill any gaps. Wipe away excess.
10. Add trim pieces
Measure and cut trim to fit around jamb. Attach with finish nails and adhesive. Fill holes.
11. Finish door and trim with paint/stain
Sand surfaces smooth, then apply primer followed by at least two coats of finish paint or stain.
12. Install door hardware
Add knobs, handles, deadbolt, and any other included hardware by following manufacturer’s directions.
Tips for Hanging a Door Perfectly
Follow these tips and tricks to ensure your door hangs beautifully:
– Make sure the jamb is plumb and square before hanging door. Shim if needed.
– Use a spacer tool like Door Shims when installing to get an even reveal around door.
– Drill pilot holes before inserting screws to prevent splitting wood.
– Tighten top hinge screws first so door doesn’t sag while installing other hinges.
– Buy pre-hung interior doors for easier, quicker installation with uniform gaps.
– Choose exterior doors that are at least 1-3/4” thick for durability and insulation.
– Let caulk fully cure for 24-48 hours before painting for best adhesion.
– Consider installing door handles at standard height of 36” centre from floor.
– Take time when measuring and cutting trim to get tight seams; use scarf joints for better fit.
– Remove all hardware before painting or staining for full coverage and minimal drips.
– Allow finish coats to dry fully before reinstalling hardware to prevent sticking.
Common Problems and Solutions
Avoid these common new door installation issues:
Problem: Door drags on the floor
– Solution: Add shims under the hinges to raise the door
Problem: Door swings open or closed on its own
– Solution: Adjust shims behind hinges to alter door position
Problem: Door knob doesn’t align with strike plate
– Solution: Fill holes with wood putty and redrill either knob or strike
Problem: Uneven gaps around door edge
– Solution: Realign shims until consistent spacing shows
Problem: Door rubs or sticks in frame
– Solution: Loosen hinge screws, adjust shims, tighten screws again
Problem: Door squeaks and creaks
– Solution: Tighten loose hinge screws or apply lubricant to hinges
Problem: Excess draft around door
– Solution: Re-caulk perimeter if gaps exist; install new weatherstripping
FAQs
Get answers to some common questions about hanging a new door:
What size door do I need?
Measure the width and height of your existing frame to determine what size replacement door you need. Standard interior doors are 30″ or 32″ wide and 80″ high.
Does a new door come pre-hung?
Pre-hung doors come already mounted in the frame with hinges – this is the easiest option. Alternatively you can purchase just a slab door to mount on existing jamb.
Should I get a solid or hollow core door?
Hollow core is lighter weight and cheaper but lacks durability. Solid core doors are more soundproof and sturdy.
How much gap should be around a door?
Aim for 1/8″ spacing on sides and top, and a 3/8”-1/2″ gap along the bottom.
What kind of hinges do I need?
Exterior doors should have ball-bearing or oil-rubbed bronze hinges. Interior doors use standard steel hinges.
How do I cut a door?
Use a circular saw or handsaw to trim doors. Cut the bottom for clearance. Mark line across door and set saw blade just slightly deeper than thickness.
What type of drill bit is needed?
Use a twist drill bit for pilot holes in wood. For hinges, use a bit slightly narrower than the screw’s width.
Can I install the handle and lock first?
Install hinges and hang the bare door first. Then mark and drill for hardware once it’s positioned correctly.
How long does it take to fully install a door?
With proper prep, an average handyman can hang a new door in 2-3 hours. Finishing and adding trim extends the time 1-2 hours.
Conclusion
Installing a door on your own takes careful prep work, patience and the right tools. But it’s a very doable project for most DIYers. Focus on creating a level, plumb frame and proper shimming. Be meticulous when marking hinge positions. And don’t forget small details like caulking and weatherstripping to finish the job properly. Follow the steps outlined above and you can achieve professional-looking results.