Installing a dryer vent cage is an important part of setting up a clothes dryer. The vent cage prevents rodents, birds, and other pests from getting into the dryer vent and building nests, which can cause clogs and fires. Installing a cage properly is key to keep your home safe. Here is a step-by-step guide on how to install a dryer vent cage correctly.
Page Contents
What is a dryer vent cage?
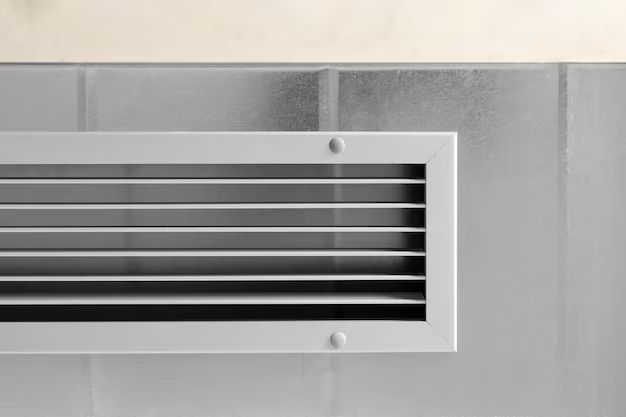
A dryer vent cage, also known as a vent guard or lint trap, is a device that covers the outdoor vent opening of a clothes dryer. It is a wire or plastic cage or grille that allows air to flow freely out of the vent while keeping animals and debris from getting in.
The vent cage has an opening on one side that fits over the vent pipe. The other sides are enclosed by a wire or plastic mesh. This mesh has openings big enough for air to pass through but small enough to block creatures and particles.
Benefits of a Dryer Vent Cage
There are several benefits to installing a dryer vent cage:
- Prevents clogs – Stopping debris like leaves, lint, twigs from entering the vent prevents clogs, which can cause the dryer to overheat and malfunction.
- Reduces fire risk – Lint and other debris accumulation raises the chances of a dryer fire. A cage stops flammable lint build up.
- Blocks pests – Rodents, birds, bugs and other pests can enter and clog vents or make nests. A vent cage blocks access.
- Improves efficiency – With airflow unobstructed, the dryer works more efficiently and dries faster.
- Reduces moisture damage – Stops rainwater and snow from entering the vent, preventing moisture damage.
- Low maintenance – Once installed properly, the vent cage requires little maintenance.
Installing a dryer vent cage provides huge benefits for home safety and dryer performance. It is an essential accessory for all dryers.
Selecting the Right Dryer Vent Cage
When purchasing a dryer vent cage, you need to get the right size and style for your specific vent and situation. Here are the key considerations:
Vent Size
Measure the diameter of your vent pipe. The cage must fit over the vent snugly. Standard vent sizes are 4 inches, 5 inches and 6 inches in diameter. Match the cage diameter to your vent size.
Material
Vent cages come in plastic, wire mesh or a combination. Plastic holds up better outdoors. Stainless steel resists rust and corrosion best if selecting a wire cage.
Weather Protection
Look for vent cages with weather flaps or covers to keep out rain and snow. Side panels also help block wind and weather elements.
Pest Protection
The cage openings should be no more than 1/4 inch to block mice and other tiny pests. Avoid larger openings.
Style
Choose a low-profile cage style to lay flatter on the wall for a secure fit. Streamlined shapes are less visible.
With the right vent size and sturdy, pest-blocking construction, your dryer vent cage will provide safety and performance benefits.
Where to Install the Dryer Vent Cage
The dryer vent cage must be installed on the exterior termination point of the dryer duct. This is where the duct ends outside of the home. Often it passes through an exterior wall or projects through the rim joist in a basement.
Wall Vent Termination
For an external wall vent, position the cage over the duct end on the outdoor side of the wall. Secure it to the wall exterior using the provided fasteners.
Basement or Crawl Space Vent
If the duct projects into a basement or crawl space, install the cage where it exits the foundation. Attach securely to the external wall or rim joist framing.
Ground Termination
For a vertical duct that exits the roof, install the cage where it terminates just above ground level outside. Fasten the base securely.
Installing the cage close to the structure provides stability. Place it where it wont interfere with landscaping or lawn care.
How to Install a Dryer Vent Cage
Follow these steps to install a dryer vent cage properly:
Step 1: Turn Off Dryer
Before starting, turn off power to the dryer at the breaker panel. This ensures the heating element turns off so the vent pipe is not hot when working around it.
Step 2: Remove Lint and Debris
Use a vacuum hose to suction out any lint or debris inside the outdoor vent opening. This allows for proper air flow once the cage is installed.
Step 3: Measure Vent Pipe
Double check the duct pipe diameter and measure the vent opening. Confirm you have the properly sized cage for the vent.
Step 4: Separate Cage Sides
Dryer vent cages have one side that is removable to slip over the vent pipe. Detach this section from the main cage assembly.
Step 5: Fit Cage Over Vent
Place the cage body over the vent pipe, centered on the opening. The detachable side piece should overlap the vent perimeter.
Step 6: Secure Cage
Reattach the removable cage section over the vent pipe using screws or fasteners. The cage should fit snugly on all sides.
Step 7: Attach to Wall
Using appropriate screws for the wall material, anchor the cage base securely to the wall or framing around the vent.
Step 8: Confirm Airflow
Turn the dryer back on and confirm strong airflow by holding a tissue or paper up to the cage. It should hold firmly.
Step 9: Clean and Maintain
Check the cage periodically and vacuum lint or debris accumulations to maintain optimal dryer airflow.
With these simple installation steps, your dryer vent cage improves safety and performance. Maintain it regularly to get the most benefit.
Troubleshooting Dryer Vent Cage Problems
In some cases, issues can occur after installing a dryer vent cage. Here are solutions to common problems:
Weak Airflow from Dryer
If airflow seems weak with the cage installed, check for lint/debris clogs both in the cage and in the interior ductwork that may restrict flow. Clean the system thoroughly.
Dryer Overheating
A dryer that overheats with the cage attached likely has a partial blockage. Detach the cage and use a vent brush tool to clean the full duct run from the dryer to the vent termination.
Cage Detached from Vent or Wall
Improper installation can lead to the cage detaching. Use longer screws and firm pressure when reattaching it to the wall or vent pipe. Follow the manufacturer instructions.
Pests Entering Vent
If pests get past the cage, ensure the vent size matches the cage diameter. Look for any gaps or detached portions of the cage that allow pests to enter.
Moisture Dripping from Vent
Excess moisture flowing through the cage is usually caused by a problem with the outdoor dryer vent flap not closing properly. Replace the flapper if worn out or damaged.
Address any dryer vent cage issues promptly to maintain proper and safe dryer function.
Conclusion
Installing a dryer vent cage is a simple process that makes a big difference in home safety and dryer efficiency. Choose the right size cage for your vent pipe diameter. Position it securely over the exterior vent termination point. Fasten the cage tightly to the wall to prevent detachment, airflow loss, and pest access.
With the cage in place, your dryer will operate safely by venting lint and moisture out of the home. Gas dryers also expel harmful combustion byproducts via the vent. Take the time to properly install a dryer vent cage and periodically check it is clear of clogs. This provides peace of mind and optimal dryer performance for years to come.
Frequently Asked Questions
What are the different types of dryer vent cages?
The main types of dryer vent cages are:
- Wire Mesh Cages – Made of stainless steel wire that allows airflow while keeping pests out.
- Plastic Cages – Molded plastic cages that resist corrosion and are durable.
- Hybrid Cages – Mixed wire and plastic designs that combine benefits.
Do you install the dryer vent cage inside or outside?
The dryer vent cage gets installed on the outside termination point of the duct. This is where it exits the home. Never install the cage on the interior ductwork.
How do you secure a dryer vent cage?
Use the provided fastener hardware to secure the cage directly to the exterior wall around the vent. This prevents detachment from wind, activity, and vibration.
What size dryer vent cage do I need?
Measure your vent duct diameter, commonly 4, 5, or 6 inches. Choose a cage labeled for that specific vent size for proper fit.
How often should the dryer vent cage be cleaned?
Inspect the dryer cage every 2-3 months and clean it if there is any noticeable lint or debris accumulation. Annual deep cleaning of the full duct is recommended.