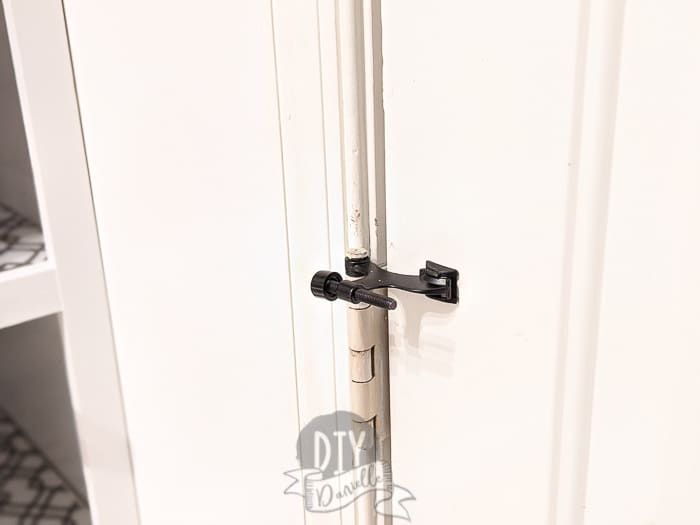
Installing a hinge pin on a doorstop is a relatively simple process that can be done by most homeowners with some basic tools and mechanical aptitude. A hinge pin connects the door hinge to the door frame, allowing the door to swing open and closed smoothly. Over time, these pins can wear down or fall out completely, causing the door to sag or not close properly. Replacing a hinge pin helps restore proper door function.
In this article, we will walk through the complete process of installing a new hinge pin on a doorstop. We will cover determining if you need a new pin, removing the old pin, selecting the proper replacement pin, drilling holes in the door frame if needed, hammering in the new pin, and testing the door.
With some patience and the right tools, installing a new hinge pin is a straightforward DIY project. Properly installed hinge pins will keep your doors hanging straight and swinging smoothly for years to come.
Page Contents
Do You Need a New Hinge Pin?
Before you can install a new hinge pin, you need to determine if replacing the pin is actually necessary. There are a few signs that indicate it’s time to replace a worn or damaged hinge pin:
– The door sags and does not hang straight in the door frame. Over time, a loose hinge pin will allow the door to sink down.
– The door does not close all the way or rubs against the door frame. If the hinge pin is worn down, it allows too much play in the hinge.
– The door does not open or close smoothly. Friction from a worn hinge pin will make the door hard to operate.
– You can see the hinge pin is loose, falling out, or missing. This is an obvious sign it’s time for a new pin.
– The hinge screws are stripped from the pin being loose. As the pin gets loose, more stress is placed on the hinge screws.
– There is visible damage to the hinge pin itself. If the pin is bent, broken, or otherwise deformed, it needs to be replaced.
If you do not notice any of these issues, your hinge pins are likely in good shape. But if your door is not operating properly, inspect the hinge pins closely to determine if replacement is needed.
Tools and Materials Needed
Installing a hinge pin is a simple job, but you need a few basic tools and supplies:
– New hinge pin. Match the replacement pin size to your existing hinges. Most are 1/8 inch diameter.
– Hammer. A regular claw hammer or small sledgehammer works.
– Center punch. This is used to mark the spot to drill pilot holes.
– Drill with 1/8 inch bit. Only needed if you have to drill new holes.
– Flathead screwdriver. Helps remove old pin if necessary.
– Lubricant spray. Lubricate the new pin for easy insertion.
– Safety glasses. Always wear eye protection when hammering or drilling metal.
– Gloves. Gloves help protect your hands while hammering.
– Wood block. Makes hammering the pin easier.
– Rags. For cleaning hinge parts before installation.
That covers all the basics you need to successfully install a new hinge pin in most situations. Having the proper tools on hand will make the job much easier.
Removing Old Hinge Pin
If the old hinge pin is still in place at all, you will need to fully remove it before installing the new pin. Here are the basic steps for pin removal:
1. Remove hinge screws. Use a screwdriver to take out any screws still holding the hinges onto the door frame.
2. Tap out old pin. Place a wood block against the bottom of the pin and lightly tap it with a hammer until the old pin drops out.
3. Remove any stuck pins. If the old pin does not tap out easily, spray lubricant into the hinge knuckle. Let it soak in for 10-15 minutes. Then try tapping it out again.
4. Clear debris. Make sure the hinge knuckle hole is clear of any stuck pin fragments.
5. Clean knuckle hole. Use a rag and cleaner to wipe out any dirt, grease, or debris from the pin hole.
6. Inspect hole condition. Check that the hinge knuckle hole is not badly worn or damaged. If it is, repairs may be needed before installing new pin.
7. Reinstall hinge. Screw the hinges back onto the door and door frame before moving on.
Taking out the old hinge pin properly prepares the hinge to accept a new pin. Go slowly when tapping it out to avoid damaging the knuckle. With the old pin gone, you can now move on to installing the replacement.
Drilling Holes for New Hinge Pin
For new door installations or if the previous pin holes are damaged, you may need to drill new holes through the hinges and door frame to accept the replacement hinge pin. Follow these steps:
1. Align hinges. Close the door to realign the hinge knuckles. The halves should match up evenly.
2. Mark hole locations. Use a center punch to mark the exact center of each hinge knuckle on the door frame.
3. Remove door. Unscrew the hinges and take the door off to access the frame.
4. Drill pilot holes. Use a 1/8 inch drill bit to drill straight pilot holes at your center punch marks. Drill through door frame only.
5. Drill hinge holes. Switch to a 1/4 inch drill bit and widen the pilot holes through both door frame sides.
6. Vacuum holes. Use a vacuum to clean out drilling debris from the new pin holes.
7. Rehang door. Screw the door hinges back onto the door and frame. The new holes should now align.
8. Check hole alignment. Look through the hinge knuckle holes to be sure they line up accurately top to bottom.
Drilling new pin holes is easiest with the door removed. Take it slow to drill straight holes. Proper pilot holes prevent wood from splintering. With aligned holes drilled, you can now move on to installing the new pin.
Installing the New Hinge Pin
Once any old pins are removed and new hinge holes are drilled as needed, you are ready to install the replacement hinge pin. Follow these steps:
1. Inspect new pin. Verify the new pin is the proper diameter to fit your hinge knuckle holes.
2. Clean pin and holes. Use a rag and cleaner to wipe down the new pin and hinge holes. Remove any dirt or debris.
3. Lubricate pin. Spray lubricant onto the new pin. This allows it to slide in easily.
4. Insert pin halfway. Place a wood block against the pin bottom. Using a hammer, tap the pin through the top hinge and into the bottom until about halfway in.
5. Check alignment. Look through the hinge hole from both sides to check that the new pin is centered and not angled.
6. Drive pin flush. Continue hammering the pin using your wood block until it is nearly flush with the top of the hinge. Do not pound it fully flush yet.
7. Close door. Test closing the door and check the hinge pin alignment again. The door should close smoothly.
8. Hammer pin flush. With the door closed, give the pin a few final taps to drive it completely flush with the top of the hinge.
9. Remove block. Take off your wood block and verify the pin is fully seated and the door operates properly.
With the new pin installed, give the door a few test swings to confirm it hangs correctly and swings smoothly. Reinstall hinge screws if needed. Proper installation keeps the pin from working loose over time.
Troubleshooting Problems
If you encounter any issues installing the new hinge pin, there are a few troubleshooting tips to try:
– Pin won’t insert fully – Lubricate and tap gently with hammer. Do not force. May need to redrill holes.
– Pin insertion is angled – Remove pin, realign hinges, and make sure holes are drilled straight.
– Door does not hang straight – Remove pin and adjust door side-to-side to align hinges before reinstalling.
– Hinge knuckle holes not aligned – Remove door and redrill holes carefully aligned. Use shims if needed.
– Door still swings roughly – Pin may be bent or uneven. Try a new pin. Also check for hinge damage.
– Pin loosens over time – Make sure it is hammered fully flush. Consider longer pin or shimming with wood glue if hole is oversized.
– Pin hole elongated – Fill hole with toothpicks and wood glue. Redrill once dry. Use longer pin for more support.
With some adjustment and troubleshooting, you can resolve most any issue with the hinge pin installation. The key is taking your time to install it properly.
Conclusion
Installing a new hinge pin to repair a loose or damaged door hinge is an economical DIY fix. With some basic tools and supplies, a little mechanical skill, and following the steps above, you can replace a worn hinge pin yourself in about an hour. While not a complicated job, having patience and checking your work as you go helps ensure the best results.
A properly installed hinge pin keeps your doors hanging straight and swinging smoothly once again. Periodically inspecting and lubricating the hinges also helps prevent future wear and tear. But over time, hinge pins will require replacing. Now you know how to undertake this common DIY project and restore your doors to proper working order.
| Tool | Purpose |
|---|---|
| Hammer | Tapping in and out hinge pins |
| Center punch | Marking spot for drilling pilot holes |
| Drill | Drilling new pin holes if needed |
| Screwdriver | Removing hinge screws |
| Wood block | Supporting pin while hammering |
| Lubricant | Helping pin insert smoothly |
| Step | Instructions |
|---|---|
| 1 | Remove old hinge pin if still in place |
| 2 | Drill holes for new pin if needed |
| 3 | Insert new pin halfway into hinge |
| 4 | Check pin alignment |
| 5 | Hammer pin until flush with hinge |
| 6 | Test door swing |