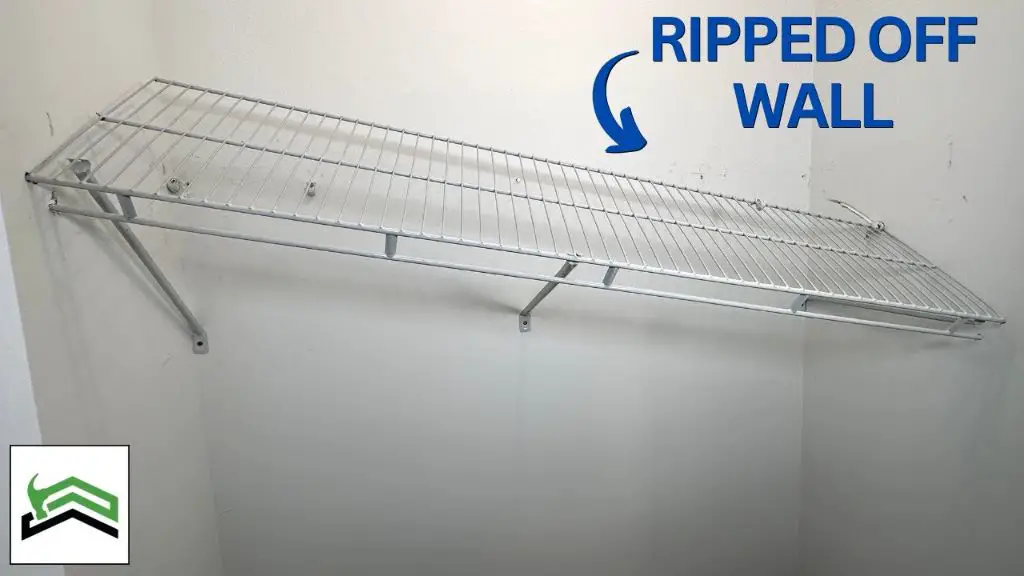
Installing ClosetMaid wire shelving brackets can seem daunting at first, but it’s actually a straightforward process if you follow the instructions carefully. ClosetMaid is one of the most popular brands of wire shelving systems, known for their versatility, durability, and ease of installation. In this comprehensive guide, we’ll walk you through the entire process of installing ClosetMaid wire shelves step-by-step, from measuring your closet to securing the brackets. Whether you’re installing shelving in your closet for the first time or just need a refresher, this guide has got you covered.
Page Contents
Things You’ll Need
Before getting started, make sure you have all the necessary materials and tools:
- ClosetMaid wire shelves
- ClosetMaid mounting brackets
- A drill with a 1/8″ drill bit
- A rubber mallet
- A tape measure
- A pencil or marker
- A level
Step 1: Measure and Mark Bracket Locations
First, measure the inside dimensions of your closet from wall to wall. You’ll need this measurement to determine how many brackets and shelves you’ll need. ClosetMaid brackets should be spaced evenly starting about 1″ from the side walls. Mark the bracket locations lightly in pencil – a good spacing is typically 24″ to 48″ apart depending on your shelving length. Be sure the rows are perfectly level using a bubble level.
Step 2: Drill Holes
Using a 1/8″ drill bit, drill a pilot hole at each bracket location. The holes should be drilled into a wall stud if possible for the most secure mount. Stud finder tools can help locate studs. If not drilling into studs, make sure to use hollow drywall anchors. Drill holes for the top and bottom rows of brackets first.
Step 3: Mount Brackets
Take the ClosetMaid brackets and line them up with the drilled holes. Insert mounting screws through the holes in the bracket and into the wall. For stud mounting, use 1-1/4″ pan head screws. For drywall mounting, use hollow wall anchors with #8 pan head screws. Use a screwdriver to secure the screws tightly into the wall. Attach all top and bottom brackets first before moving to the middle.
Step 4: Install Shelves
Now you’re ready to set the wire shelves onto the brackets. Place the back edge of the shelf onto the bottom bracket row. Then lift the front edge and press down over the top brackets. The shelf wires should fit snugly over the bracket hooks. Add any middle shelves in the same way, resting the back on the bottom brackets first. Ensure shelves are centered and level.
Step 5: Load the Shelves
You can now load up your new ClosetMaid shelves! We recommend loading starting with the bottom shelf first. Distribute weight evenly across shelves and do not overload top shelves. For optimal closet storage, place commonly used items at eye level. Organize using bins, dividers or shelves to maximize your new space.
Tips for Installing ClosetMaid Shelves
- Always check for level during installation
- Space brackets evenly for optimal stability
- Mount into studs whenever possible
- Follow all safety instructions
- Start loading from the bottom up
- Add closet organization accessories
ClosetMaid Shelf Specs
ClosetMaid offers many sizes and configurations of wire shelves and brackets. Here are the basic specs:
| Shelf depths | 12″, 16″, 18″, 20″, 24″ |
|---|---|
| Shelf lengths | 24″ to 96″ |
| Shelf finishes | Chrome, white, black |
| Weight capacity | 100 to 800 lbs |
| Bracket types | Standard, heavy duty, fixed |
There are also various specialty brackets like wall standards and hanging rails. Shelf accessories include baskets, shoe racks, tie and belt racks, and drawer organizers.
Conclusion
Installing ClosetMaid wire shelves is a straightforward DIY project that can easily be completed in an afternoon. Following the instructions carefully and measuring precisely are the keys to success. Soon you’ll be enjoying freshly organized closet space. ClosetMaid offers all the shelving components and accessories you need to create a customized closet system. With some simple planning and these step-by-step instructions, you can take on this project and make the most of your storage space.
