Corner tile shelves are a great way to add extra storage space to your shower. Installing them yourself can save you money compared to hiring a professional. With some basic tiling skills and the right materials, installing corner shelves in your tile shower is an achievable DIY project.
Page Contents
Things You’ll Need
Before starting your corner shelf installation project, make sure you have all the necessary materials on hand:
- Tile shelf unit – Choose a shelf designed for shower installation. Stainless steel, teak wood, or coated wire shelves are good options.
- Tile – Match the tile to your existing shower tile for a seamless look.
- Thinset mortar – Use a latex-modified thinset. Make sure it’s formulated for wet area installations.
- Notched trowel – A 1/4″ square or U-notched trowel is ideal for most tile applications.
- Grout – Use an acrylic-based or epoxy grout for water resistance.
- Caulk/sealant – Look for mold-resistant formulations made for wet areas.
- Mixing bucket, mixer, sponges, grout float
- Safety gear – Gloves, knee pads, safety glasses
In addition to these supplies, make sure you have the right tools for cutting tiles and removing existing surfaces if needed.
Preparing the Installation Area
Proper prep work is crucial for a successful corner shelf installation. Here are the key steps:
- Make sure the corner is clear of any soap holders, protruding pipes, or other obstructions.
- Use a utility knife to cut away existing caulk. Be careful not to scratch tiles.
- Remove old grout with a grout saw or rotary tool. Clean out all loose debris.
- Use sandpaper to rough up the surface of glossy tiles. This helps the thinset mortar adhere.
- Wipe down the entire area with denatured alcohol to remove soapy residue and oils.
Once prepped, the corner should have exposed tile edges and be clean enough for thinset to bond effectively.
Installing the Shelf
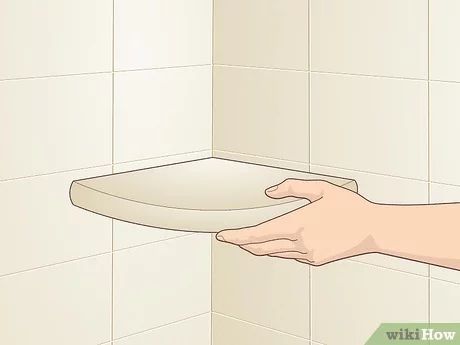
With the right corner prepared, it’s time to install the shelf unit itself. Follow these key steps:
- Begin by dry fitting the shelf. Hold it in place and check for level. Make any adjustments needed.
- Mix up thinset mortar according to package directions. Let it slake for 5-10 minutes.
- Spread a layer of thinset on the back of the shelf with the notched trowel.
- Press the shelf firmly into the corner, maintaining level. Use spacers for even gaps.
- Let the thinset cure according to manufacturer recommendations, usually 24-48 hours.
- Once set, remove any spacers and clean up excess thinset. Let dry completely.
At this point, the shelf should be firmly mounted into the corner. Make sure it feels completely stable before proceeding.
Cutting and Mounting Tiles
Next, tile around the shelf unit. Follow these steps:
- Measure and mark tiles to fit around the shelf. Cut them to size as needed.
- Spread thinset over shelf edges and surrounding wall area.
- Press tiles into thinset, maintaining even grout lines. Use spacers if needed.
- Let thinset cure fully, then remove any spacers and clean up excess.
- Use a grout float to spread grout over all tile joints. Avoid getting grout on the shelf surface.
- Let grout setup slightly, then use a damp sponge to clean tiles and smooth joints.
- Allow grout to fully cure for 72 hours before using shower.
Going slowly and carefully when cutting and mounting the tiles ensures everything will line up perfectly around the shelf.
Sealing the Shelf Installation
The last step is sealing up your new corner shelf to prevent leaks:
- Wait at least 72 hours after grouting for everything to fully cure.
- Apply a continuous bead of silicone caulk around the outside edges of the shelf where it meets the walls and corner.
- Use a caulk smoothing tool to spread the caulk evenly and eliminate any gaps.
- Allow caulk to fully cure for 24-48 hours before using the shower.
The caulk waterproofs the shelf installation and prevents moisture from getting behind the tiles. Reapply yearly or whenever cracks appear.
Maintenance Tips
Once your corner shelf is successfully installed, follow these tips to keep it looking great:
- Use shelf sealant regularly to protect wood shelves from moisture damage.
- Avoid placing extremely heavy items on wire shelves that may cause them to sag or detach from the wall.
- Repair grout joints if you notice cracking, mildew, or missing grout.
- Re-caulk outside edges yearly or whenever you see gaps that could lead to water getting behind tiles.
- Clean shower tiles and shelves regularly using non-abrasive bathroom cleaners.
With proper care, your corner shelf can stay in top shape for many years of daily use.
Tips for a Successful Installation
Here are some additional pointers to help your corner shelf project go smoothly:
- Carefully read the manufacturer’s instructions before starting. Call them with any questions.
- Have all tools and materials ready before beginning. Test fit the shelf before applying any thinset.
- Take your time cutting tiles. Rushing increases the chance of mistakes.
- Allow recommended curing times for thinset, grout and caulk to ensure good adhesion.
- Keep the shelf area clean while working to prevent debris from getting into thinset.
- Ask a helper to hold the shelf while attaching it if you need an extra set of hands.
Planning ahead and moving slowly through each installation step will set you up for success.
Corner Shelf Installation Costs
If you hire a professional tile installer to handle your new corner shelf, expect to pay:
- Shelf unit: $50 – $150+ depending on size and materials
- Tile: $5 – $15 per square foot installed
- Labor: $50 – $100 per hour
For a basic two-foot shelf with surrounding tile, expect to pay $200 – $500+ for professional installation. The specific tile choices, shelf size, and contractor rates in your area will affect the final cost.
Doing the work yourself can save at least 50% over hiring a pro. The main costs will be the shelf itself and new tile. With free online tutorials, the right tools, and some tile experience, DIY installation is an achievable option for many homeowners.
Hiring a Professional
Although installing corner shelves is a DIY-friendly project, some homeowners prefer to hire a professional tile installer. Here are some benefits:
- Experienced pros get the work done faster with fewer mistakes.
- They have specialized tools like wet saws to make precision cuts.
- A licensed contractor will pull permits if your local codes require it.
- Reputable remodelers guarantee their workmanship if problems arise.
- Pros can suggest the best shelf and tile options to match your bathroom.
Just be sure to verify licenses, read reviews, inspect past work, and get a detailed written contract when hiring any tile pro.
Conclusion
Adding a corner shelf unit is an easy upgrade that can instantly increase storage space in your shower. While hiring a professional tile installer is one option, this is also a DIY-friendly project if you have basic tiling experience. The keys are using quality shower-rated materials, proper preparation, following manufacturer instructions, and taking your time to get clean finished results.
With the right materials and some patience, you can install an attractive new corner shelf in a day or weekend. Just be diligent about sealing the edges and maintaining your new shelf, and it will provide useful storage space in your shower for years to come.
For more information about corner shelves and other shower upgrades, contact your local tile and bath showrooms. They can recommend shelves suitable for your space and provide all the necessary tile, thinset, and grout materials for a successful DIY installation.
With a little planning and effort, installing a corner shelf unit can take your shower storage and style to the next level.